Intercom Integration
With featureOS for Intercom, you can embed feedback boards, feature request forms and more right within your Intercom Messenger. Also, quickly add new feature requests while you are talking to your customers.
Setting Up Intercom Integration on featureOS
Go to Dashboard → Organization Settings → Integrations and click on connect in the Intercom section.
You will be redirected to Intercom’s authorisation page where you can sign into your Intercom account.
On the next page, you can scroll down and click on Authorise access to allow featureOS and Intercom to communicate.
The base of your Integration is set now.
Setting up a featureOS board as the Intercom Board
The default board on your featureOS organization will be the Intercom board by default. However, if you would like to change it to a different board you can follow the steps below:
Go to Dashboard of your featureOS organization → Boards → Use the more options button for the specific Public board and choose Set as Intercom Board.
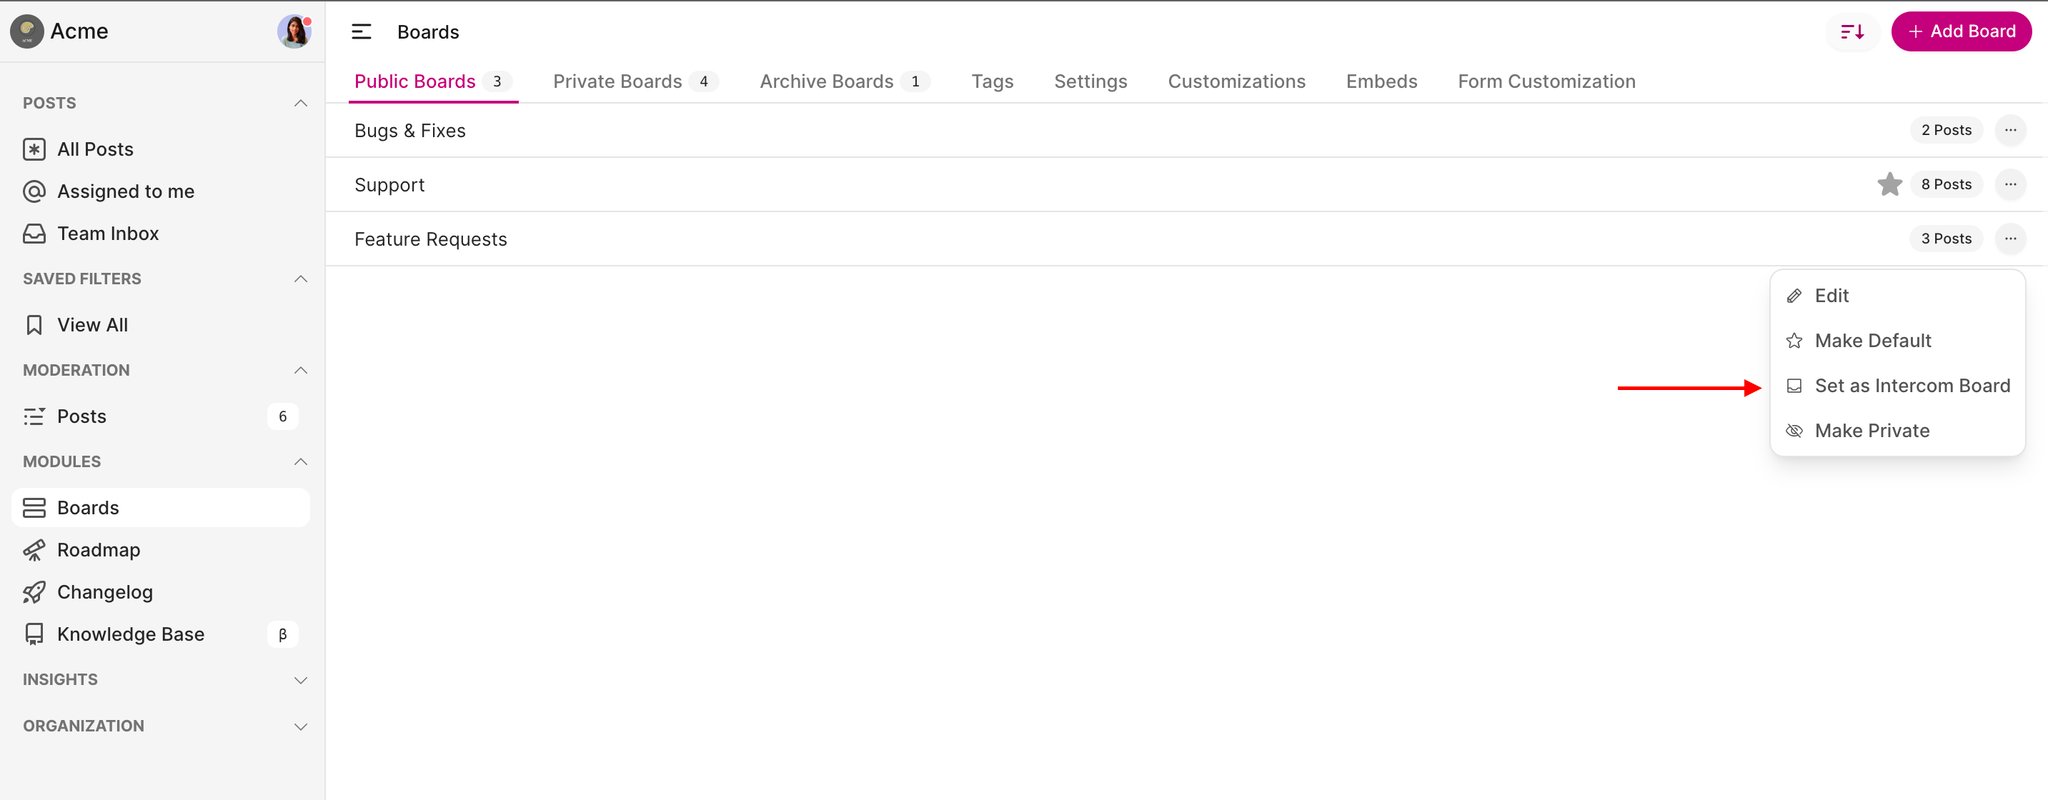
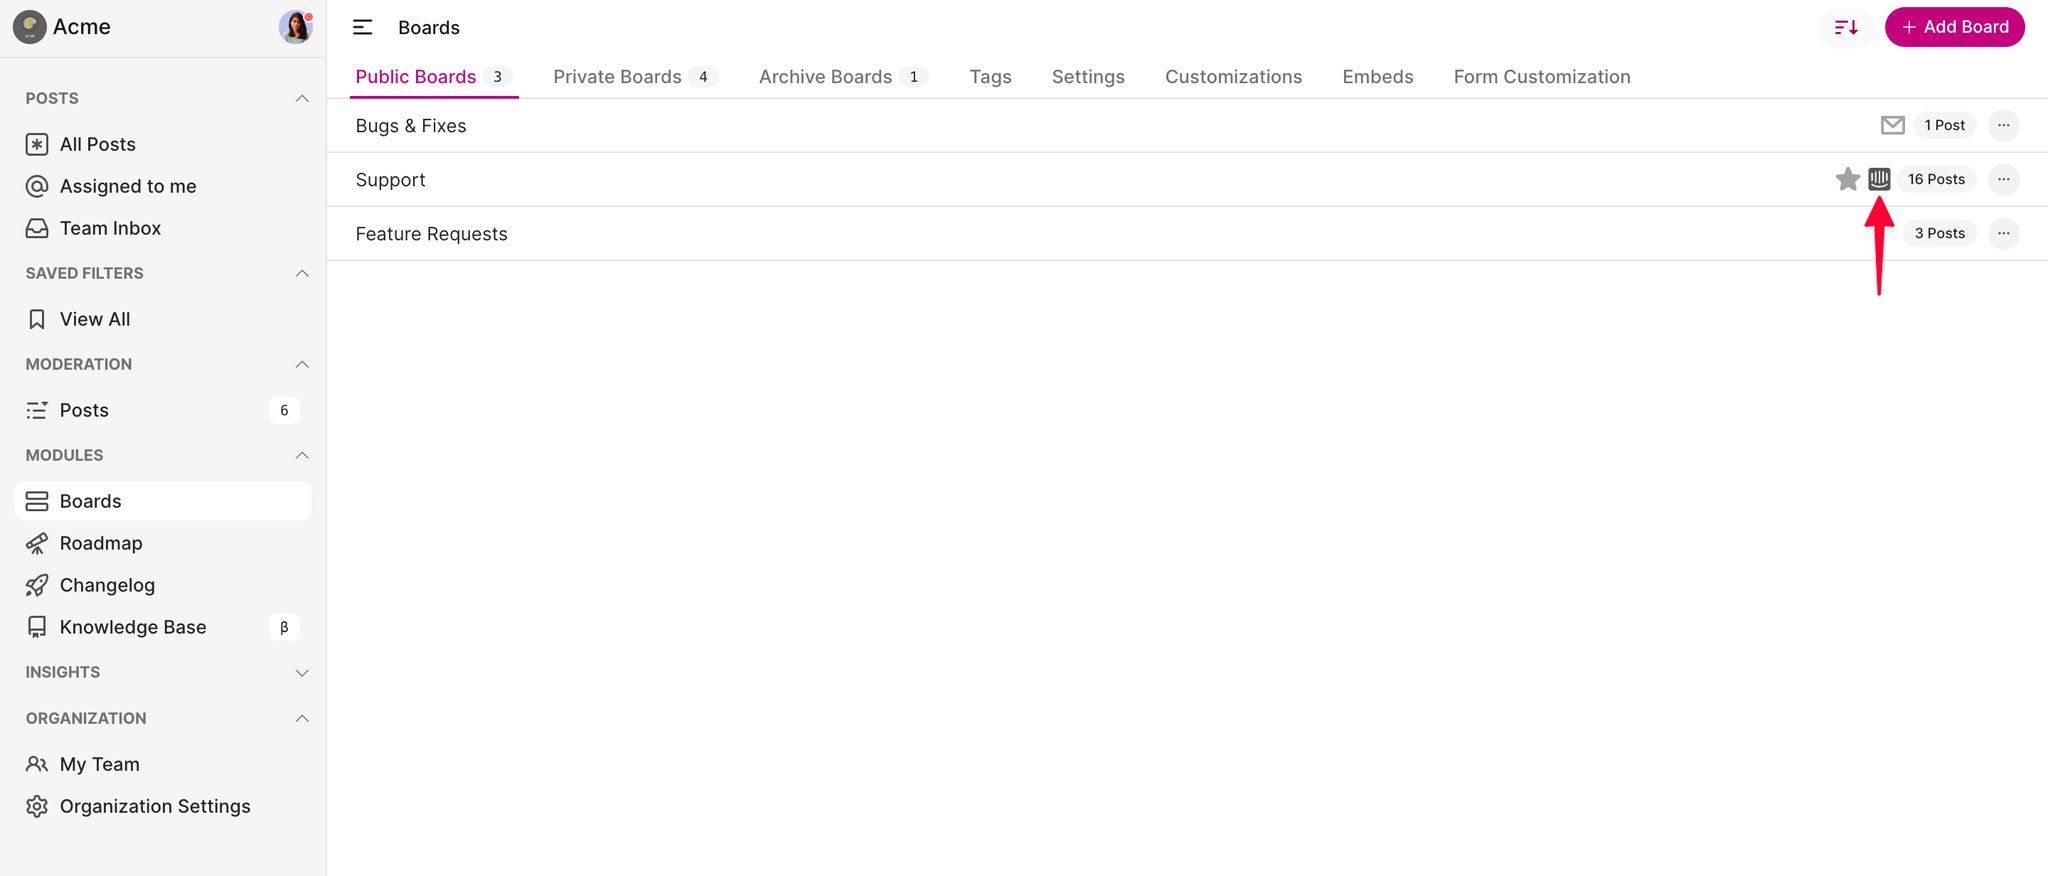
You'll find an icon as shown below, beside a board in the dashboard, indicating that is the embedded Intercom board. You'll be able to set only one board as the Intercom board.
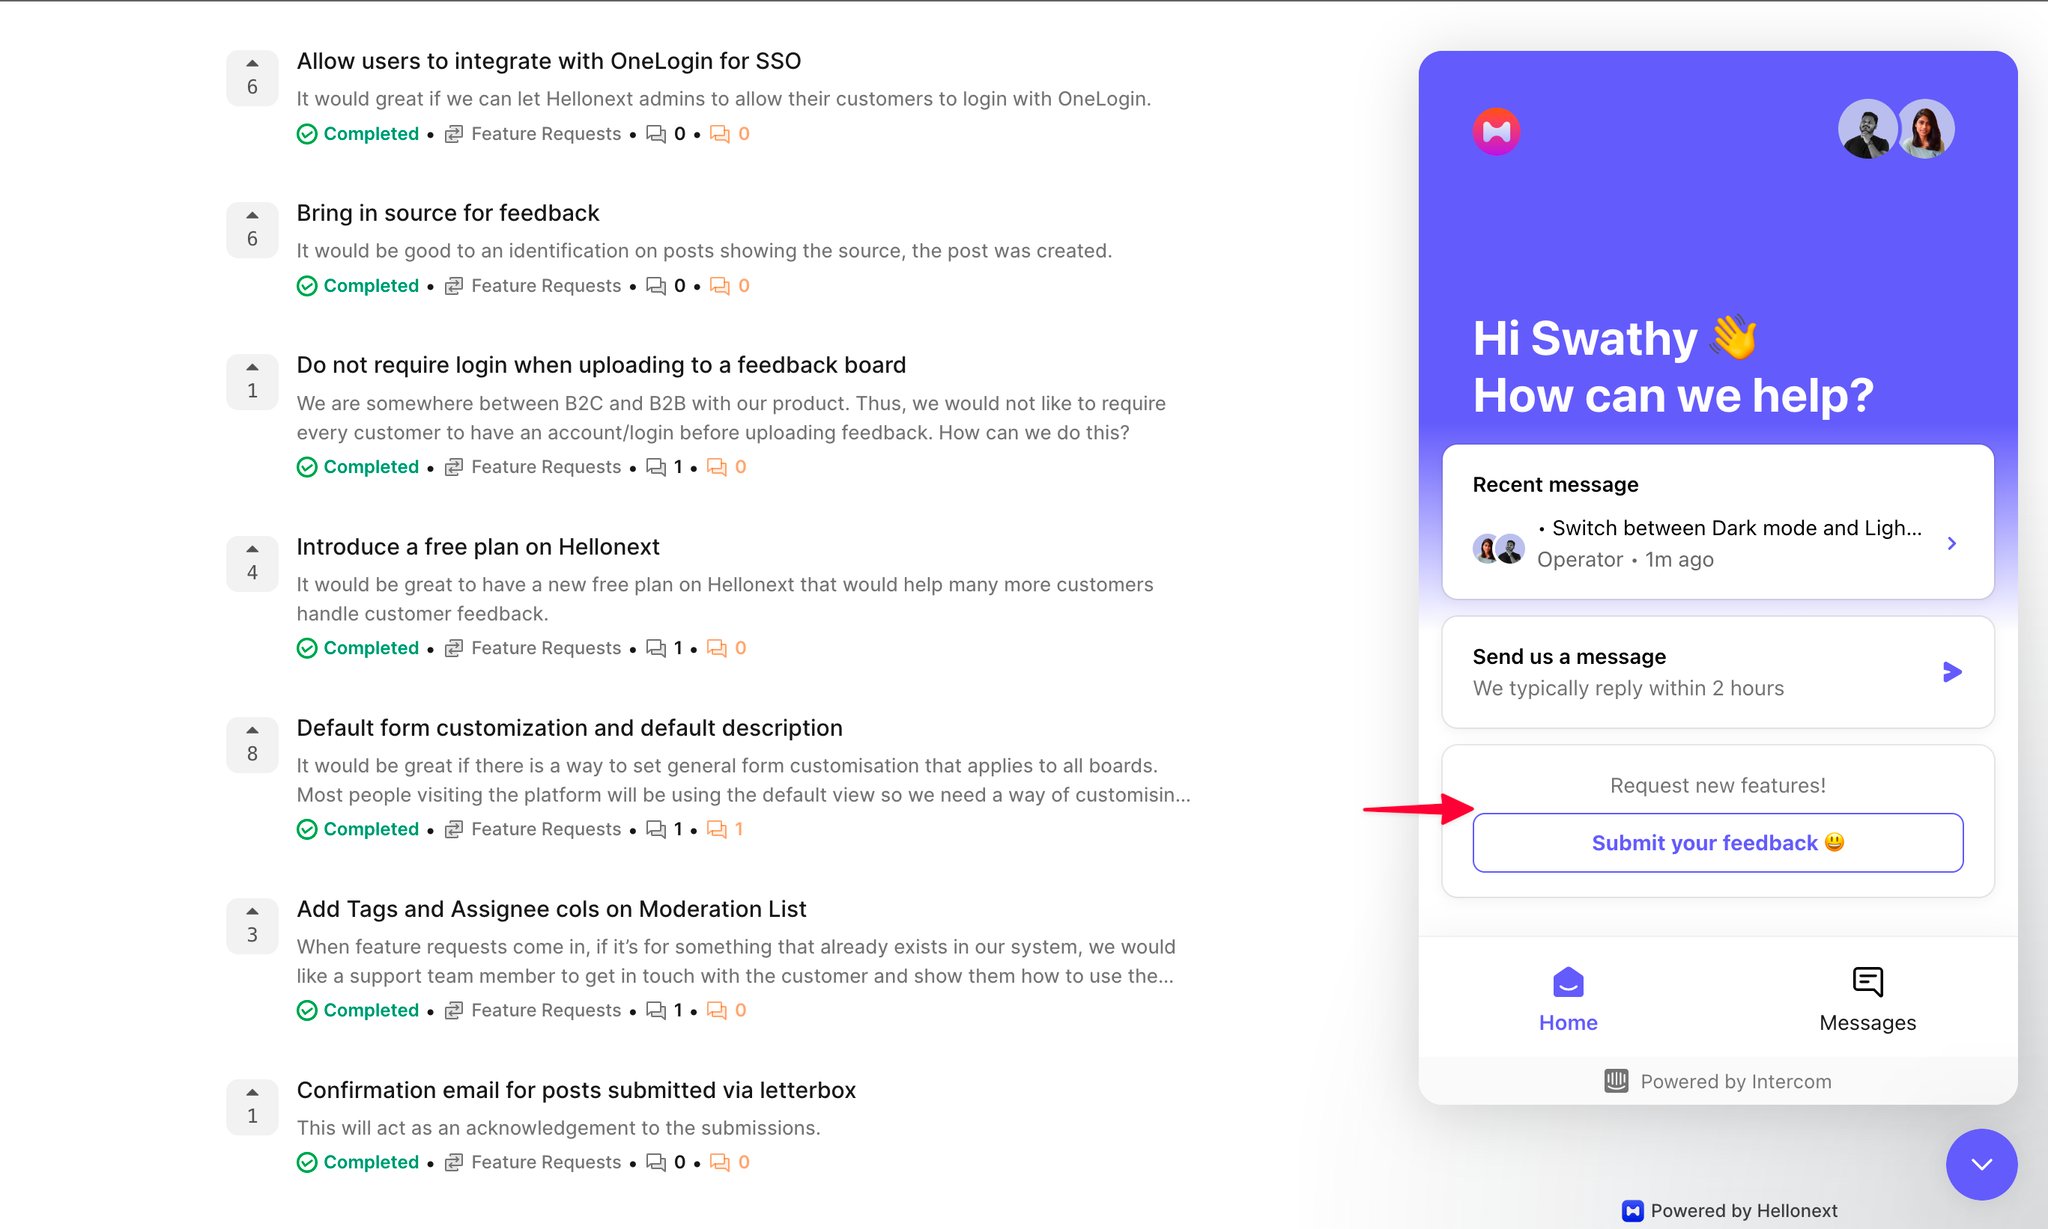
Once you set a board as the Intercom board, all the posts submitted by your customers in chat threads will be captured on this Board.
Bringing Intercom chat widget within featureOS
Open a new tab and sign into your Intercom application by visiting https://www.intercom.com/
From the bottom left corner of the page choose the icon for Messenger. Hovering the cursor over the icons will show you the name of it.
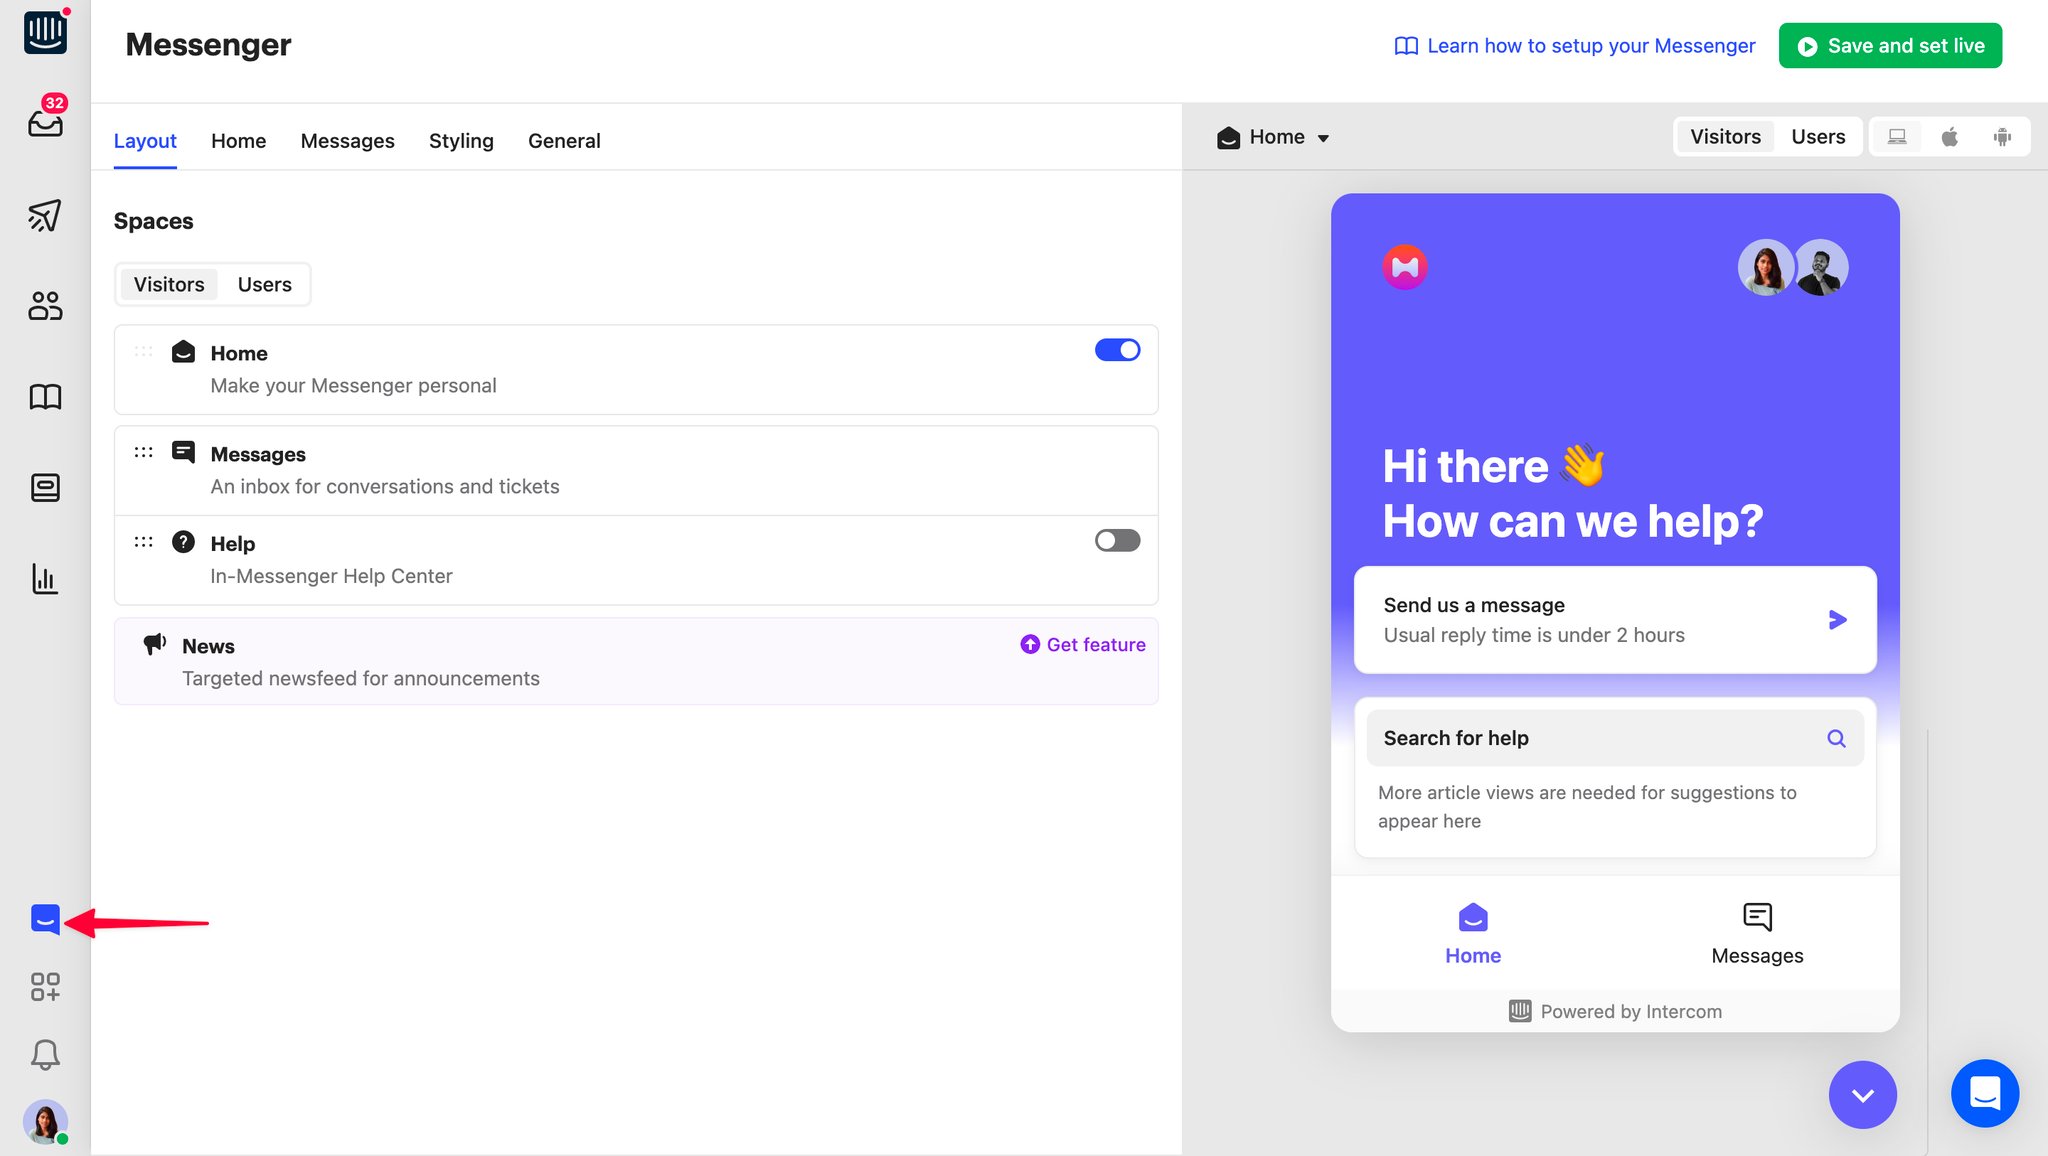
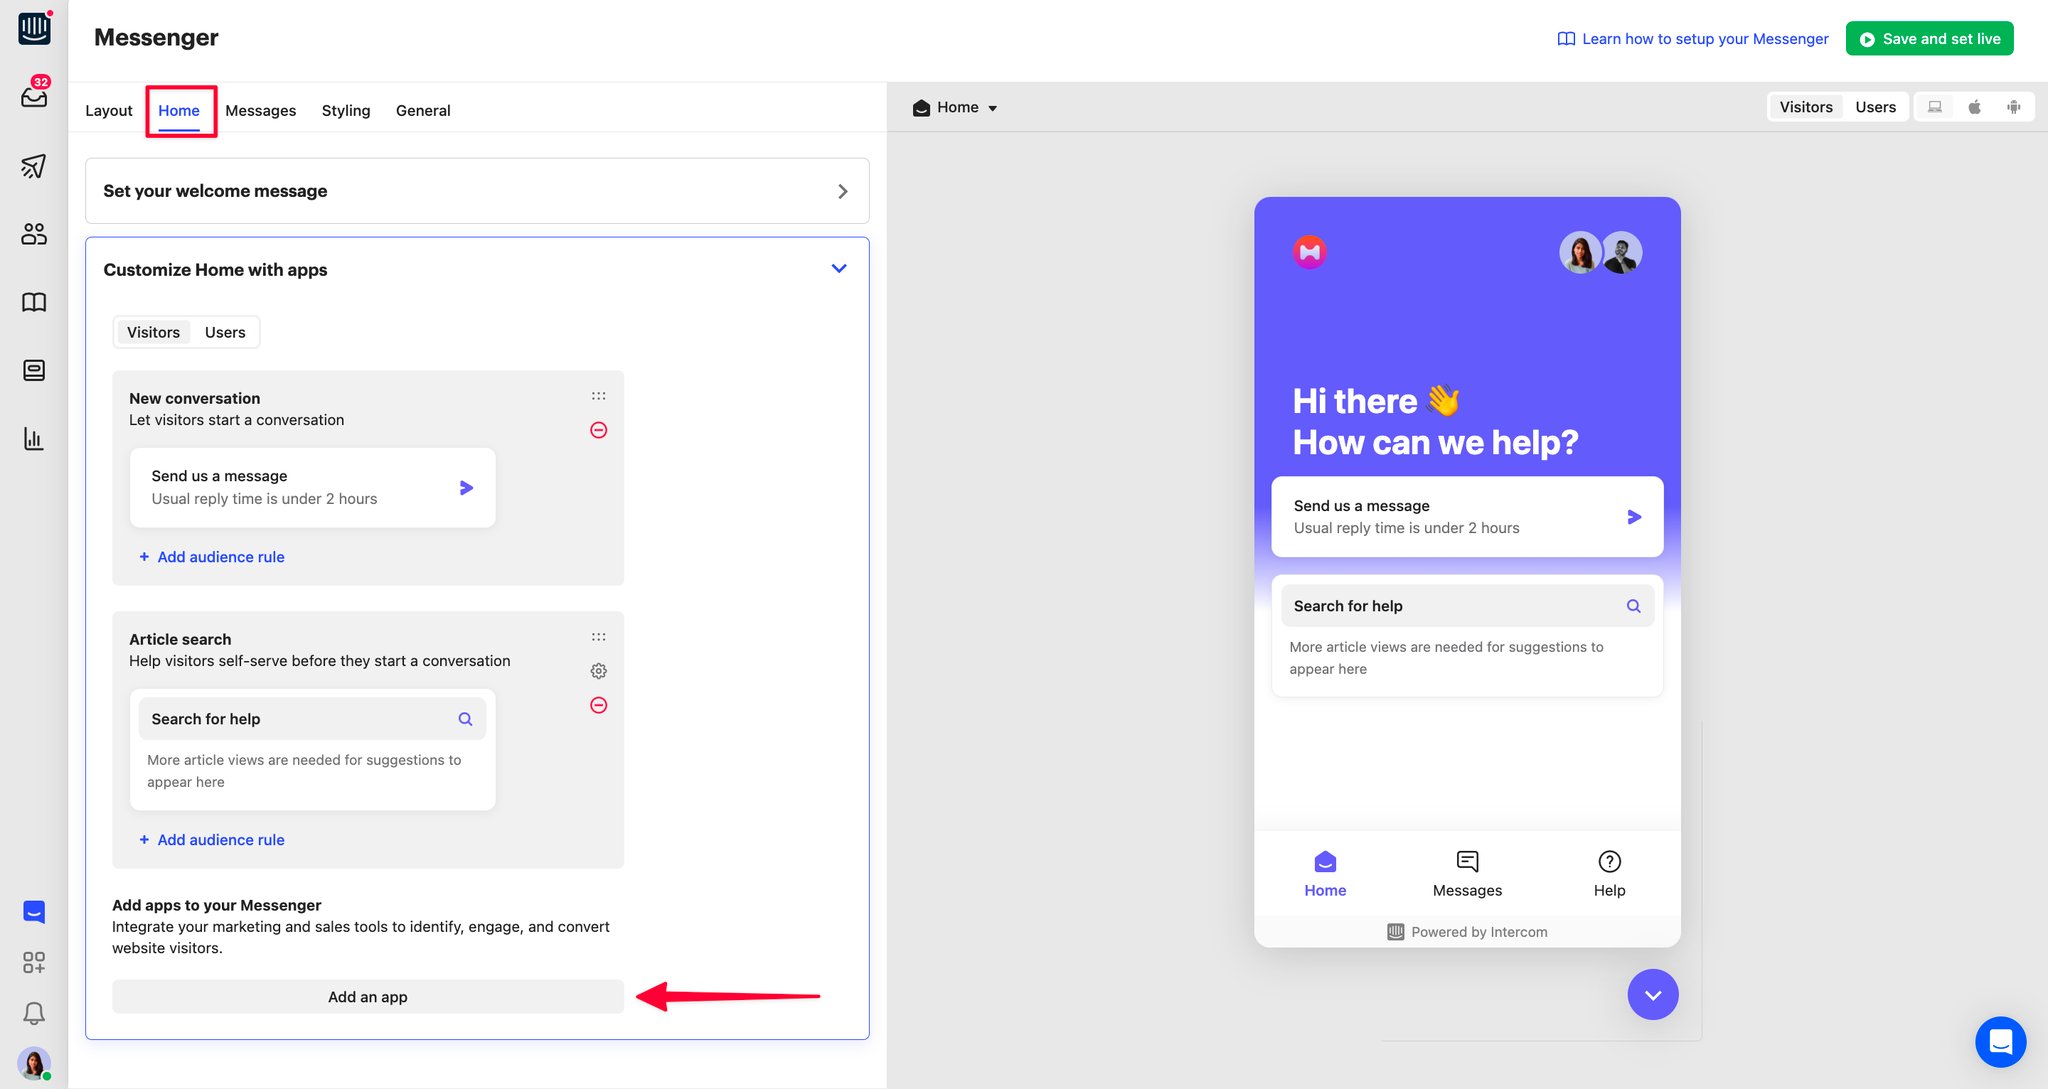
Under the section Customise the experience expand the section Add apps to your Messenger.
You can toggle to Home to configure the messenger for your visitors and users. Click on “Add an app”.
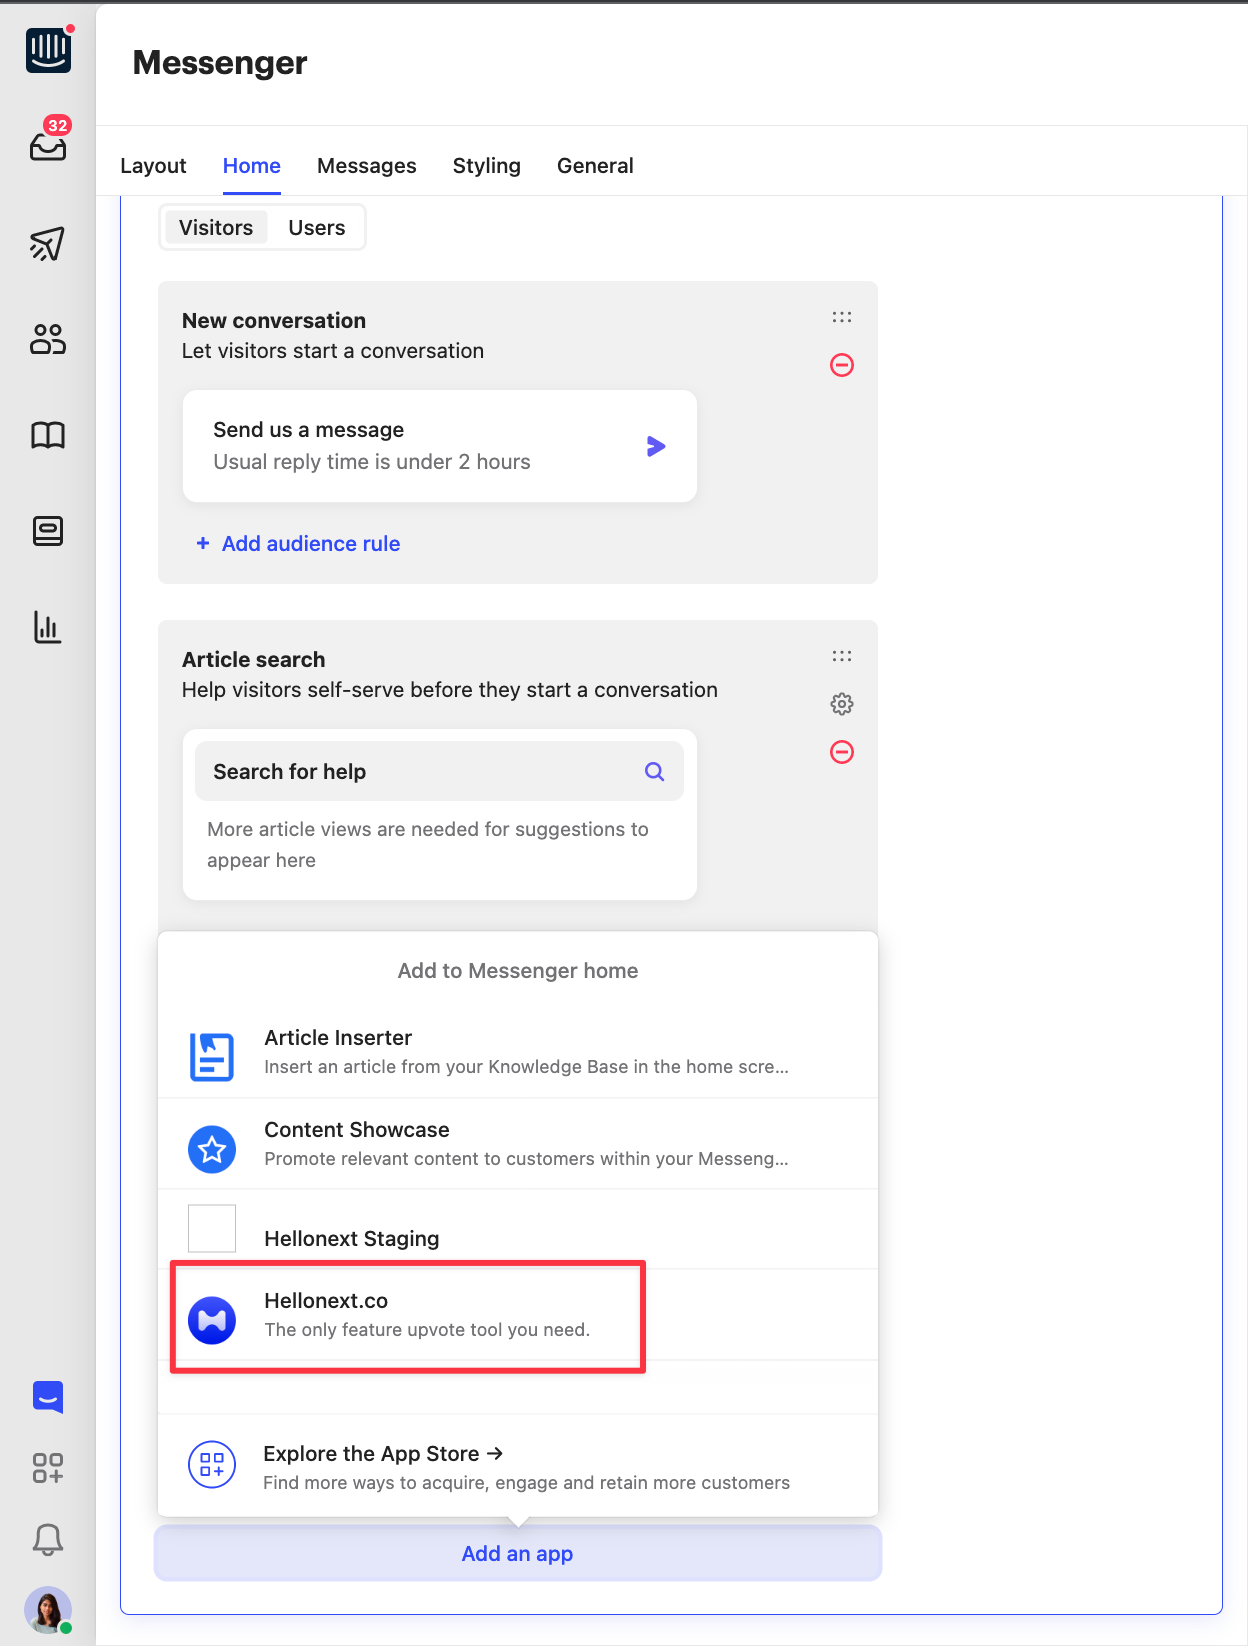
Choose Hellonext.co and set a title and button text to appear on the messenger.
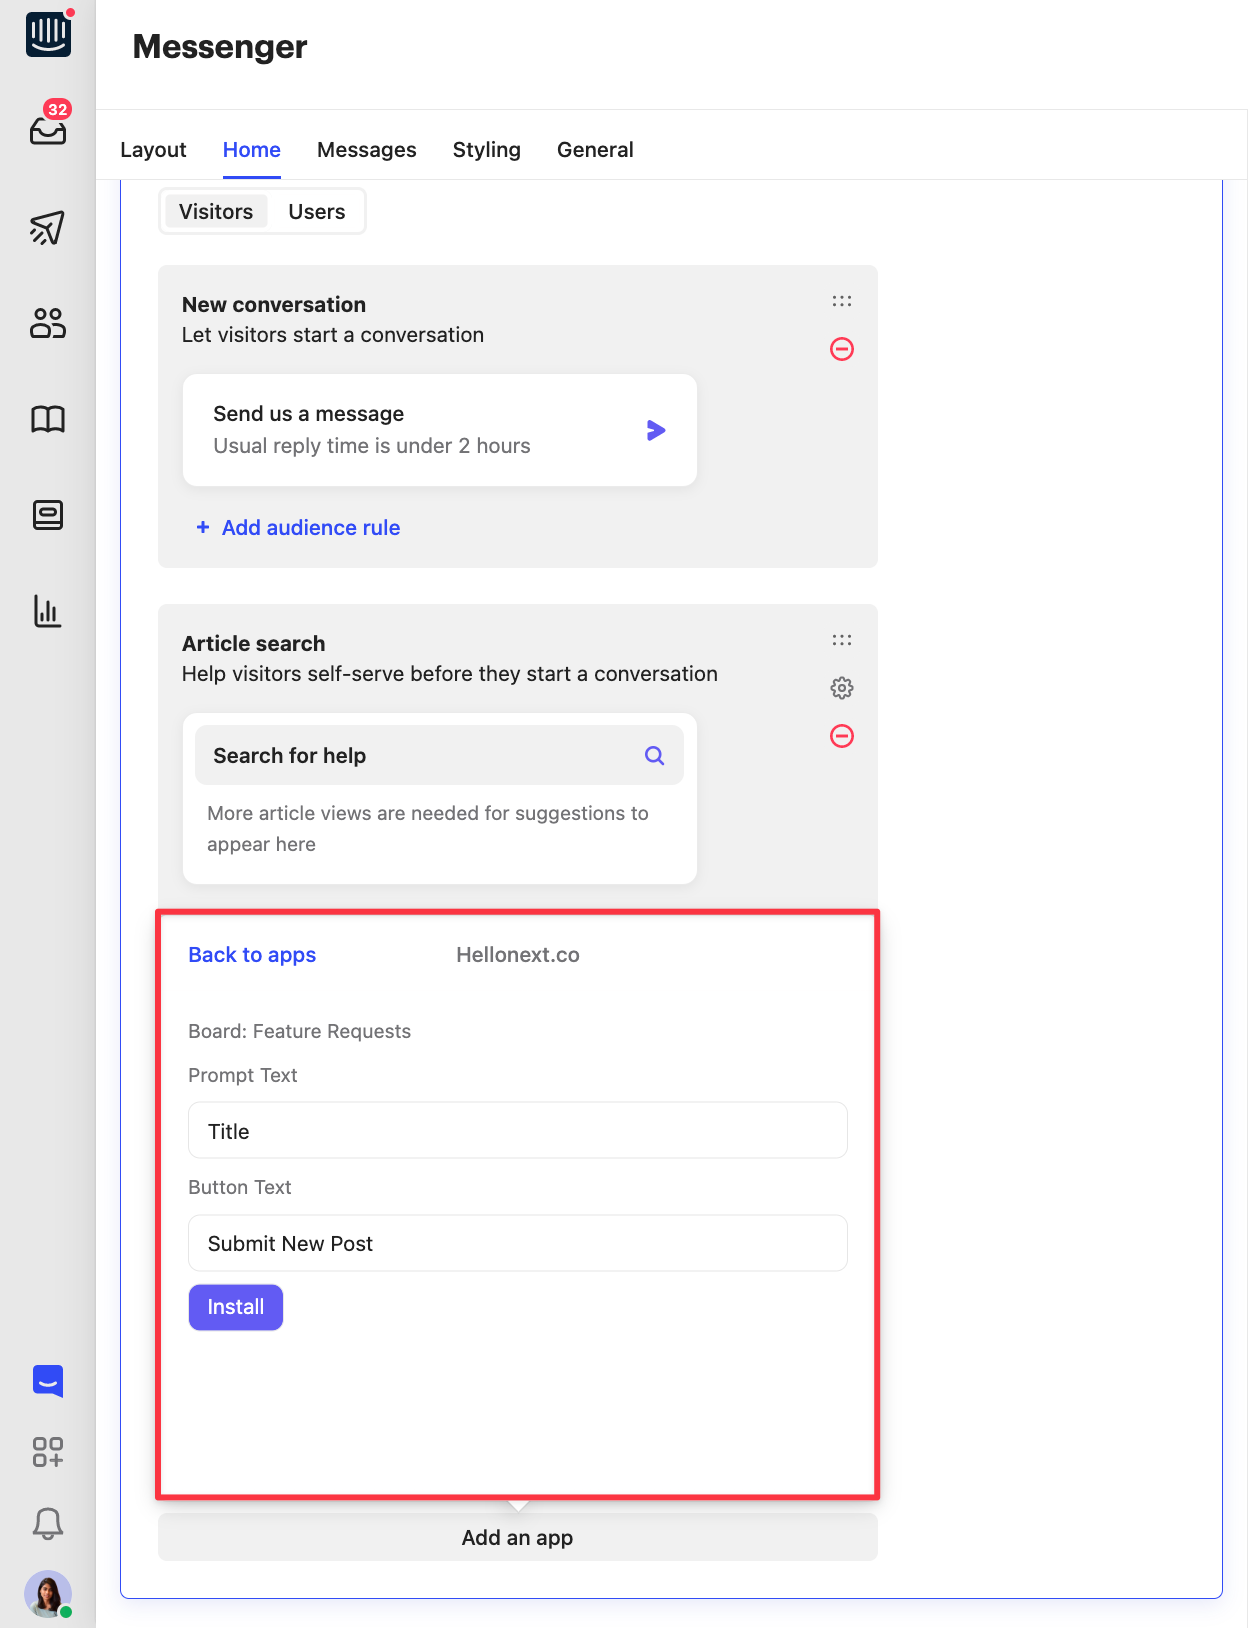
The Intercom board will be set as the board name. Click on Install → click on Save and set live, in the top right corner of the page.
Adding Intercom chat ID on your featureOS dashboard
The URL of your Intercom page will contain the Chat Widget ID of your Intercom messaging platform.
For example: https://app.intercom.com/a/apps/f1fytnmp/messenger - Here f1fytnmp is the Chat widget ID.
Once you obtain this ID, toggle back into your featureOS Integrations page under Organization Settings > scroll down to Chat Widget.
From the drop down for Chat Widget choose “Intercom” and paste the Chat widget ID beside it > click on “Update”.

Your customers can now post their queries and feedback by submitting a post.
Using featureOS app within Intercom messenger
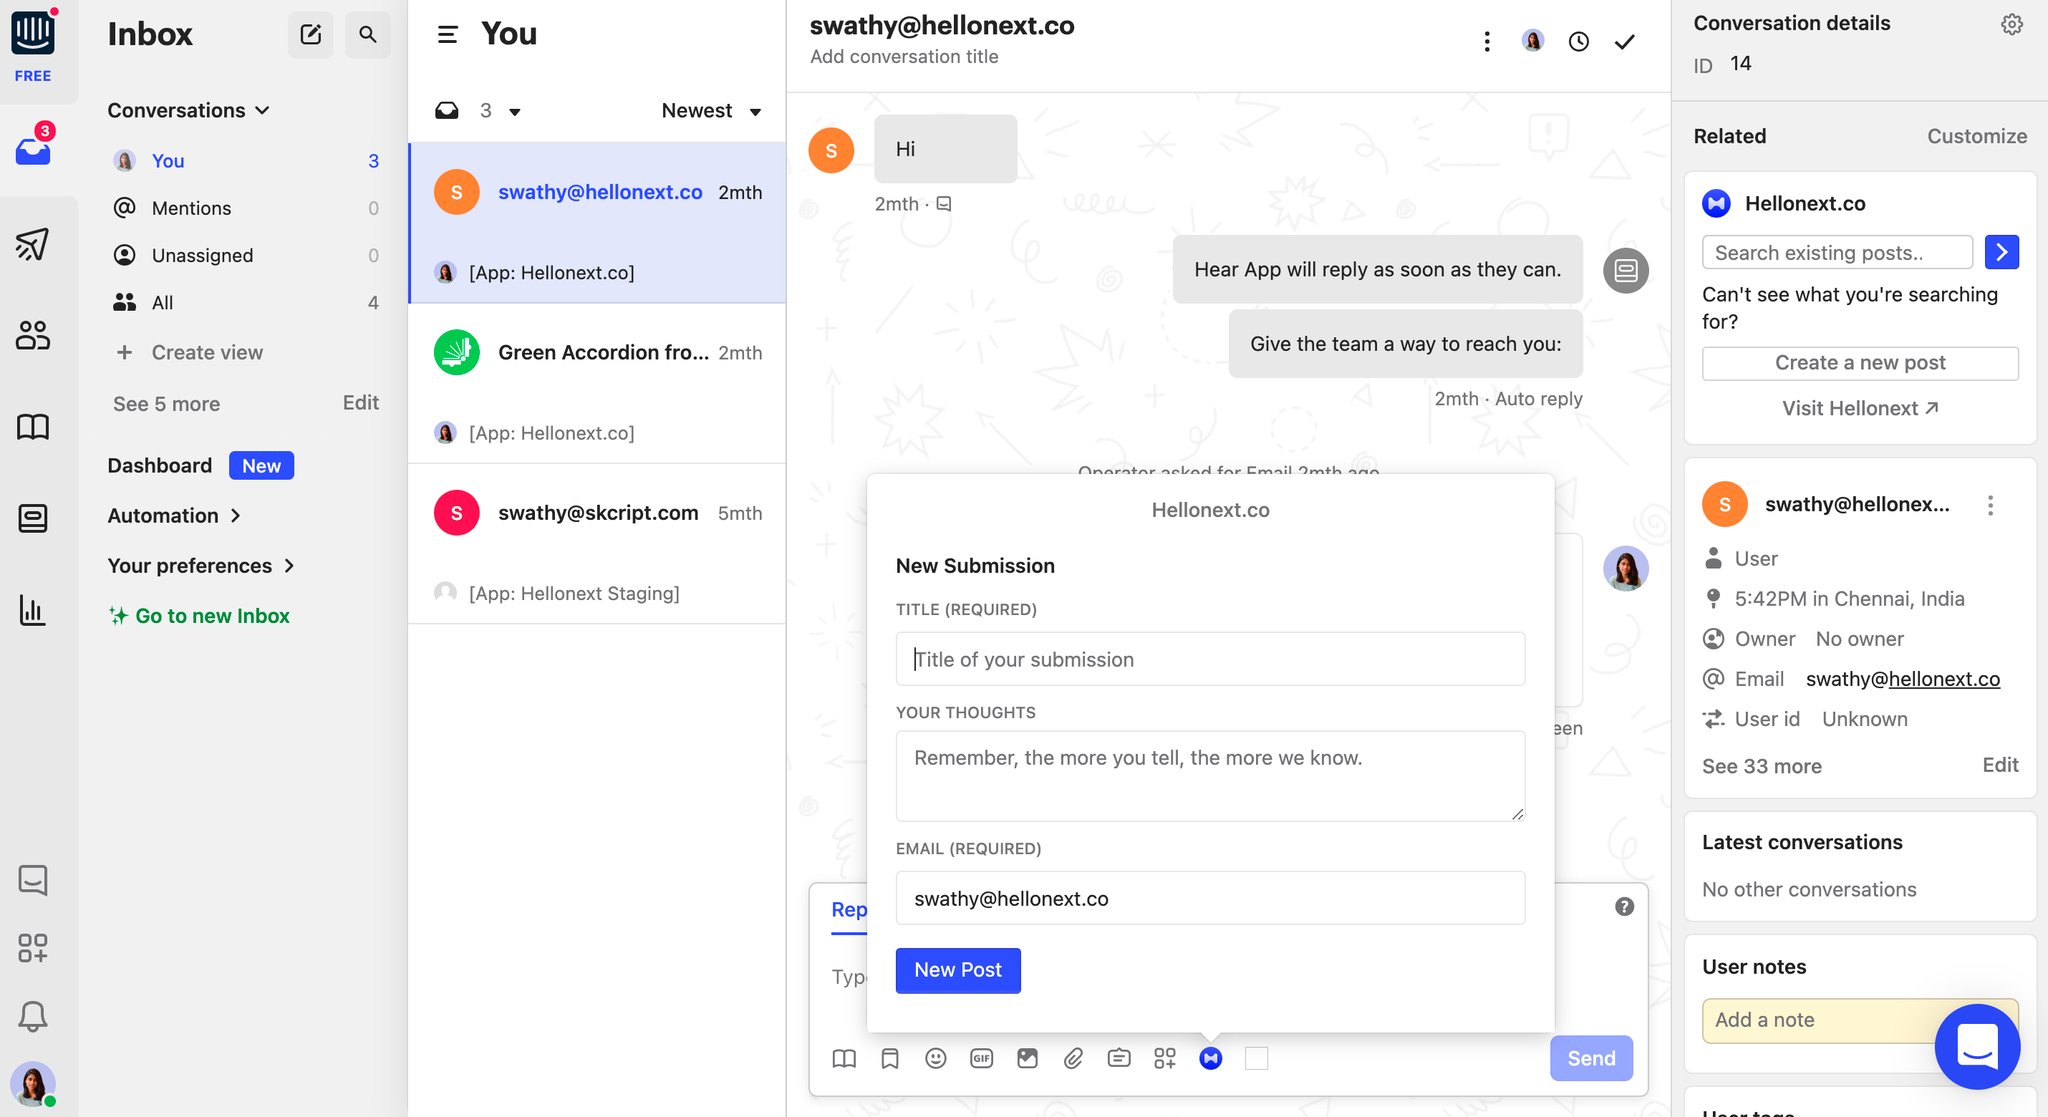
On your Intercom application, go into the Inbox and into one of the conversations.
In the Reply section, at the bottom, you will find an icon for featureOS. Once done, you can
Search for a post from here
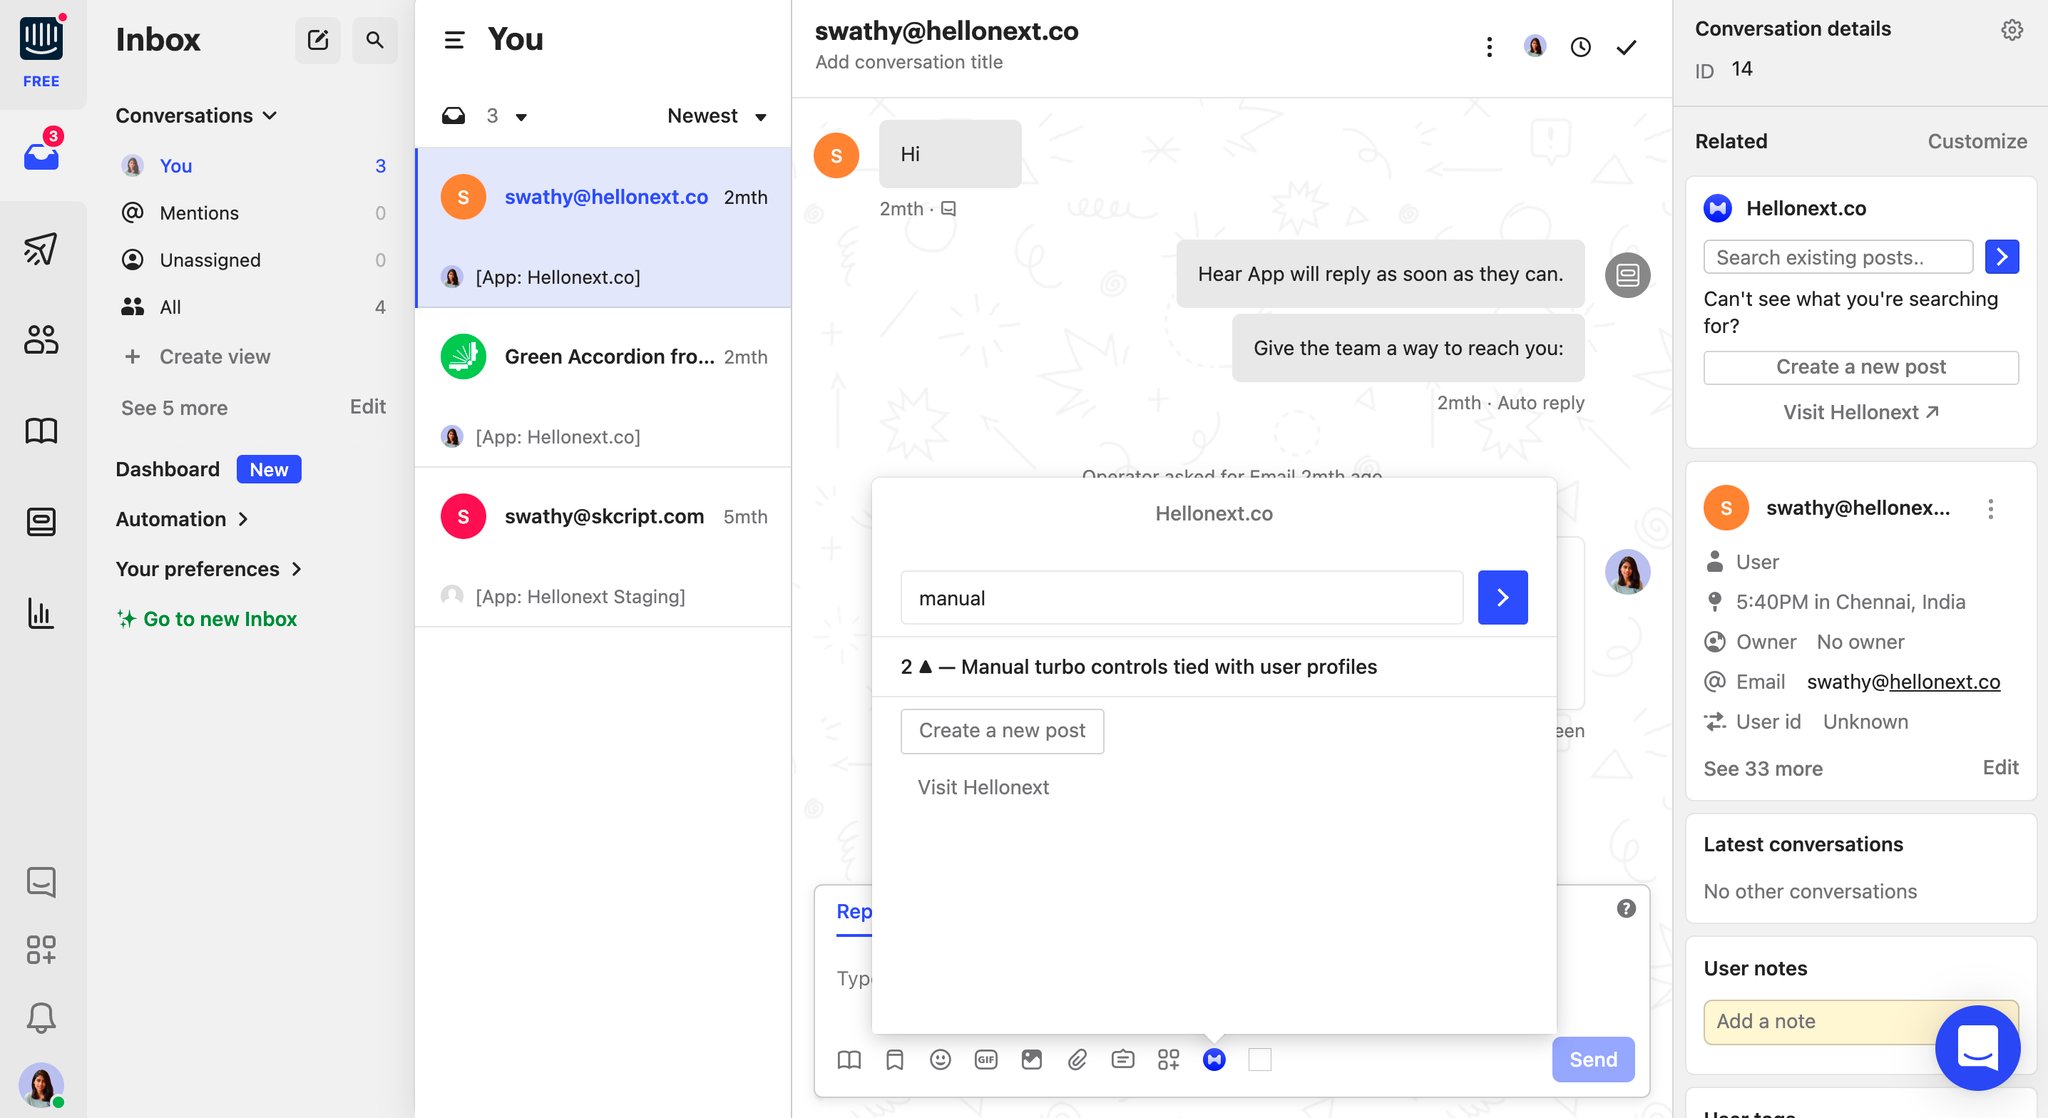
Include it in the conversation
Vote on behalf of the customer
Attach the post to this conversation
View full post
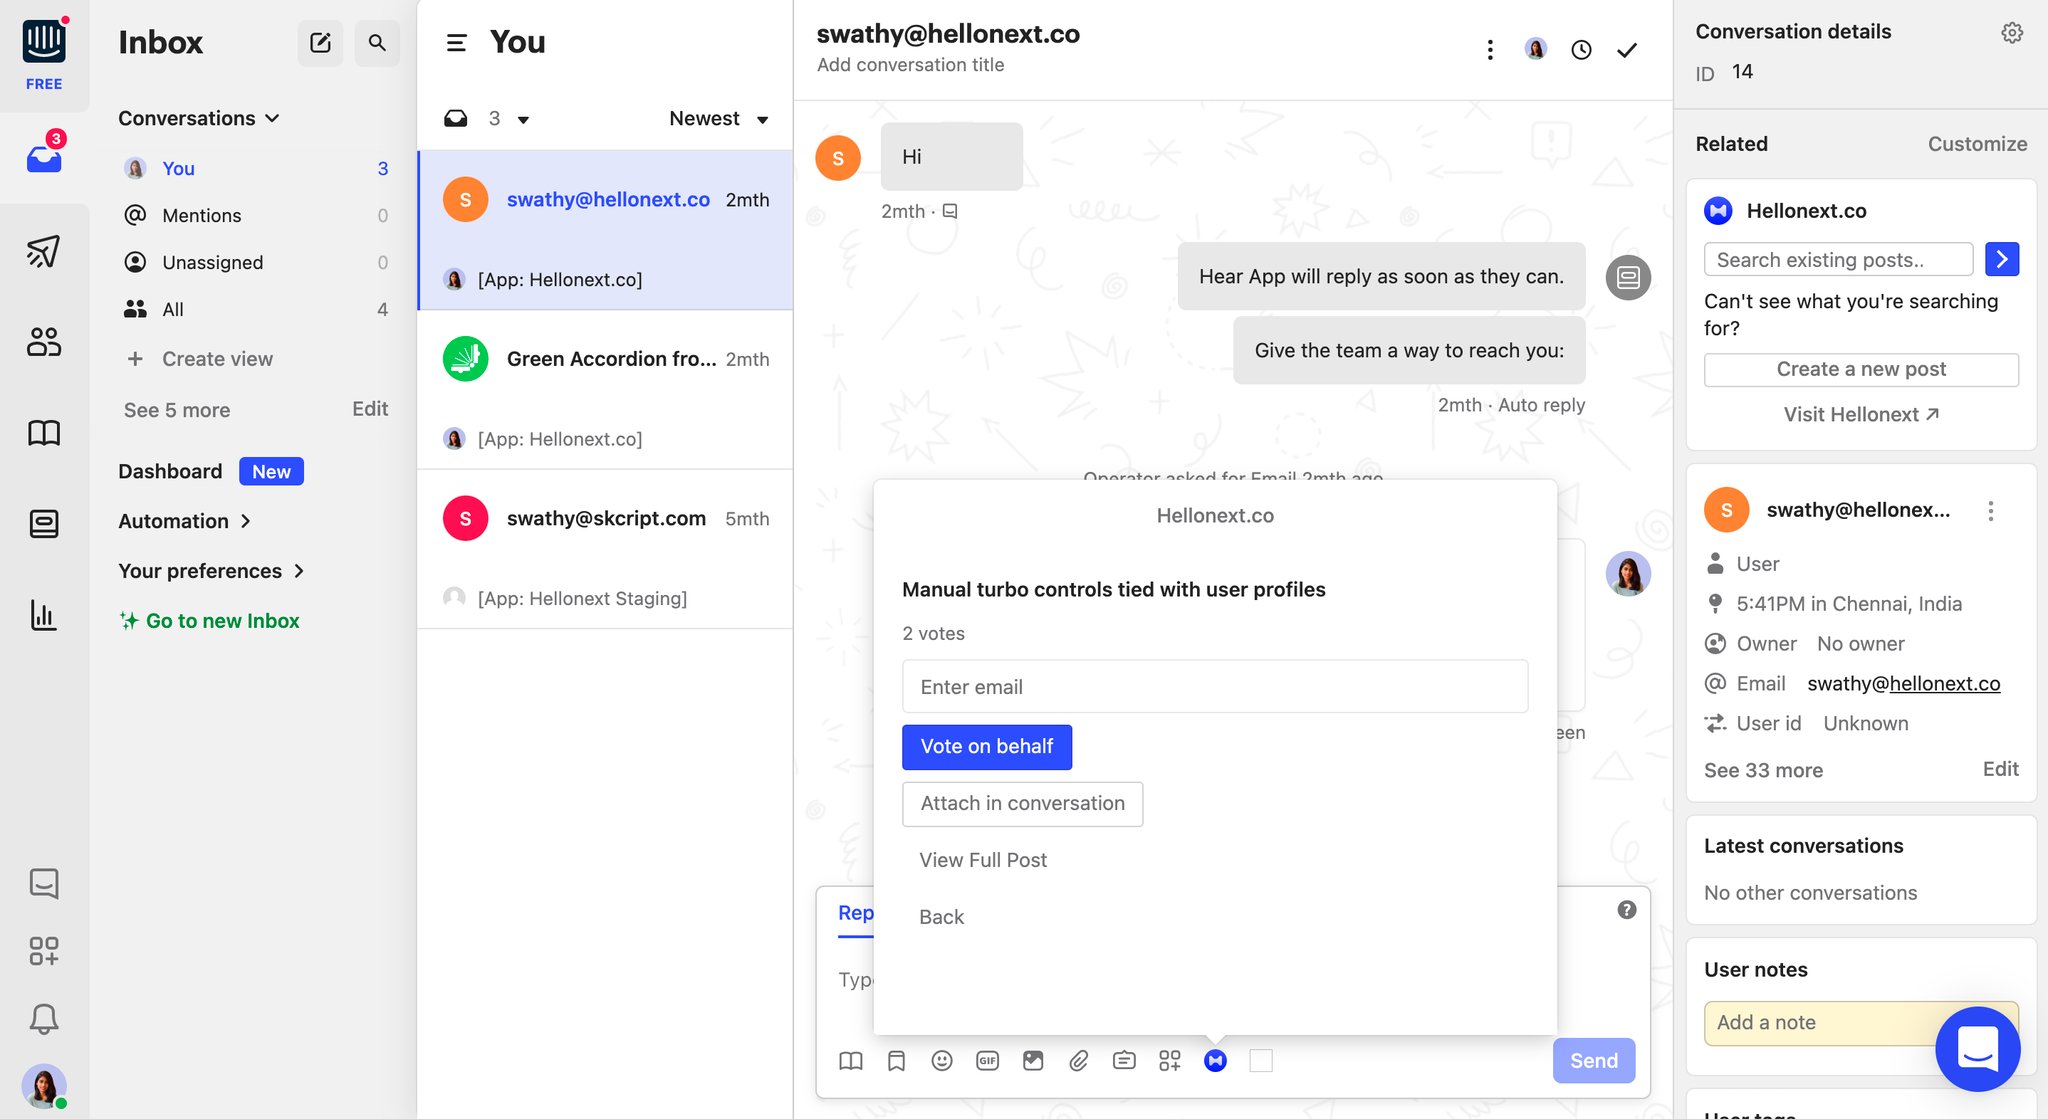
Create a new post if required
Adding customer feedback from conversation to a featureOS board
On your Intercom application, go into the Inbox and into one of the conversations.
Over the top right corner of this page you would find a section for Hellonext.co to Organize feedback in one place.
You can either search to find the relevant post and upvote it.
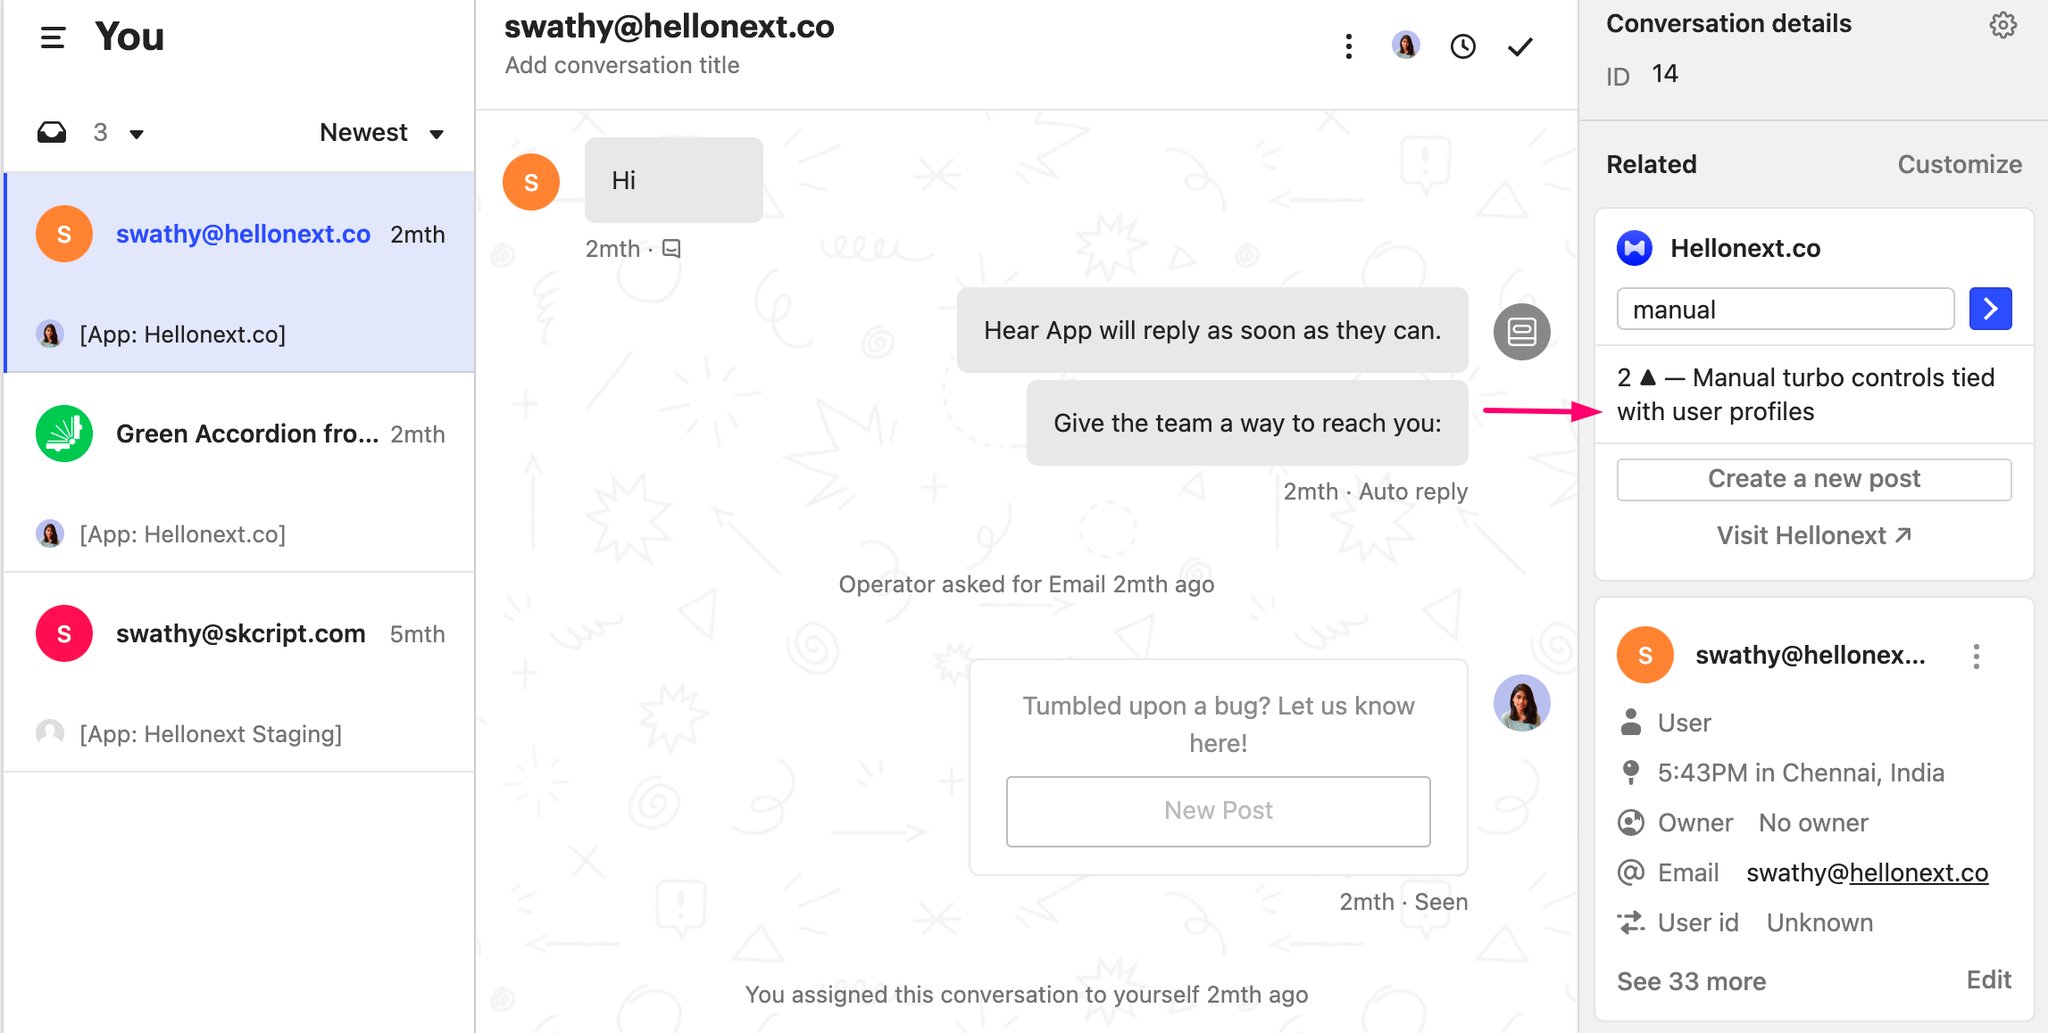
Or create a new post on the customer’s behalf or submit as yourself.
Enter a Title and a Description.
Choose the Board you want this post to be categorized under.
Click on Submit.
Need more help?
Reach out to our support at [email protected] or submit a request on our support board! 😃