
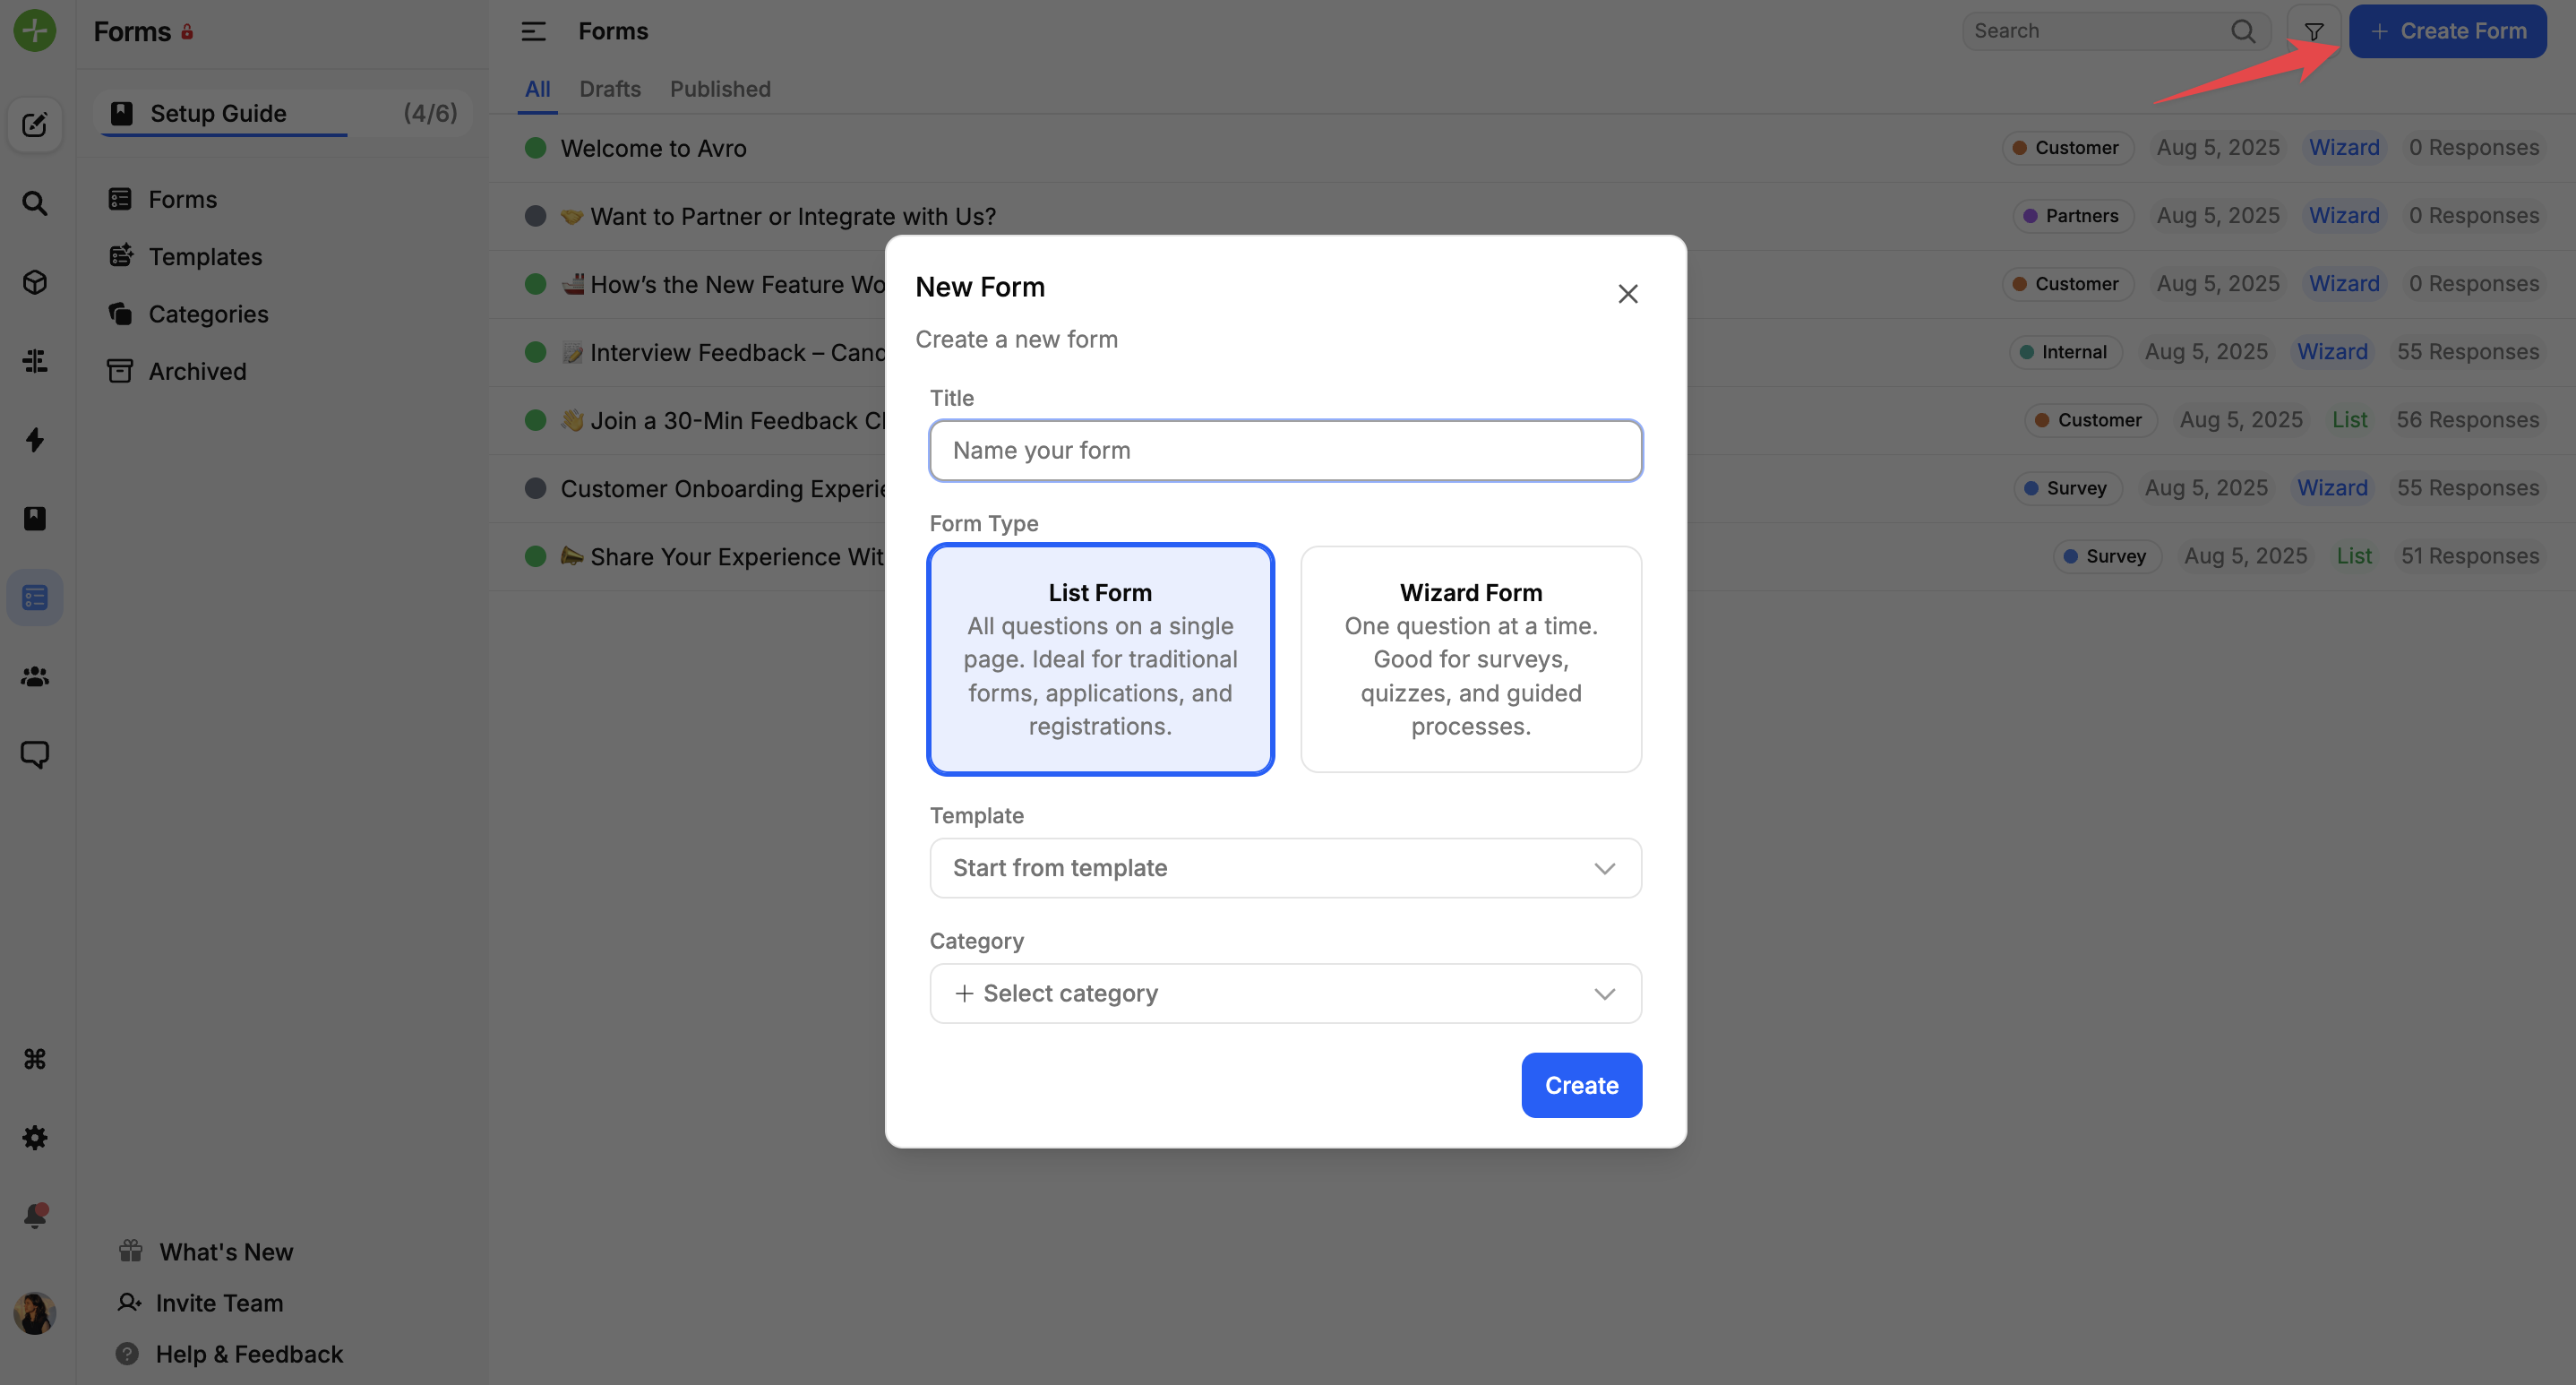
Creating a form in FeatureOS is simple and flexible, allowing you to collect exactly the information you need.
1. Choose a Starting Point
Either head to Forms > Create a Form [or] Go to Templates > Use an existing template.
Set a Title, Description, and Category.
2. Set the Form Type
Choose between,
List – All questions on one screen
Wizard – One question at a time (great for progressive experiences)
3. Add & Configure Fields
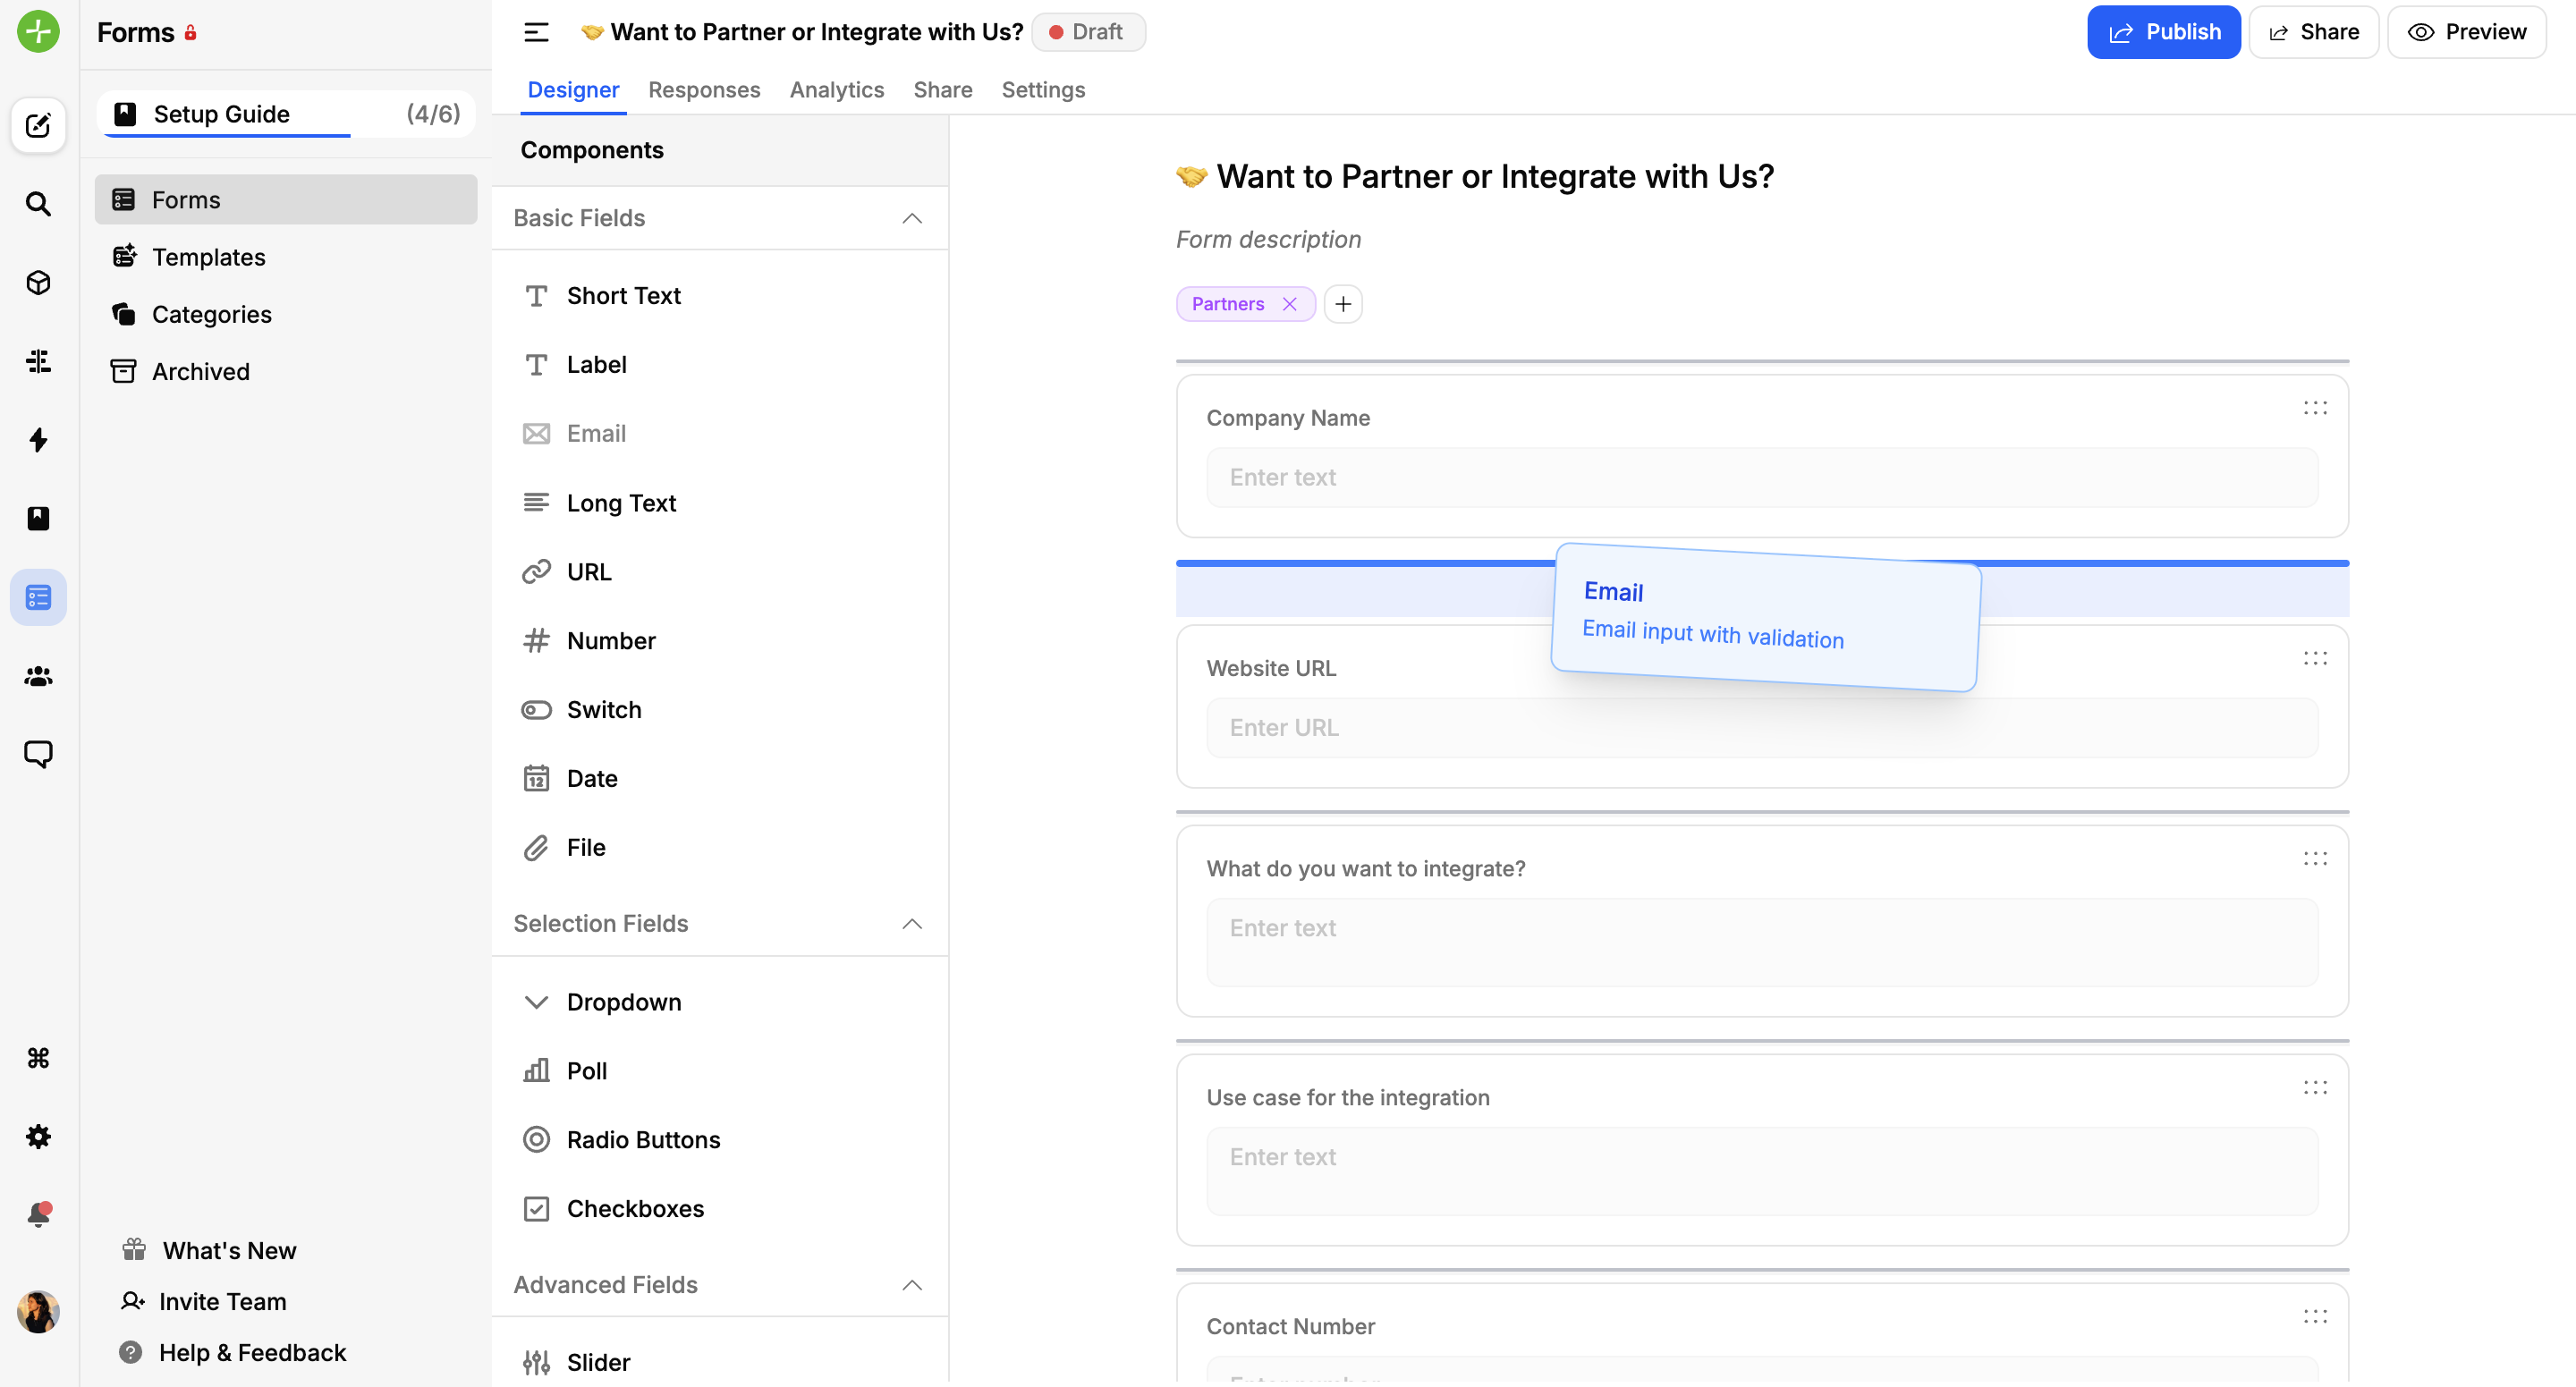
Drag and drop fields like:
Text input
Dropdowns
Ratings
Multi-choice
Email, date, number, and more
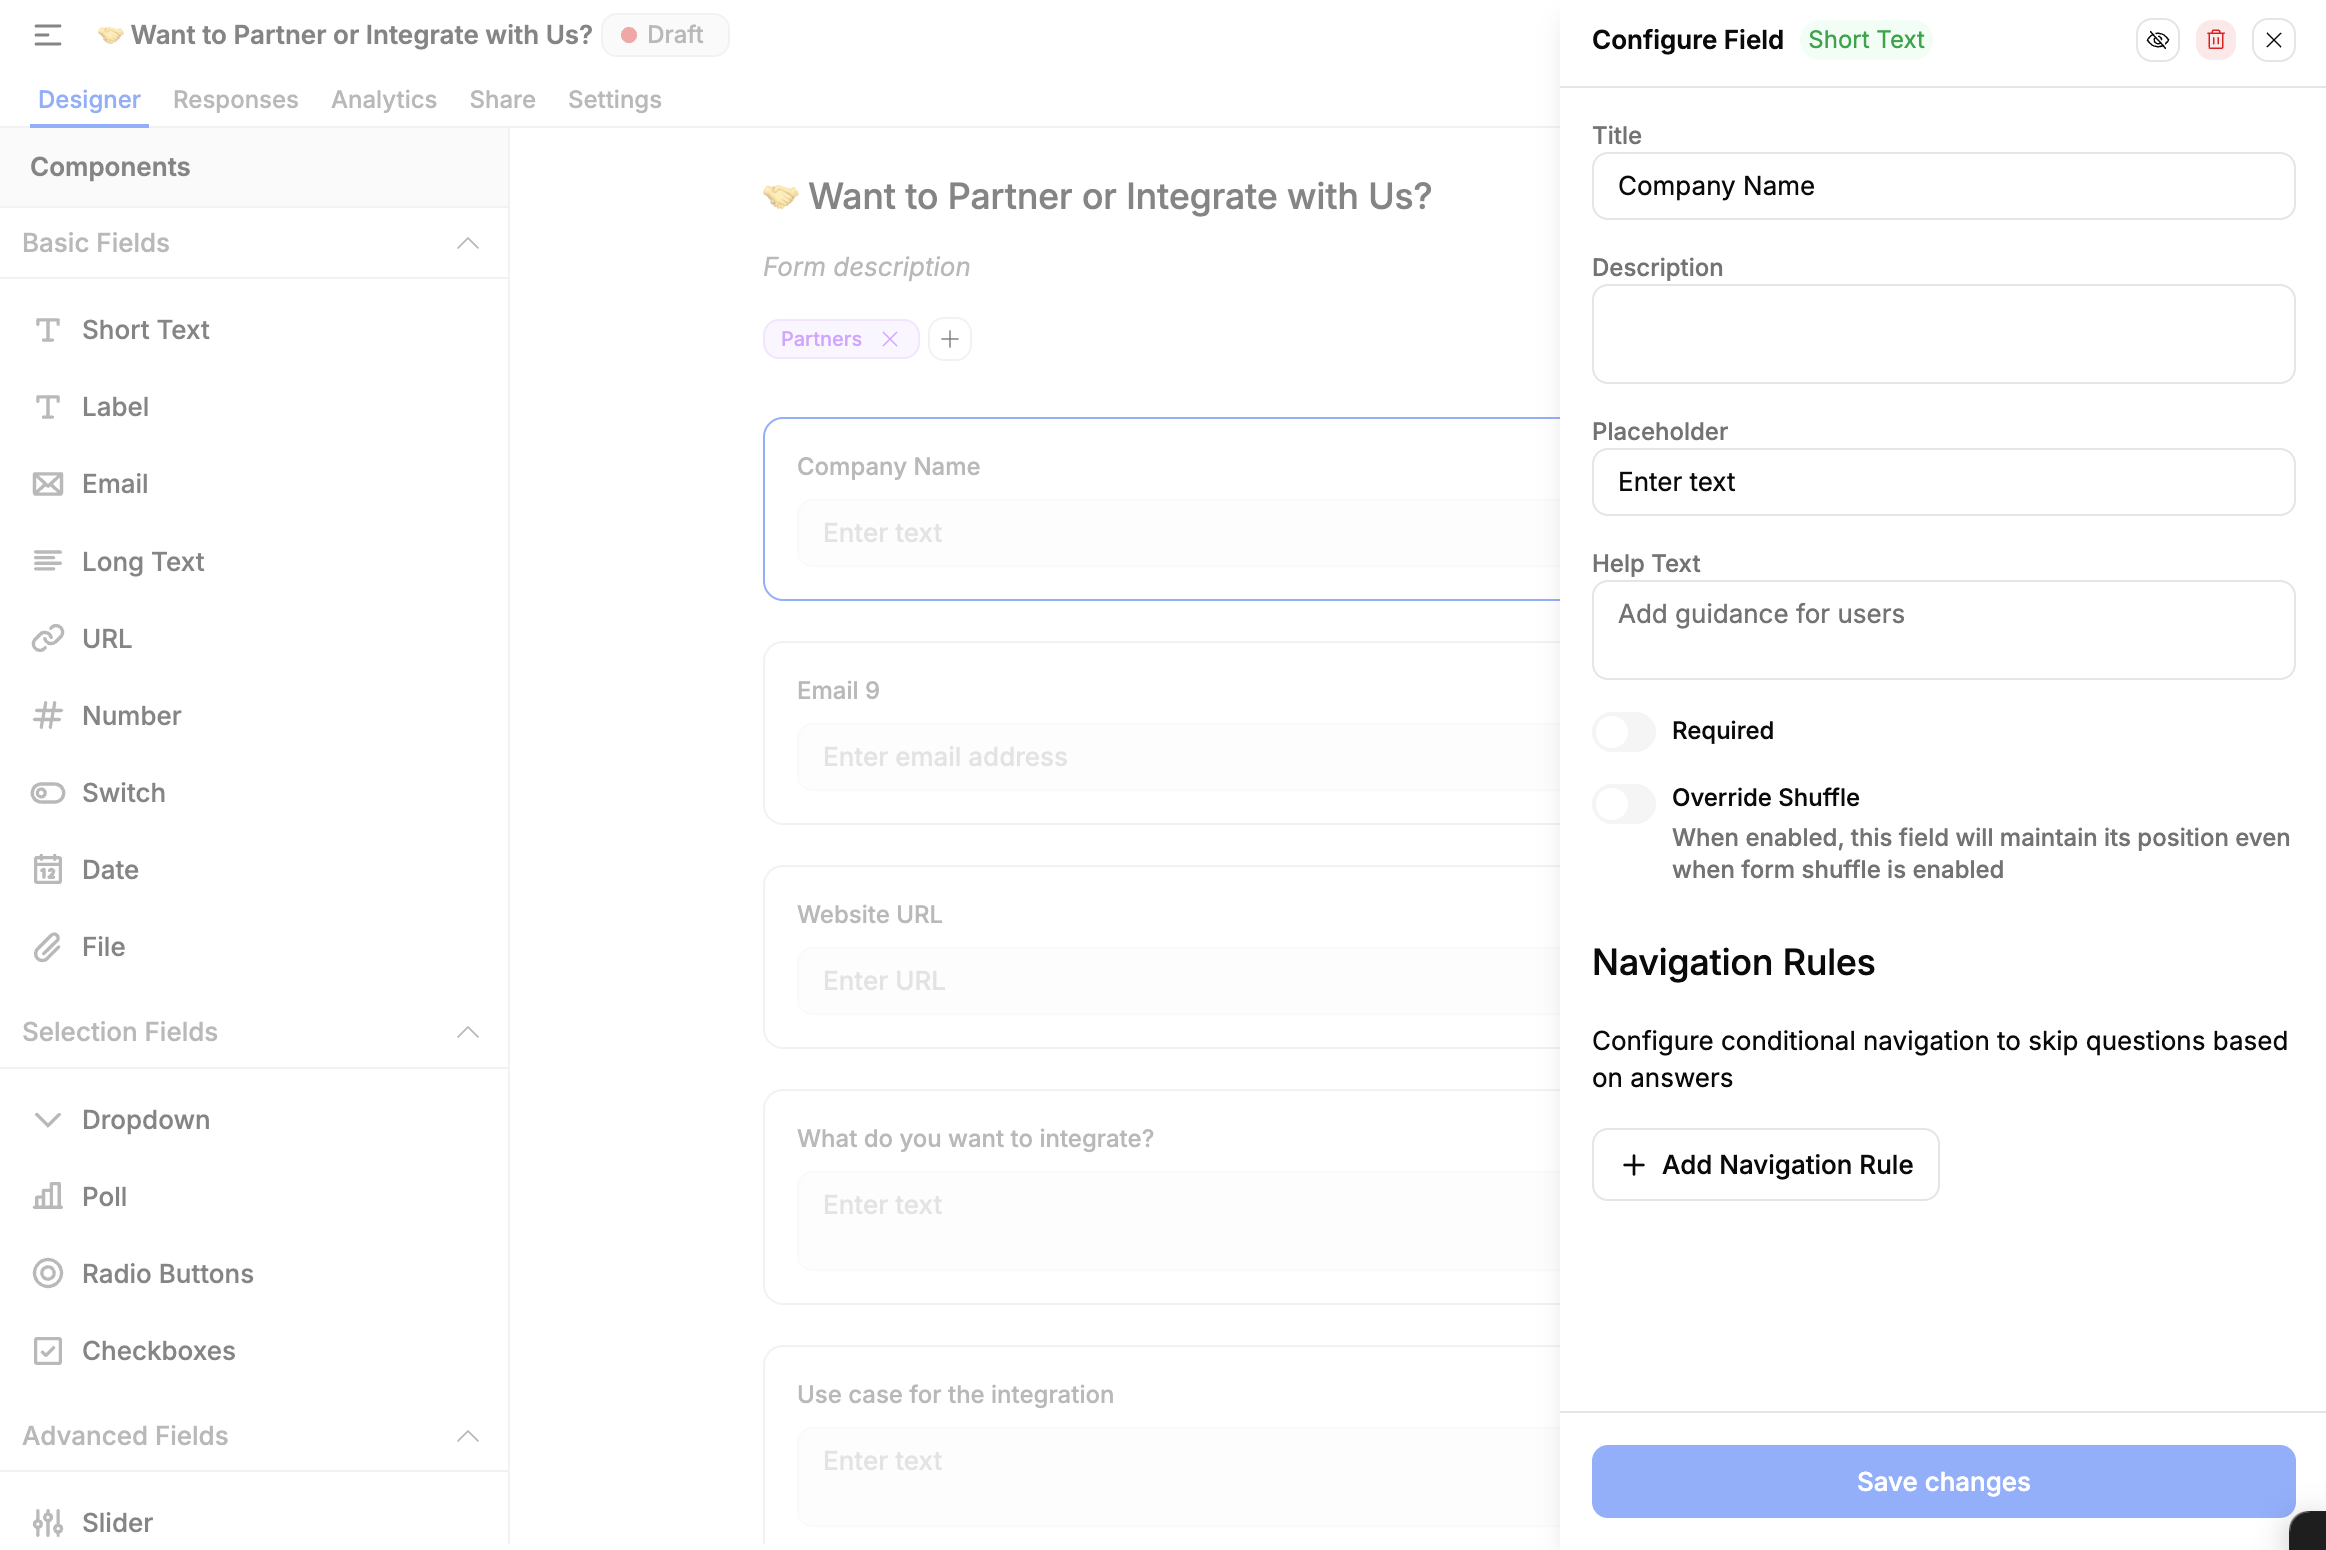
4. Set Configuration Rules for Fields
For each field, you can configure,
Title & Description
Placeholder - helper text inside the input)
Help Text - tips or instructions for the user
Required toggle - make it mandatory
Override Shuffle - lock the field’s position even if shuffling is on
Navigation Rules – Set conditional logic to navigate or show questions based on previous answers.
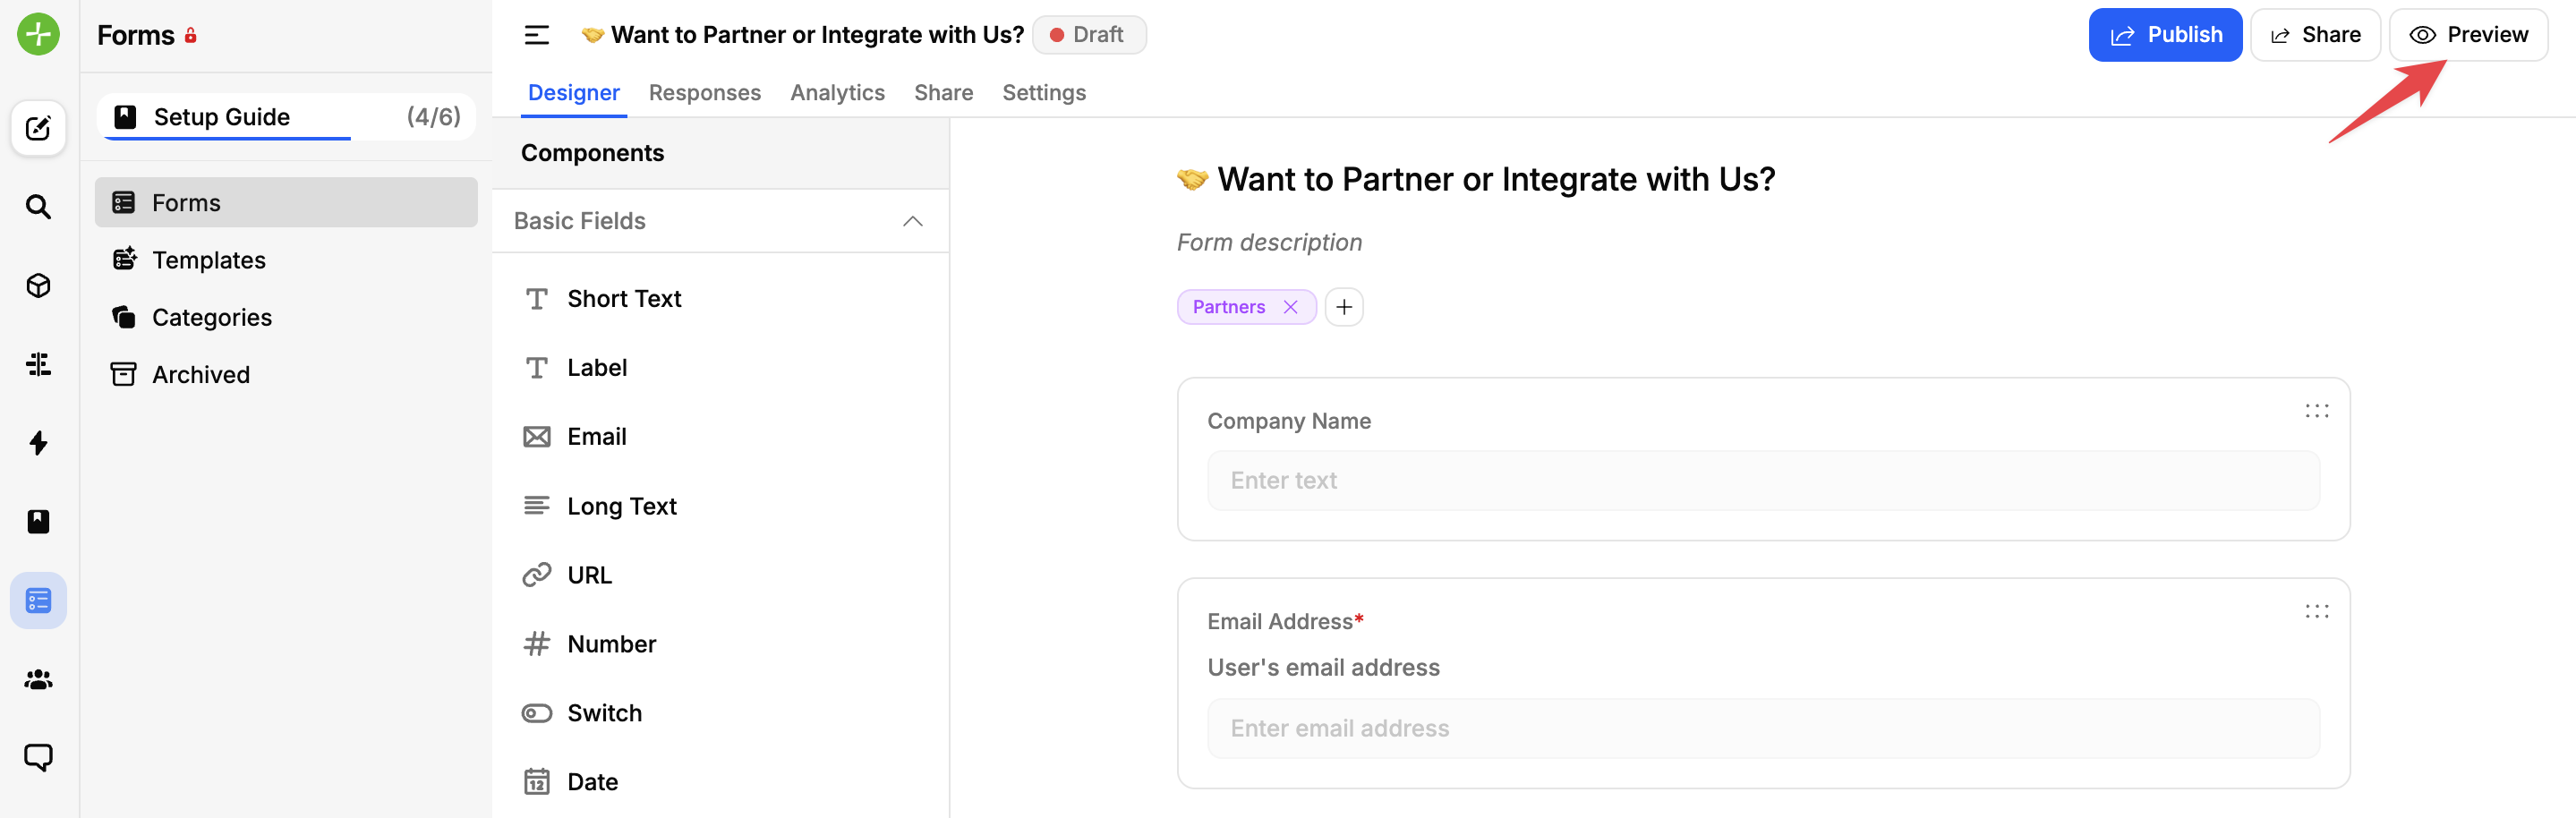
5. Preview Your Form [If needed]
At any time, click Preview (top right) to see exactly how the form will appear to respondents before publishing.
6. Update Form Settings [If needed]
The Settings tab of your form lets you control its behavior, access permissions, appearance, and more. Whether you’re preparing a form for launch or adjusting it after collecting responses, here’s a breakdown of each setting.
Read more about Form Settings here →
7. Publish
Once you’re happy with the form, hit Publish. You’ll get a shareable link and optional embed code.
Need Help?
Email us at [email protected] or drop your question on our support board! 🙌🏼
Was this helpful?