User segmentation helps you group your customers based on specific rules you set using custom attributes. This means it’s a powerful way to
Focus on posts from a specific segment of customers who matter the most at that time.
Send targeted updates or notifications to relevant groups.
Pricing & Access Level
The People section on the Dashboard where you can configure User Segmentation can be accessed only by the Admins.
User Segmentation is available on the Fly High plan.
Setting Up Custom Attributes
Custom attributes are the key to building meaningful customer segments. You can configure them either via your SSO authentication, via JS SDK, via Salesforce integration or via the UI from your Customers Page.
1. Creating Custom Attributes on the UI
To start head to your FeatureOS Dashboard > People section over the left > People Settings > Settings > Add Attributes.
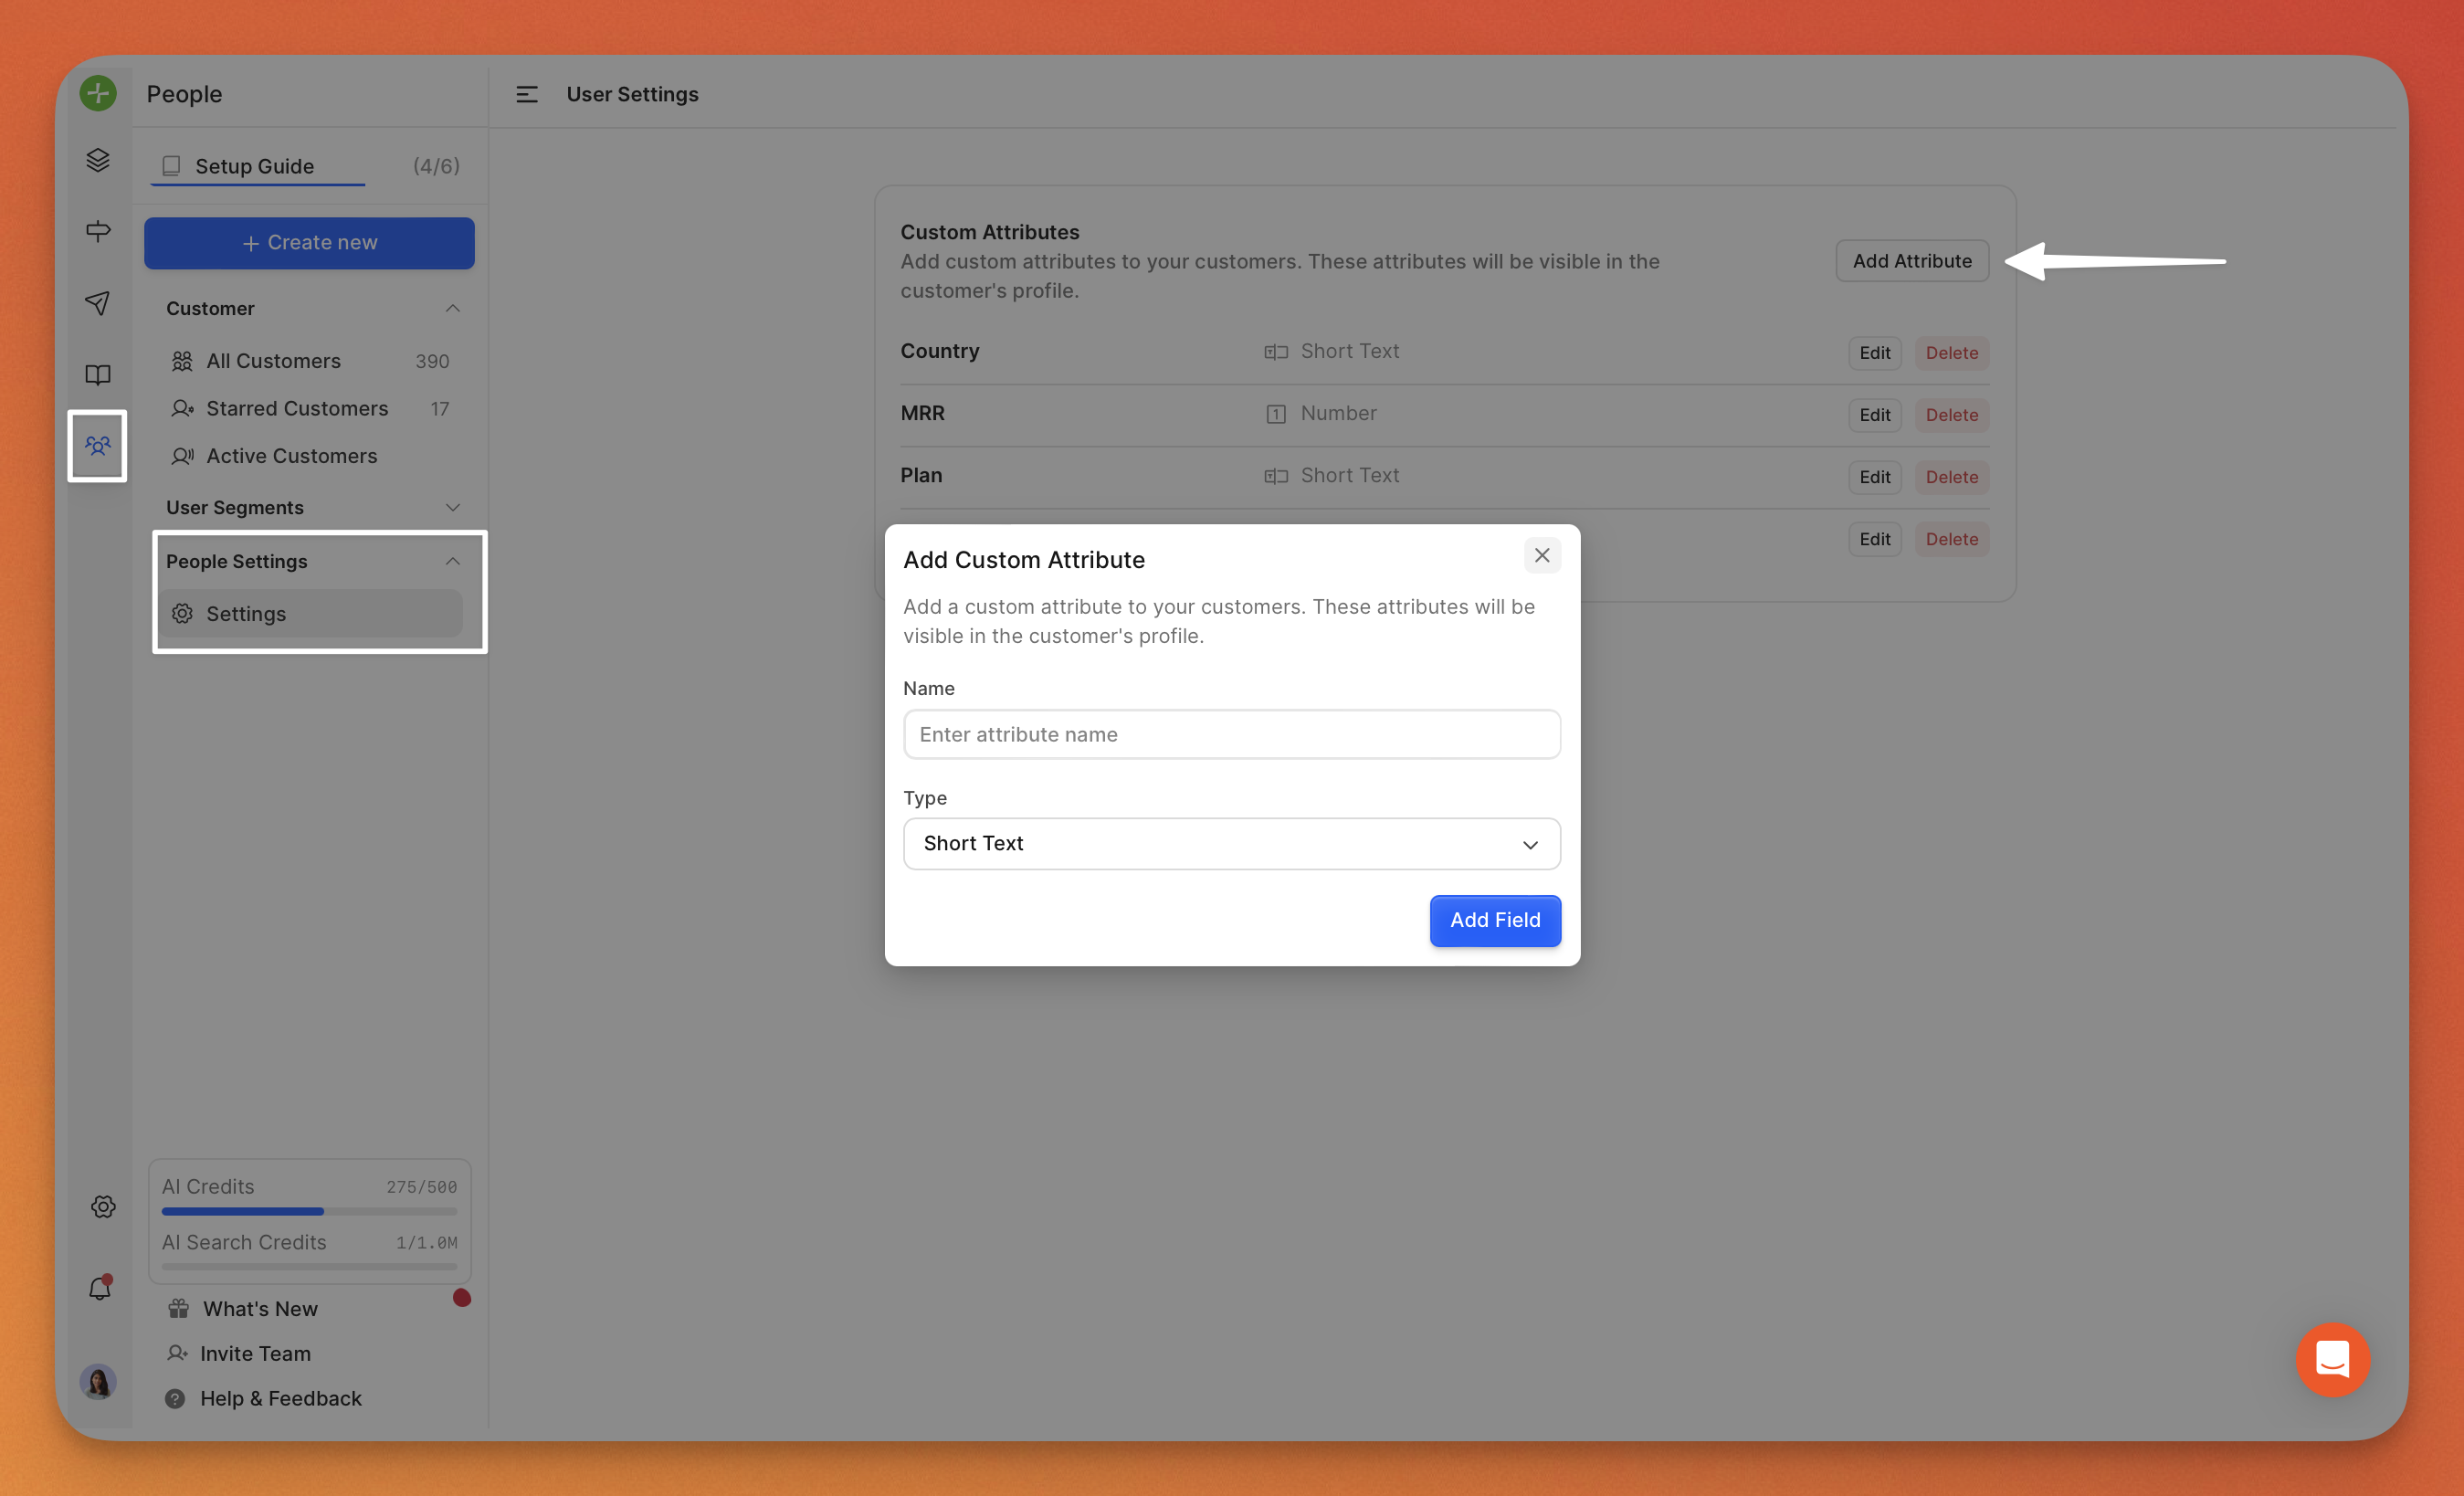
Give your attribute a name and set its type. Choose from the 4 supported attribute types.
Short text
Long text
Boolean
Number
A few things to keep in mind
2. If you pass undefined attributes via SSO or JS SDK, they’ll automatically be added as String types.
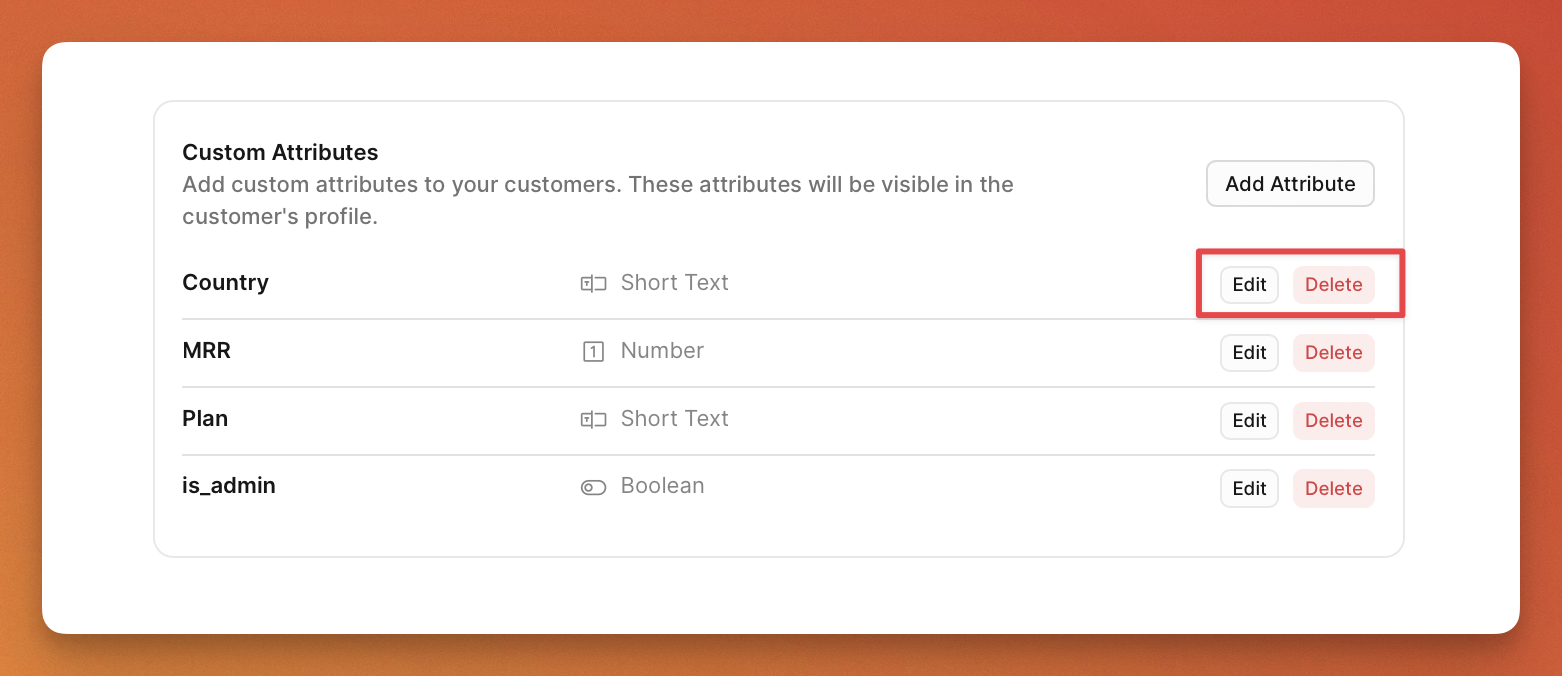
2. Editing Custom Attributes
aYou can currently change the name of an attribute anytime, but you won’t be able to change its type.
This restriction prevents any disruption to your existing customer data, as changing types could impact thousands of records.
3. Deleting Custom Attributes
If you no longer need an attribute, you can delete it individually. Deleting this attribute will remove it from all the associated customer records.
4. Adding Custom Attributes via the UI
You can open individual customer records to add a custom attribute - a key & value pair.
Alternatively you can also use Bulk Actions to add attributes. Here’s a recording for your reference.
Creating and Managing Segments
1. Creating a Segment
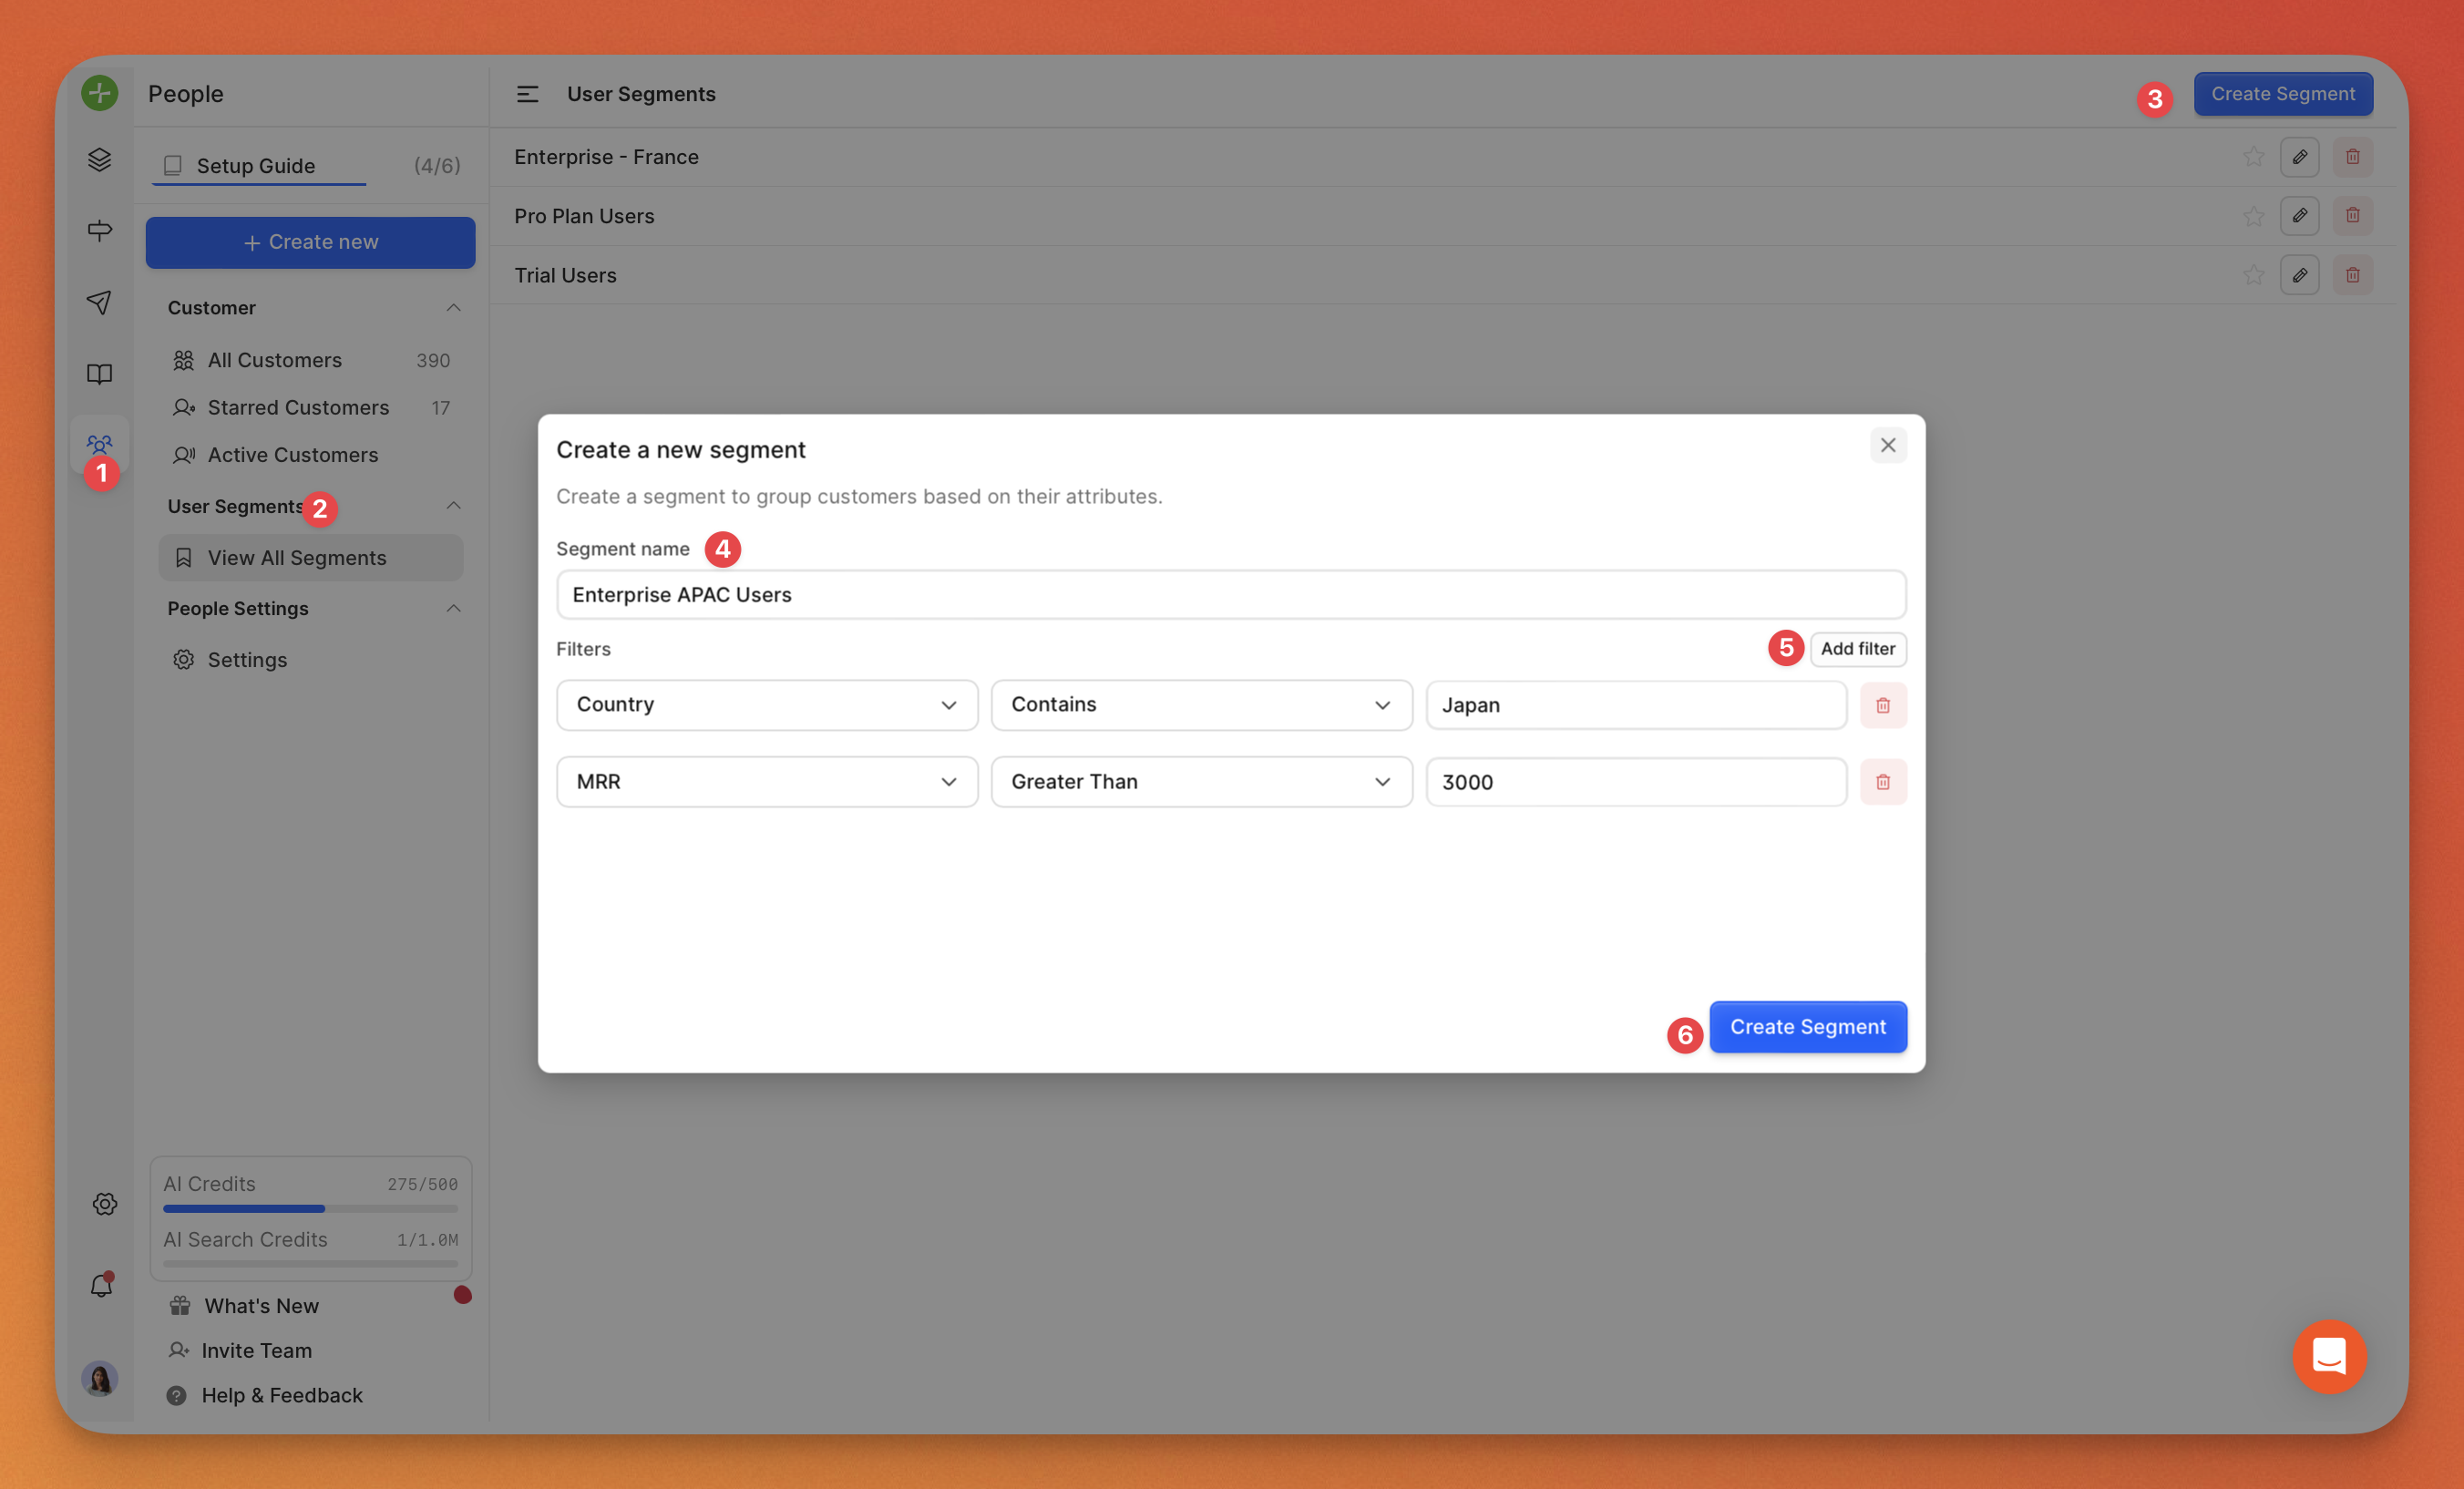
Go to the People section > User Segments > Create Segment.
Give your segment a name.
Choose the filters and any custom attributes-based filters you need.
Click Create.
Once the segment is created, you’ll be redirected to its page, where you can view all the users in that segment.
2. Editing a Segment
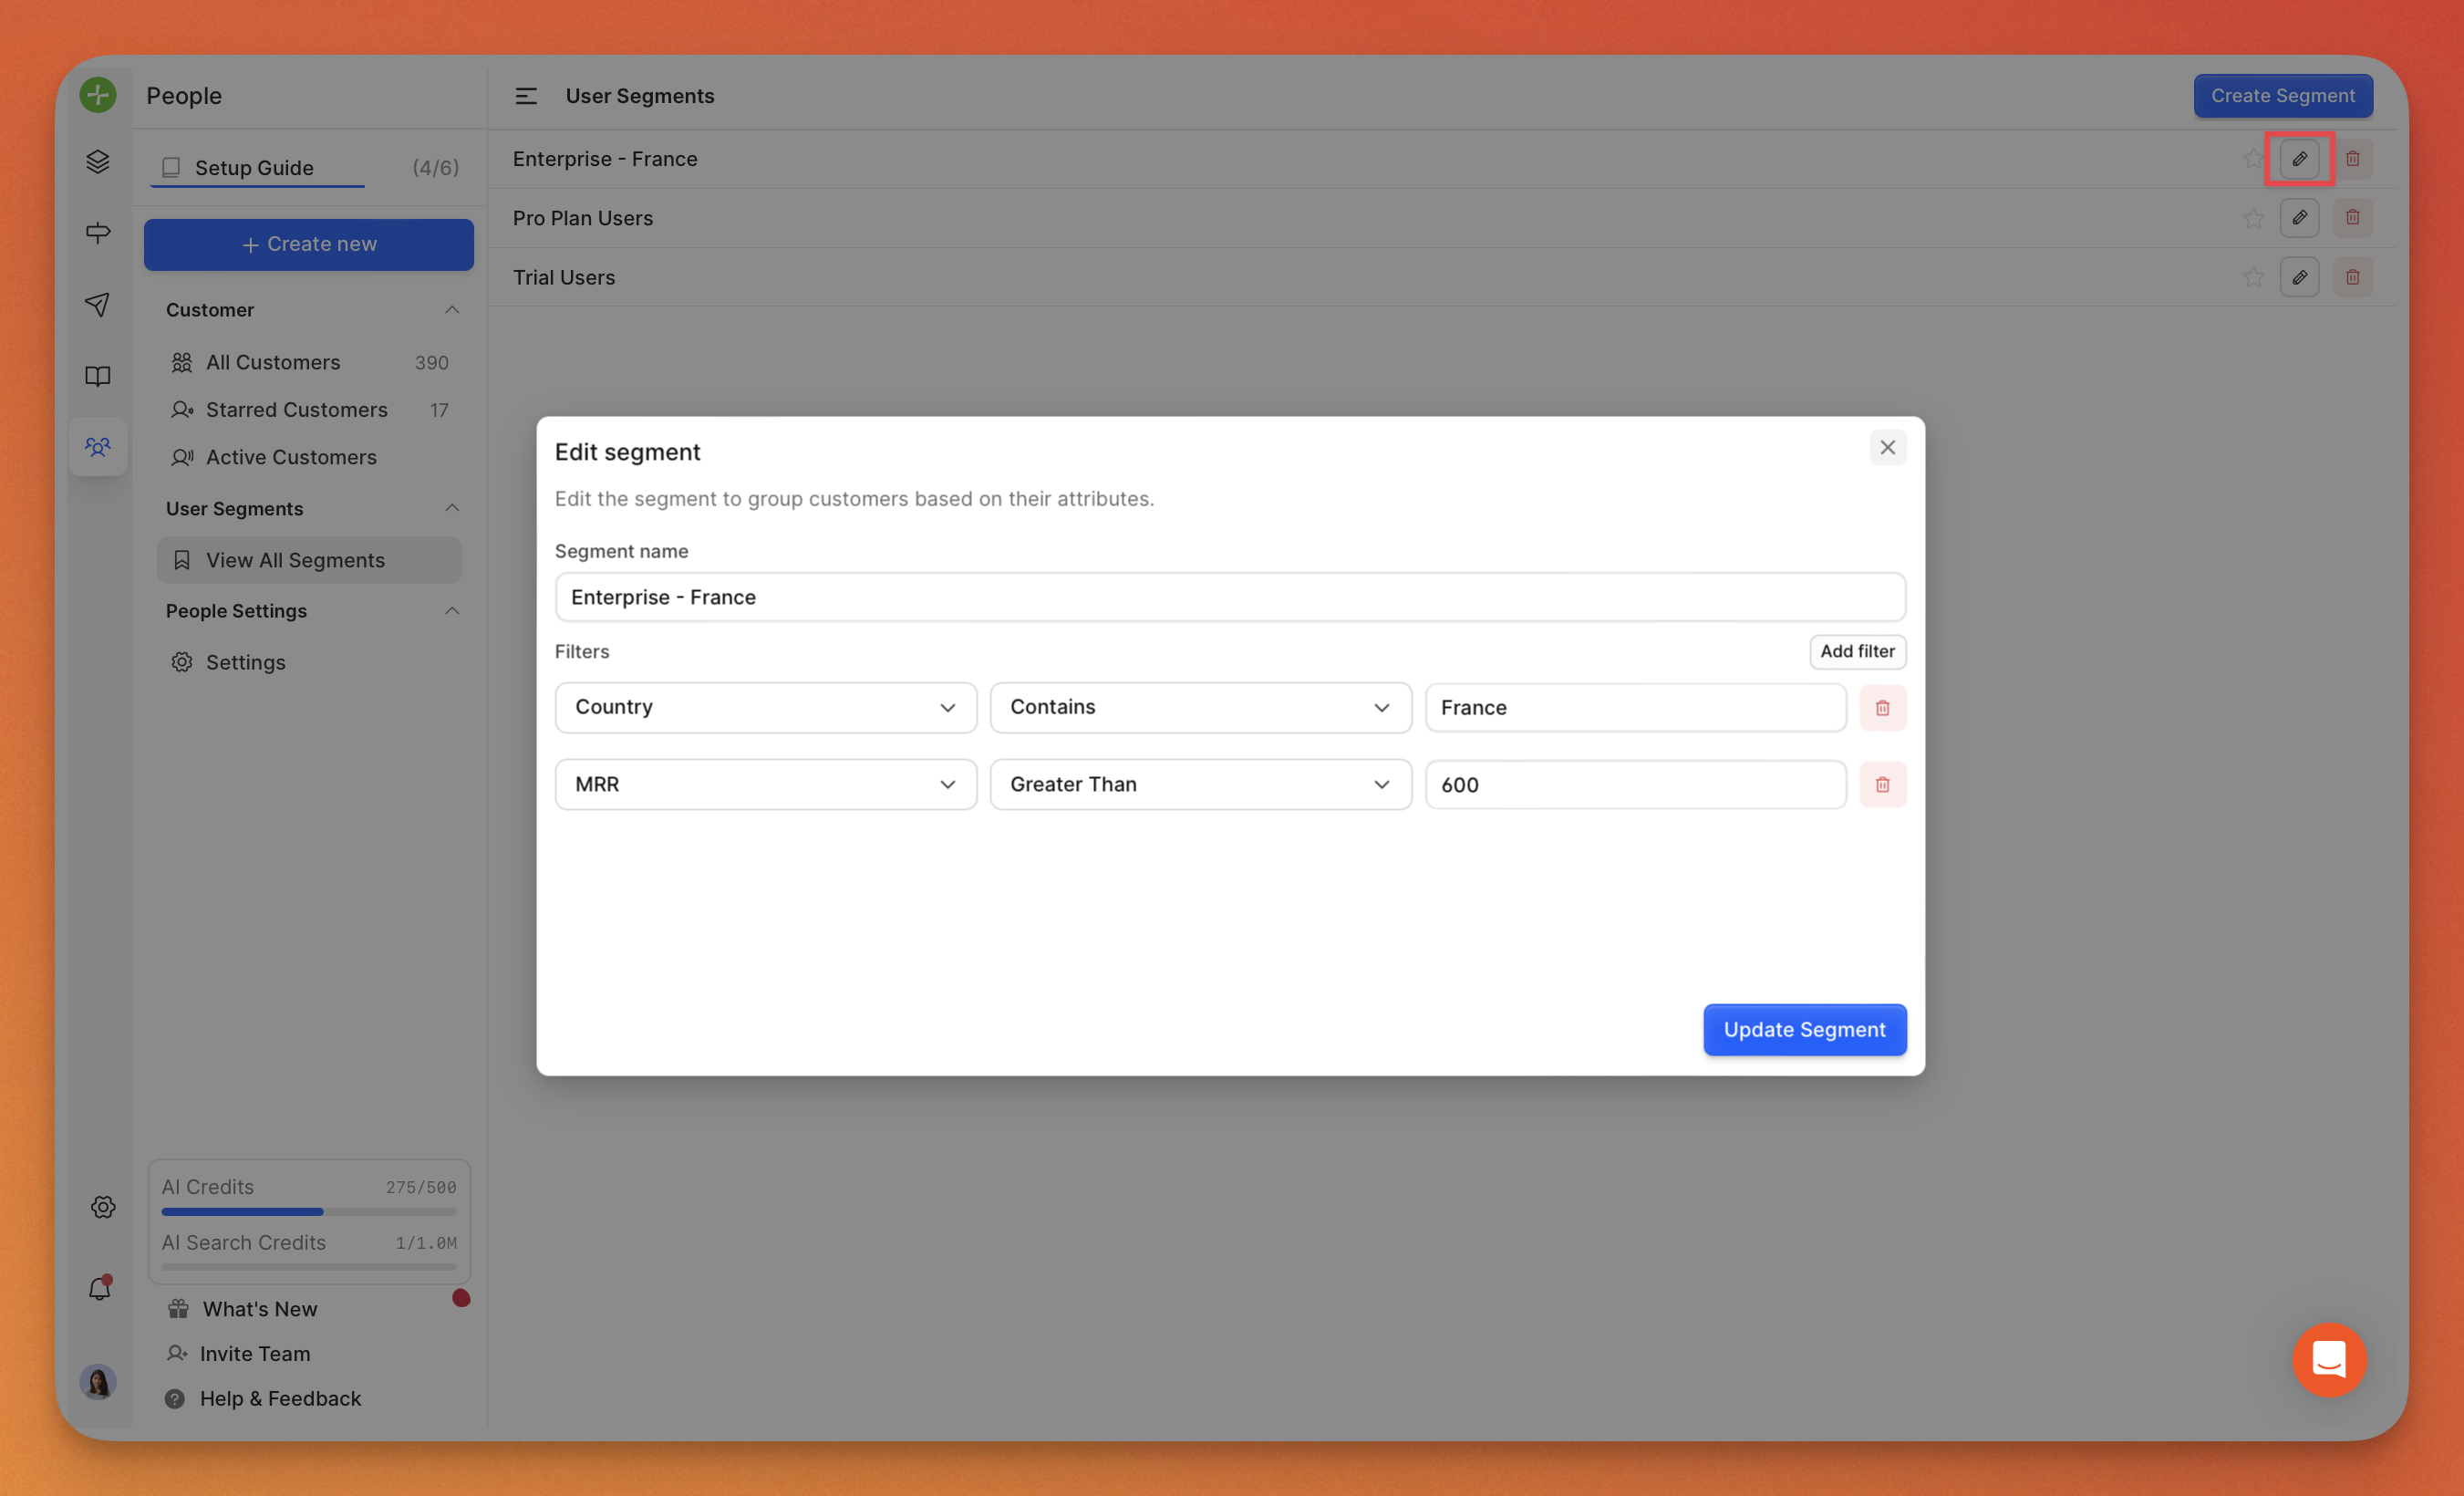
Head to the User Segments > View All Segments section.
Click on the Edit icon beside a segment.
Modify the fields and click Update Segment.
3. Deleting a Segment
If a segment is no longer in use, you can delete it from the View All Segments page. Please note that deleting a segment is an irreversible action.

Segments in Action
1. Using Segments for Changelog Notifications
Segments you create can be used to send targeted email notifications when publishing a changelog. Here’s how:
When publishing a changelog, you’ll see an option to choose a Notify Customers > Choose a segment.
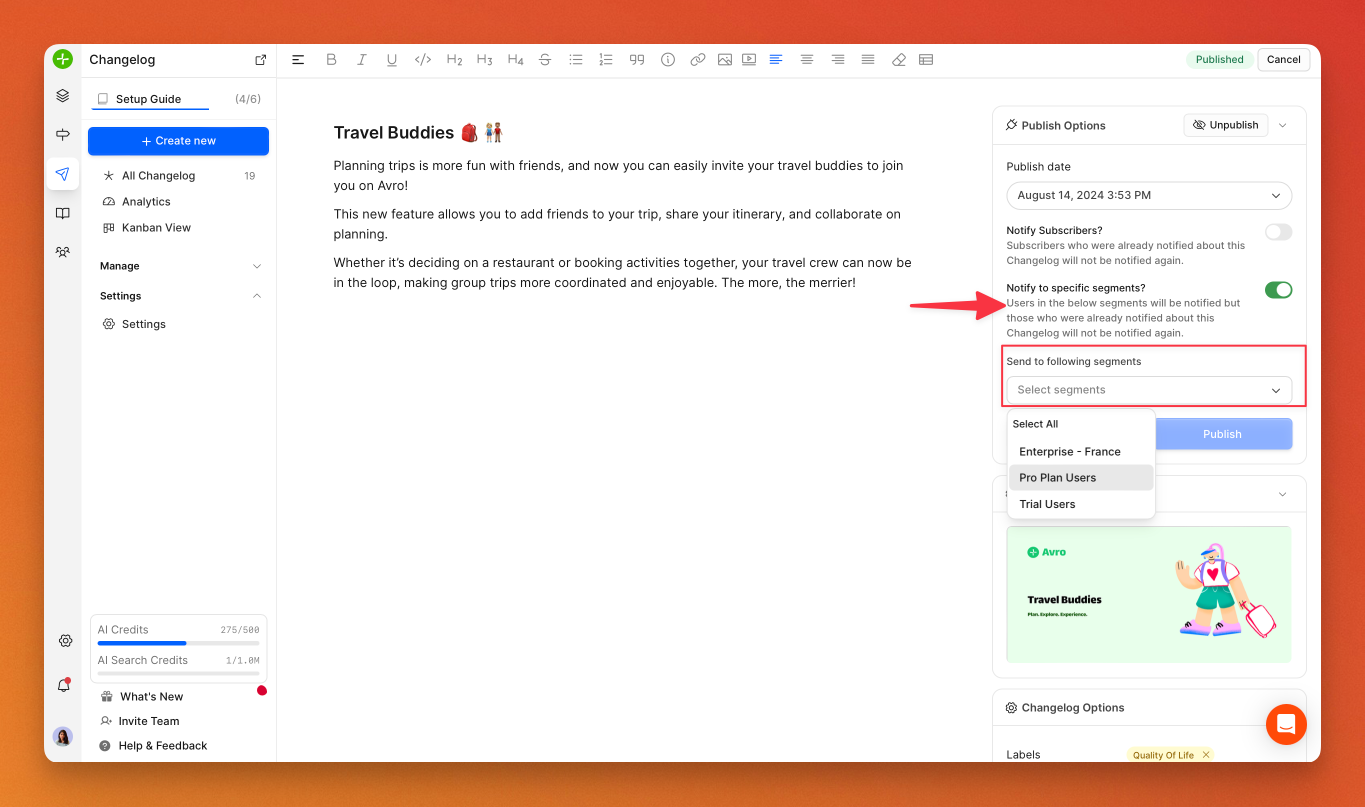
Select the relevant segment to send the notification only to users who belong to that group.
Publish the changelog, and the email notification will be sent to the chosen segment, ensuring it reaches the right audience.
This is especially useful for keeping specific groups of customers informed about updates that matter most to them.
2. Using Segments to Filter Posts
Segments also make it easier to view feedback from a specific group of users. Follow these steps:
Go to your Dashboard and navigate to the All Posts section.
Use the Filters > More Filters > Filter by Submitter Segment & Voters Segment.
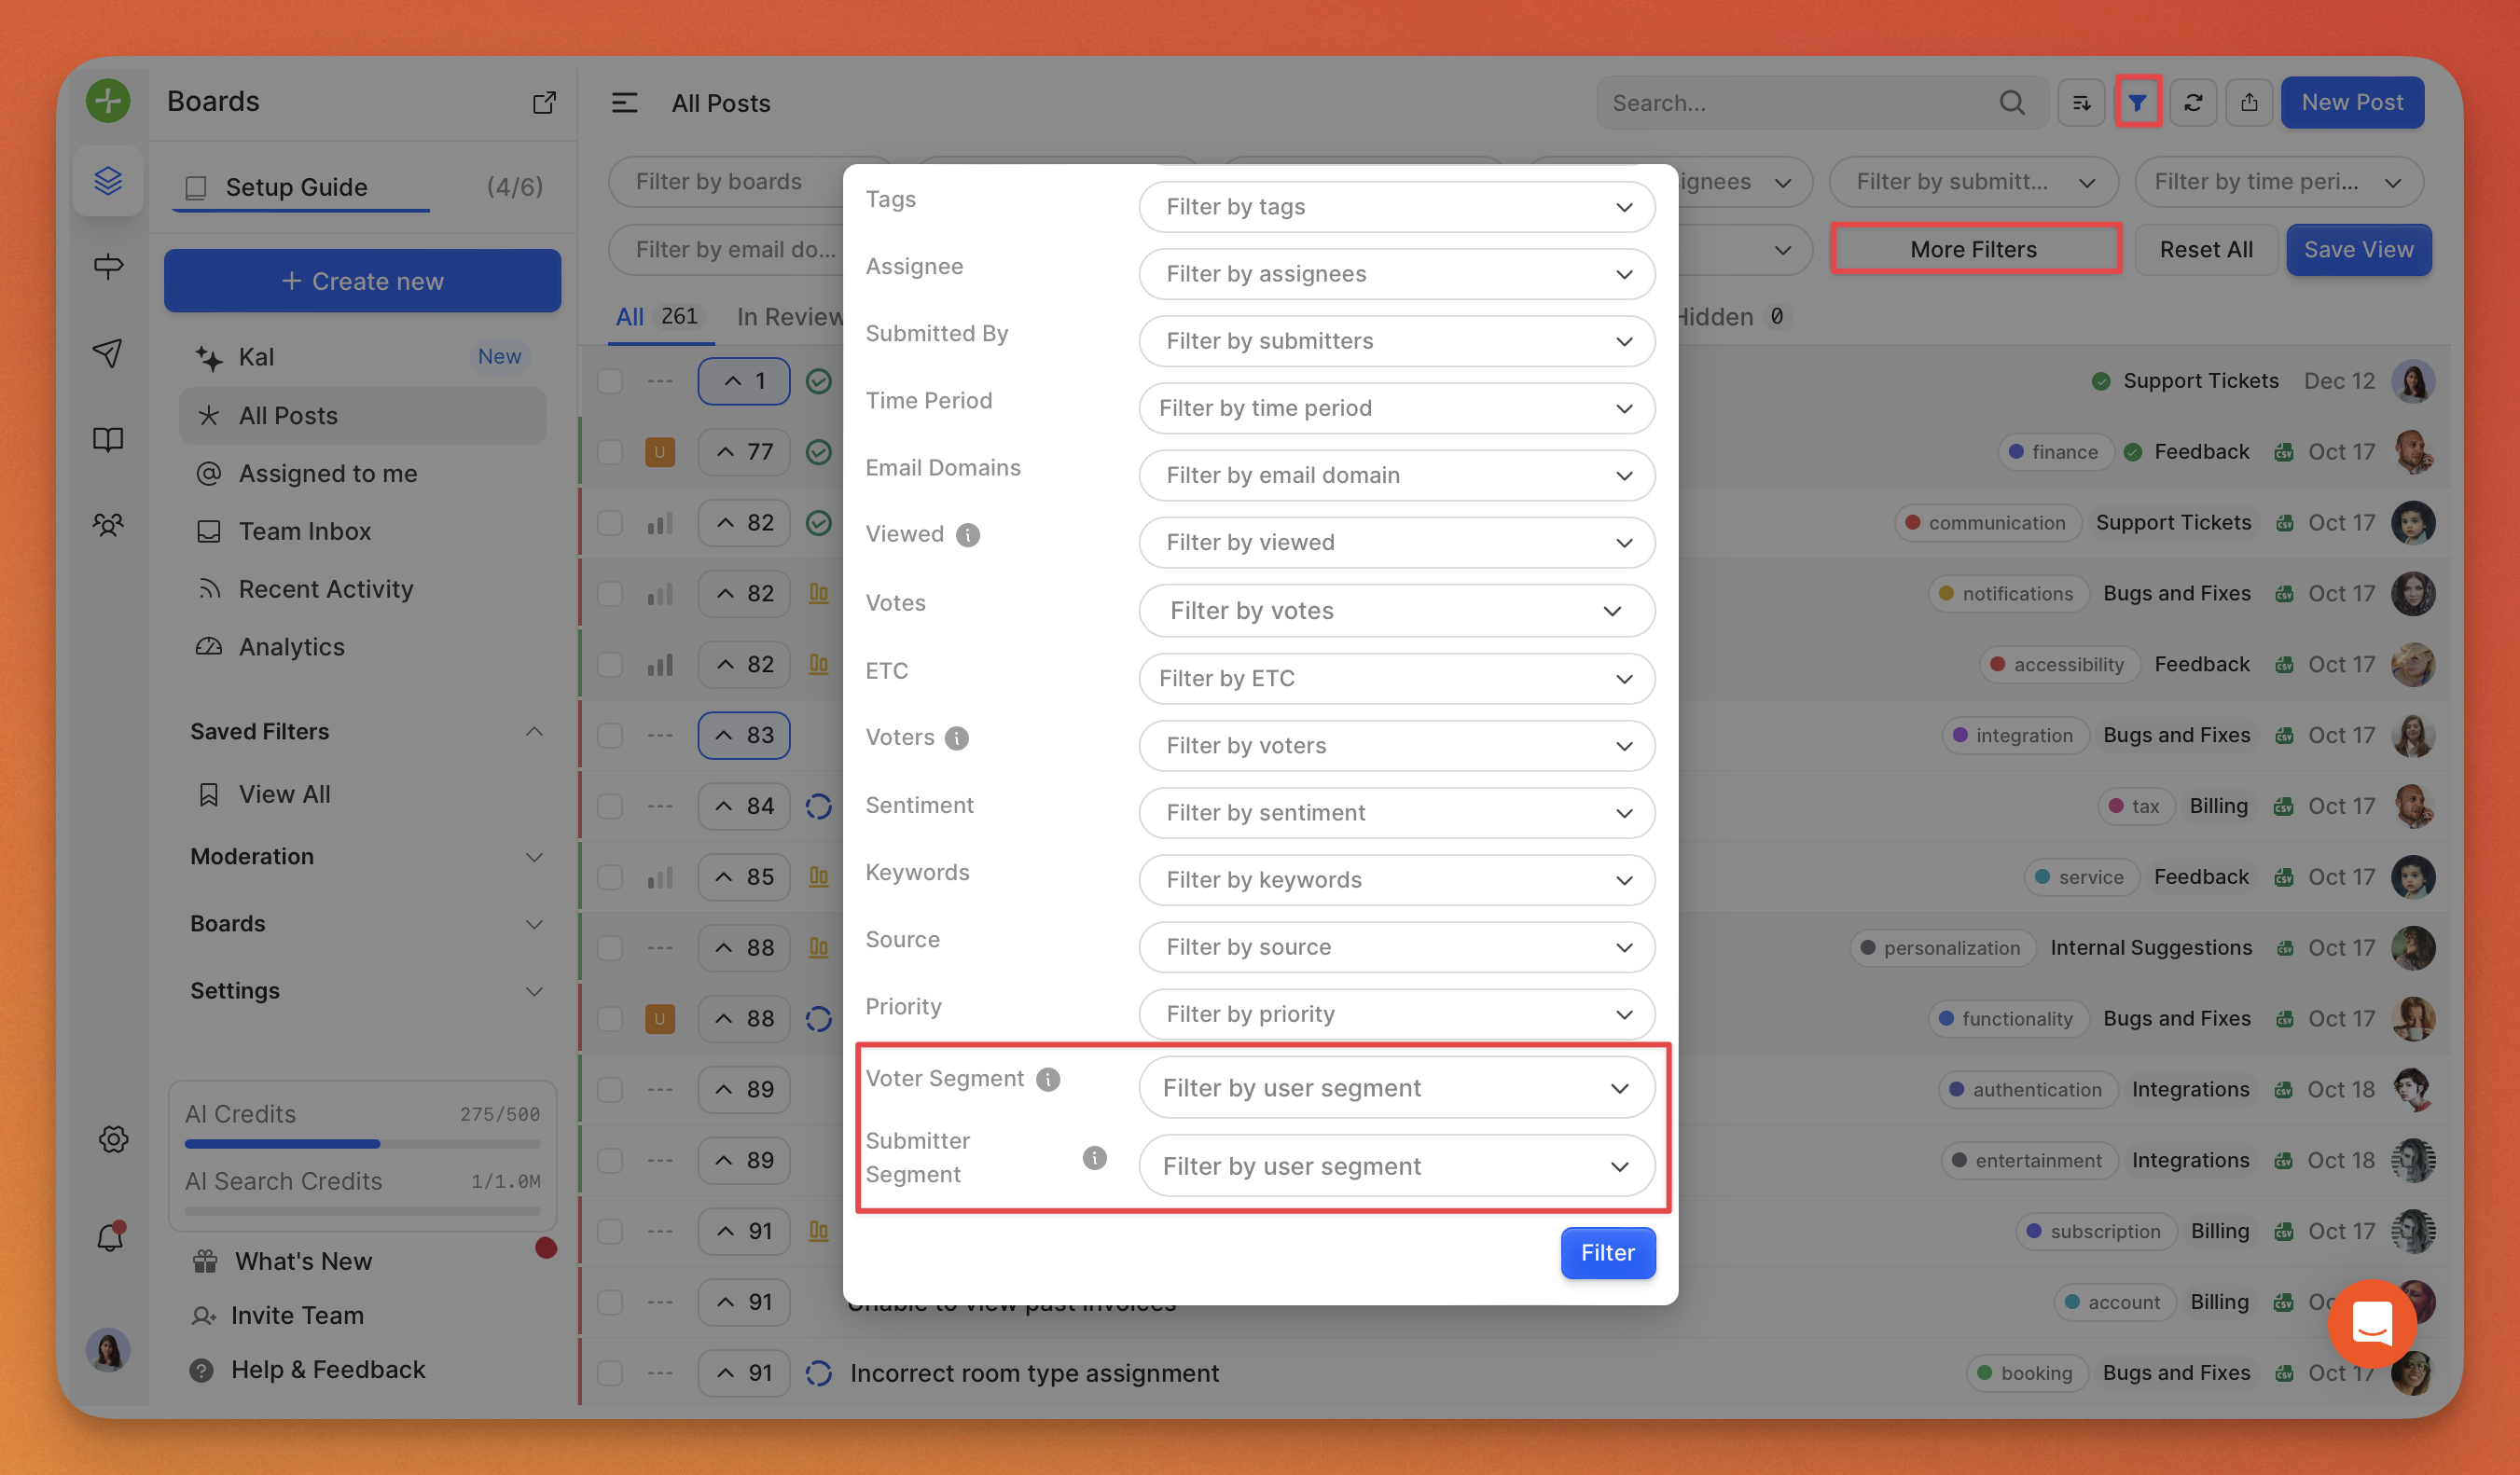
The dashboard will now display posts that were submitted or voted on by customers in the chosen segment.
This helps your team prioritize feedback from specific groups, such as high-value customers or users with similar needs.
Need more help?
Reach out to our support at [email protected] or submit a request on our support board! 😃
Was this helpful?
