


You can now turn your product updates into direct action by adding customizable Call-to-Action (CTA) buttons to your changelogs. Instead of just announcing a feature, you can immediately guide your users to try it out, read the documentation, or book a demo.
How to add a CTA Button
You can insert and customize a button anywhere in your post using these steps:
In the changelog editor, simply type
/buttonon a new line and select the Button option from the menu.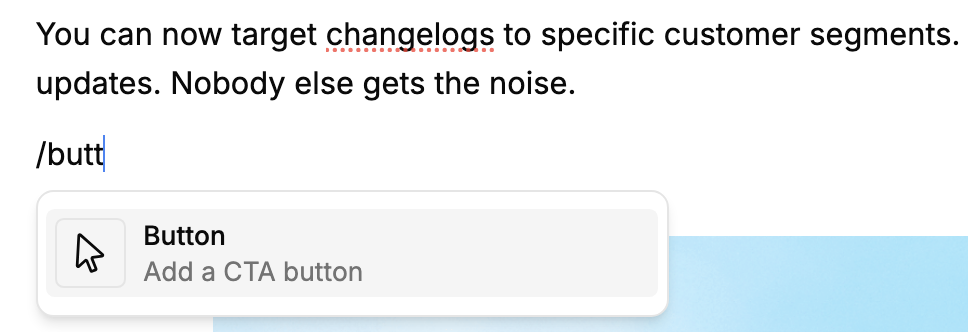
After which, the editor for button appears. Enter your desired label in the Button text field (e.g., "Try the new integration") and paste your destination link into the URL field.
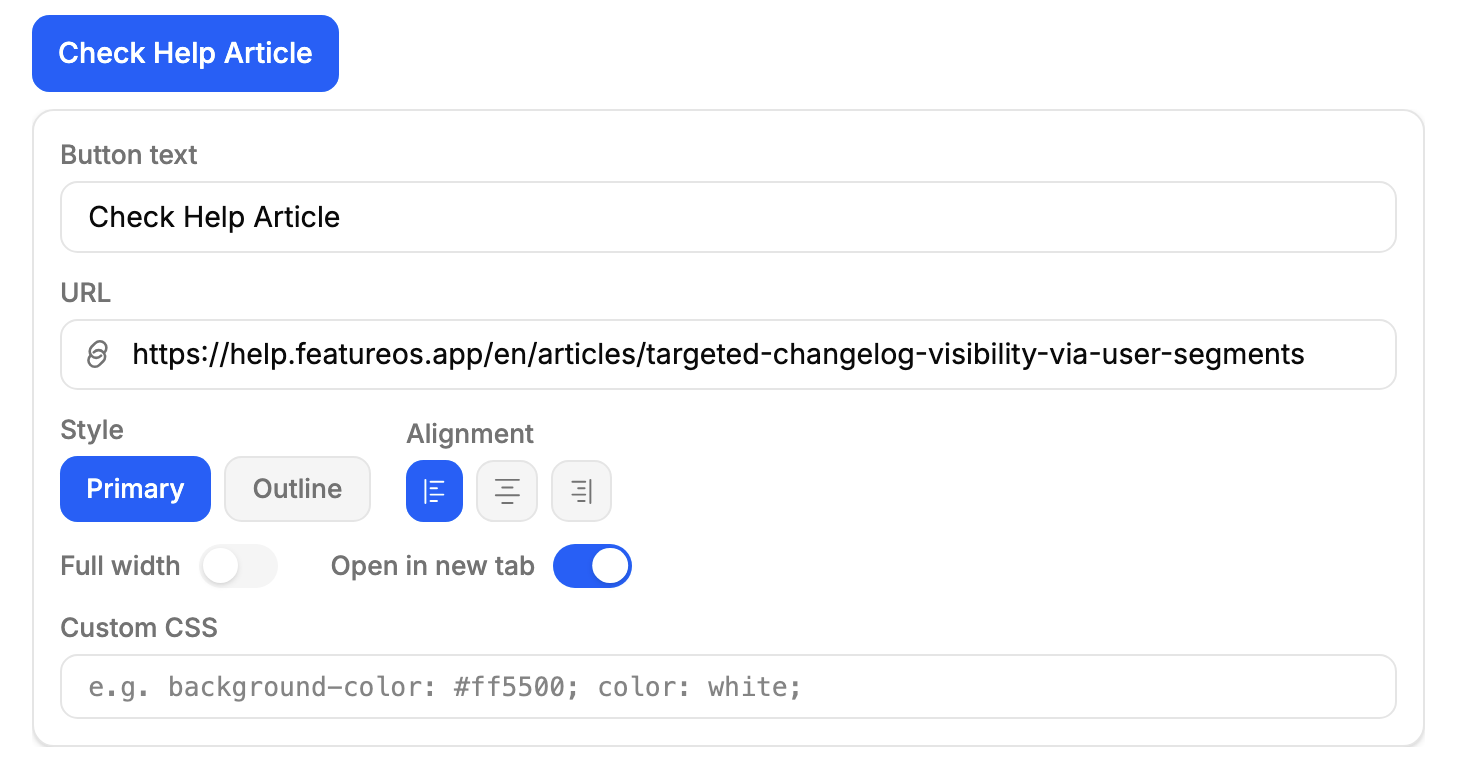
You can control how your button appears and functions to match your branding:
Style: Select between a Primary (solid) button to grab attention or a sleek Outline version for secondary actions.
Alignment: Position your button to the left, center, or right of the page to fit your layout.
Full Width: Toggle this on if you want the button to span the entire width of the post.
Open in New Tab: Enable this to ensure users don't lose their place in your changelog when they click through to your link.
Custom CSS: For total brand alignment, you can use the Custom CSS field to apply specific hex codes, borders, or hover effects.
Once you're happy with the preview, your button is ready to drive engagement the moment you hit publish.
Need more help?
Reach out to our support at [email protected] or submit a request on our support board! 😃
Was this helpful?