

Your homepage header is the first thing visitors see. FeatureOS lets you personalize it with your logo, navigation links, a banner image, and custom fonts. This guide walks you through every setting available, step by step.
Before you begin: Enable the custom header
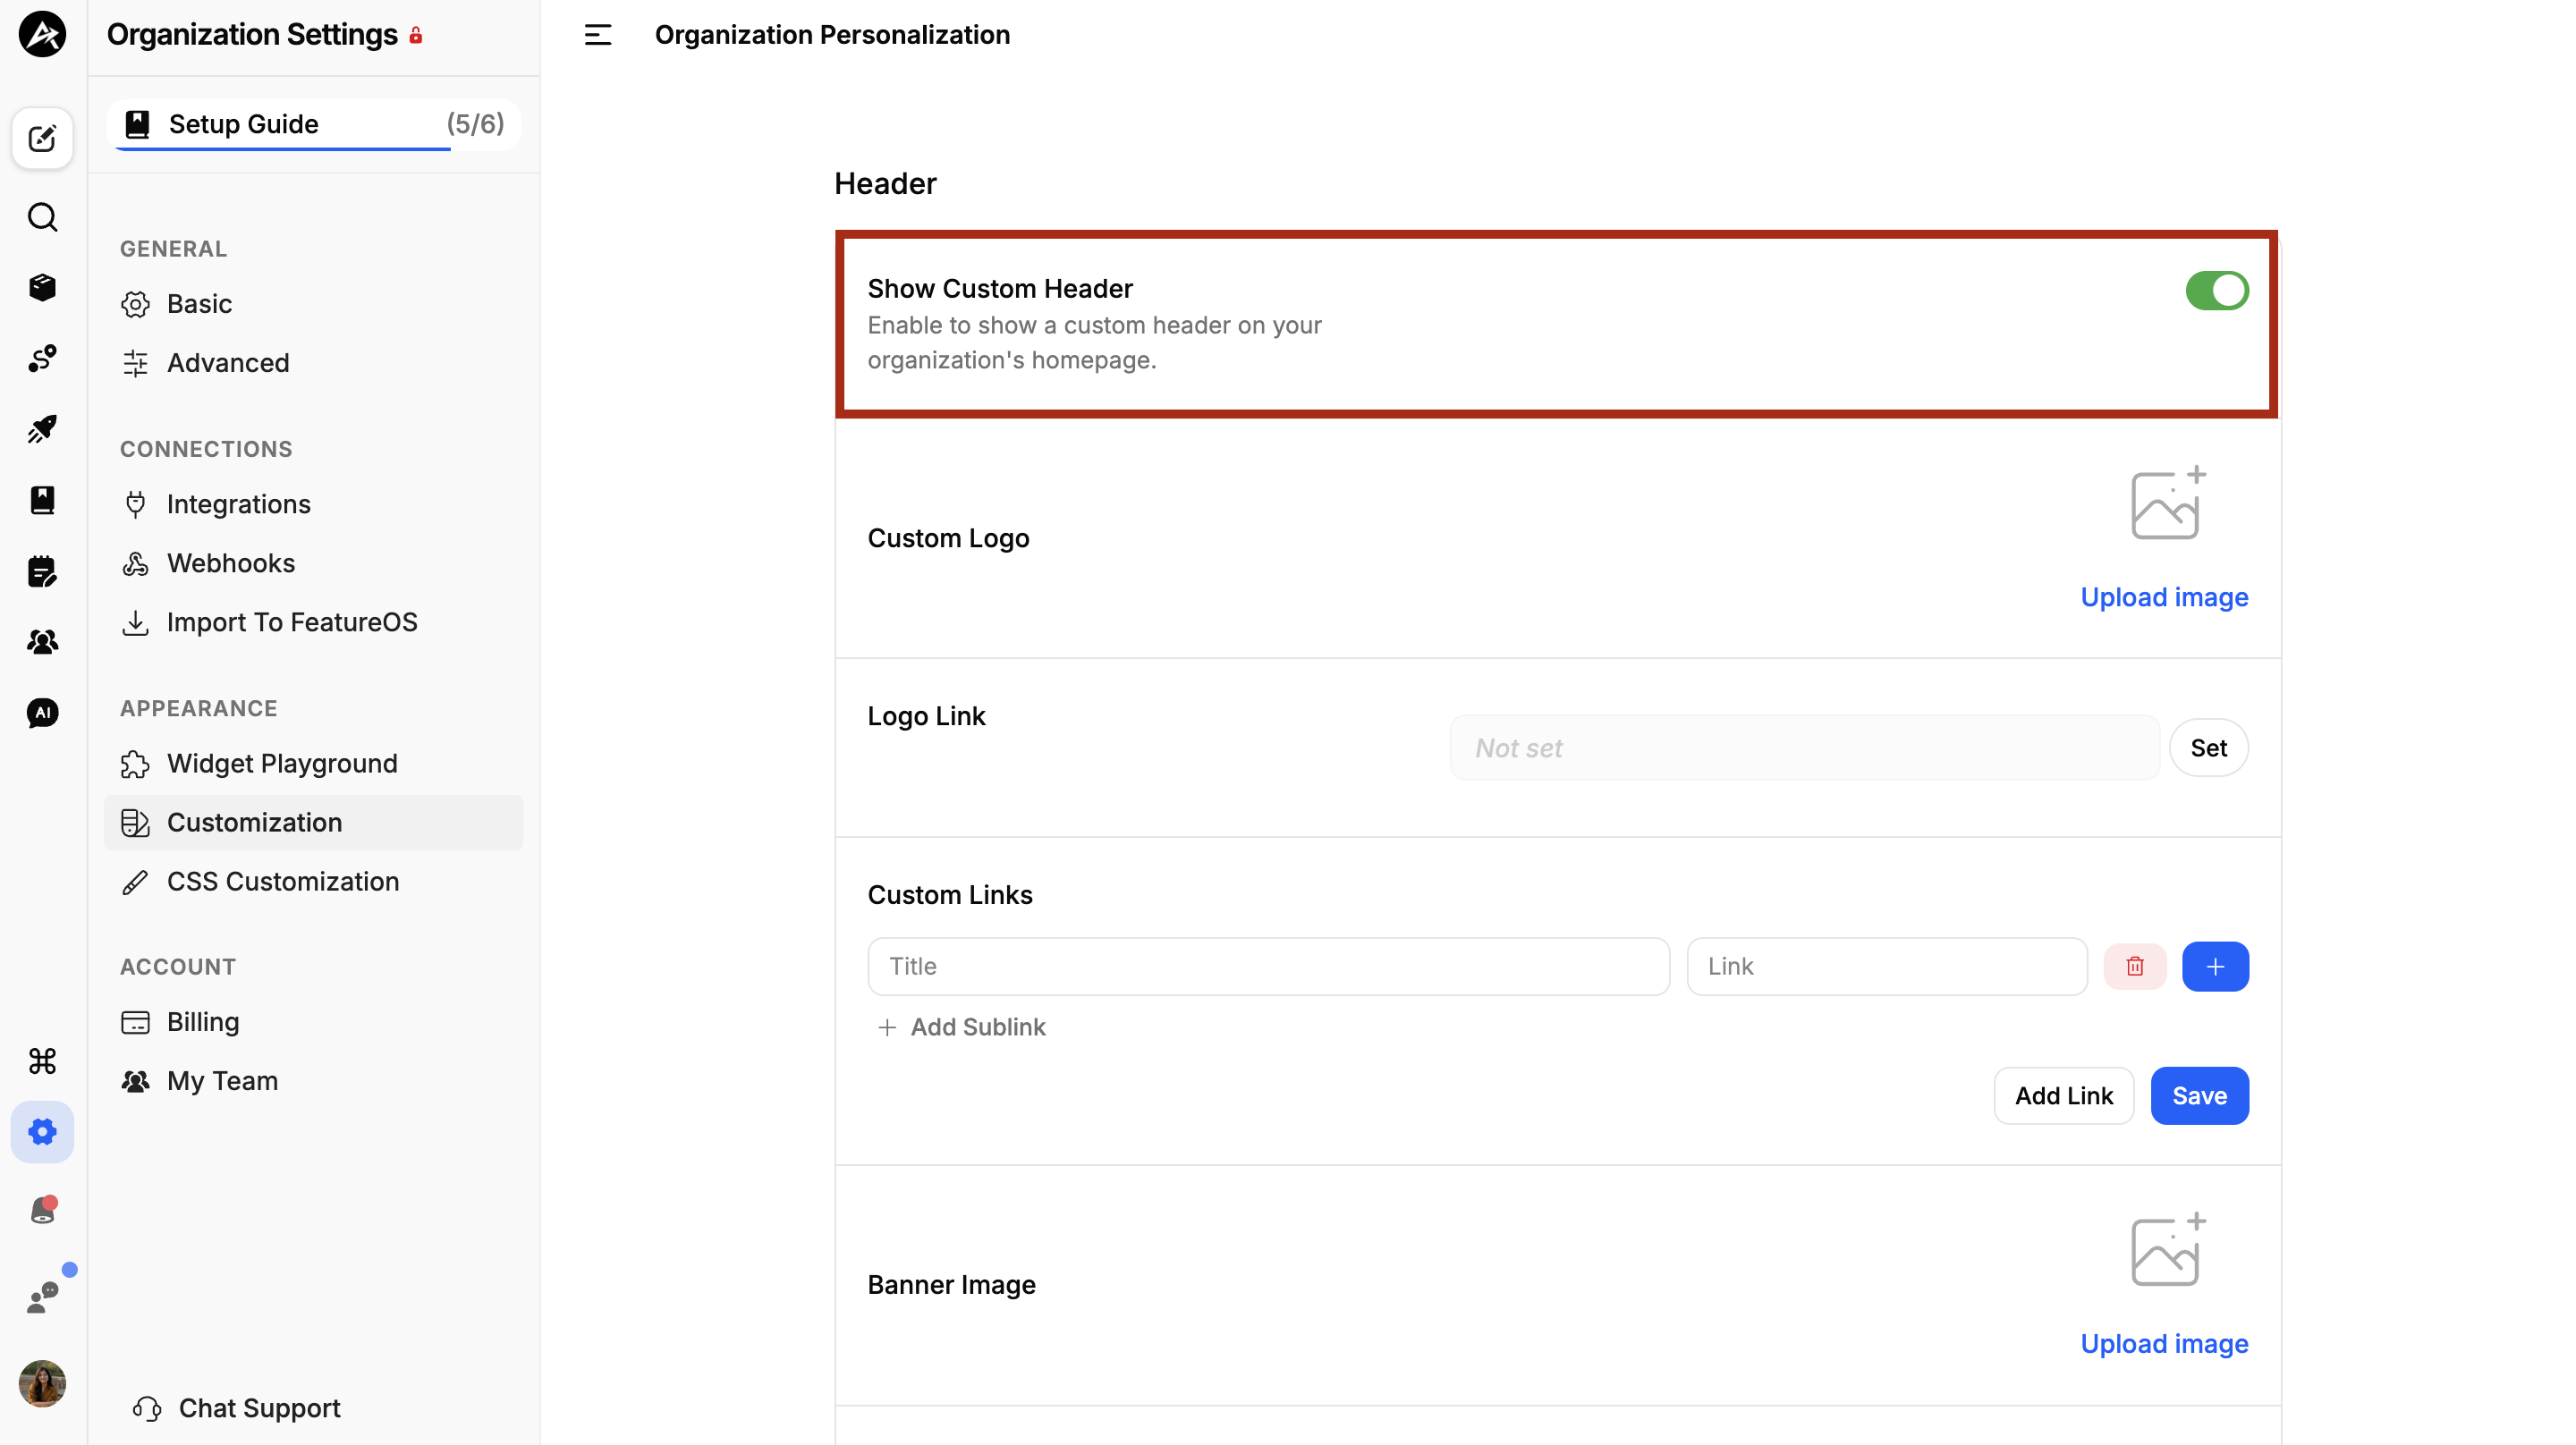
At the top of the Customization page, you'll find a Show Custom Header toggle. This is the master switch for everything on this page, none of your customizations will be visible to visitors unless this is turned on.
Add Logo
Your logo is the most recognizable part of your header. Under the Custom Logo section, click Upload Image to add your brand logo. To get the best result, it is recommended to use se a PNG file with a transparent background so it sits cleanly against any header color.
Set Logo Link
Once your logo is uploaded, you can make it clickable. In the Logo Link field, enter the URL you want visitors to land on when they click your logo, this is typically your main website. Enter the URL and click Set to save it.
Add Custom Links
Navigation links appear in your header and help visitors find their way around your portal. You can add as many links as you need and organize them with sublinks for a cleaner, grouped structure.
To add a link, you will have to follow the given steps :
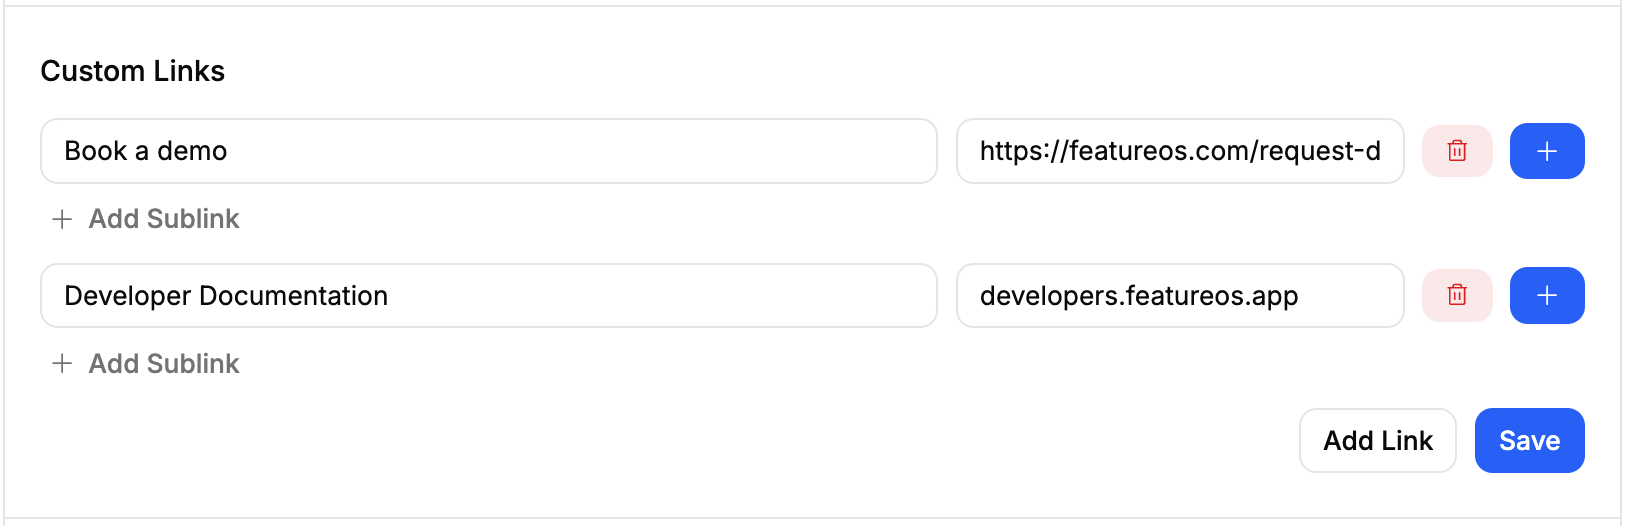
Under Custom Links, enter a Title, this is the label visitors will see in the header
Enter the destination URL in the Link field
Click the + button to confirm the entry
Repeat for any additional links
Click Save when you're done
Adding sublinks -
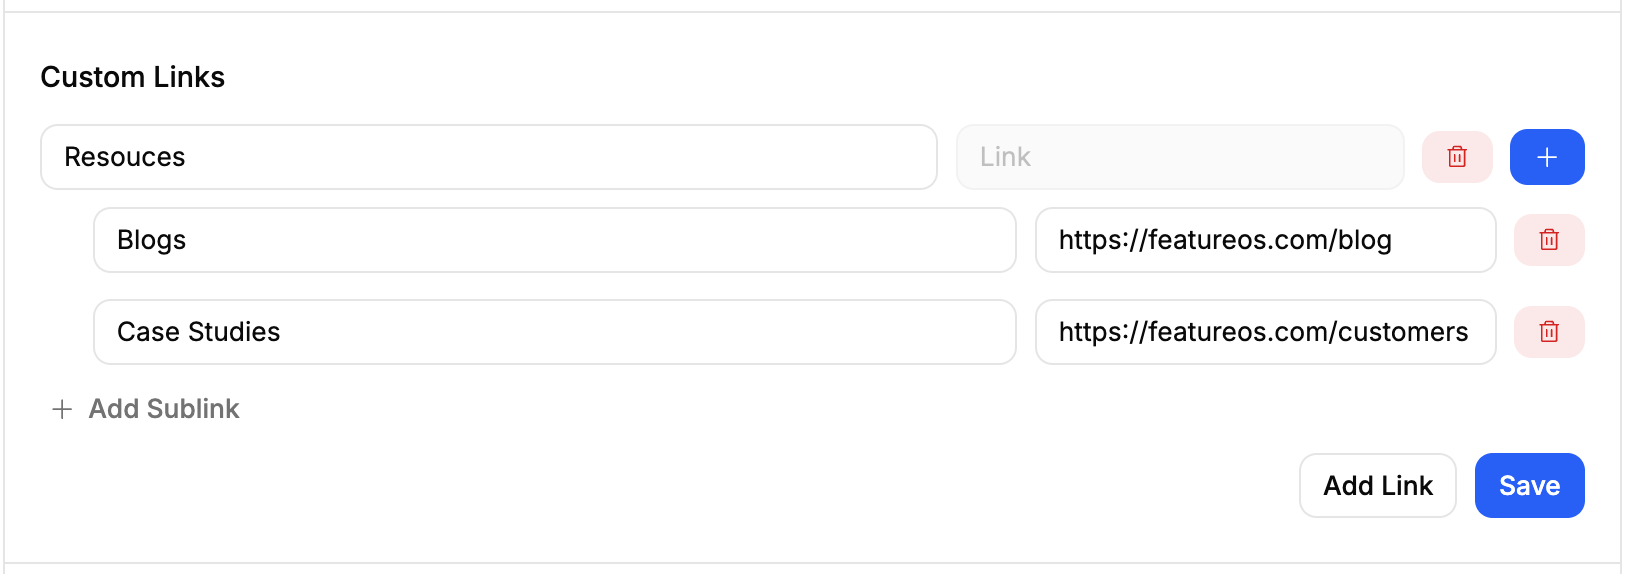
Sublinks sit underneath a parent link and appear as a dropdown when a visitor hovers over or clicks that link. This is useful when you want to group related pages under a single header item for example, a "Resources" link with sublinks for Documentation, FAQs, and Blog.
To add a sublink, click + Add Sublink beneath the parent link and fill in the title and URL. You can add multiple sublinks under the same parent link. Click Save once you've finished setting up your links.
Add Banner Image
The banner is a full-width visual section that sits prominently on your homepage, below the header navigation. It's a great place to reinforce your brand or highlight a key message to visitors.
Under Banner Image, click Upload Image to set your banner. For the best visual result, use a wide, high-resolution image that works well as a background.
Customize Banner Title and Subtitle
If your banner has text displayed over it, such as a title or subtitle, along withe ability to choose colour for each, to make sure it's legible against your image. You also have the ability to change it for Boards, Roadmap and Changelog.
Add Custom Font
If your brand uses a specific typeface, you can apply a Google Font to your homepage header so it stays consistent with the rest of your brand experience.
Step 1 - Register your font
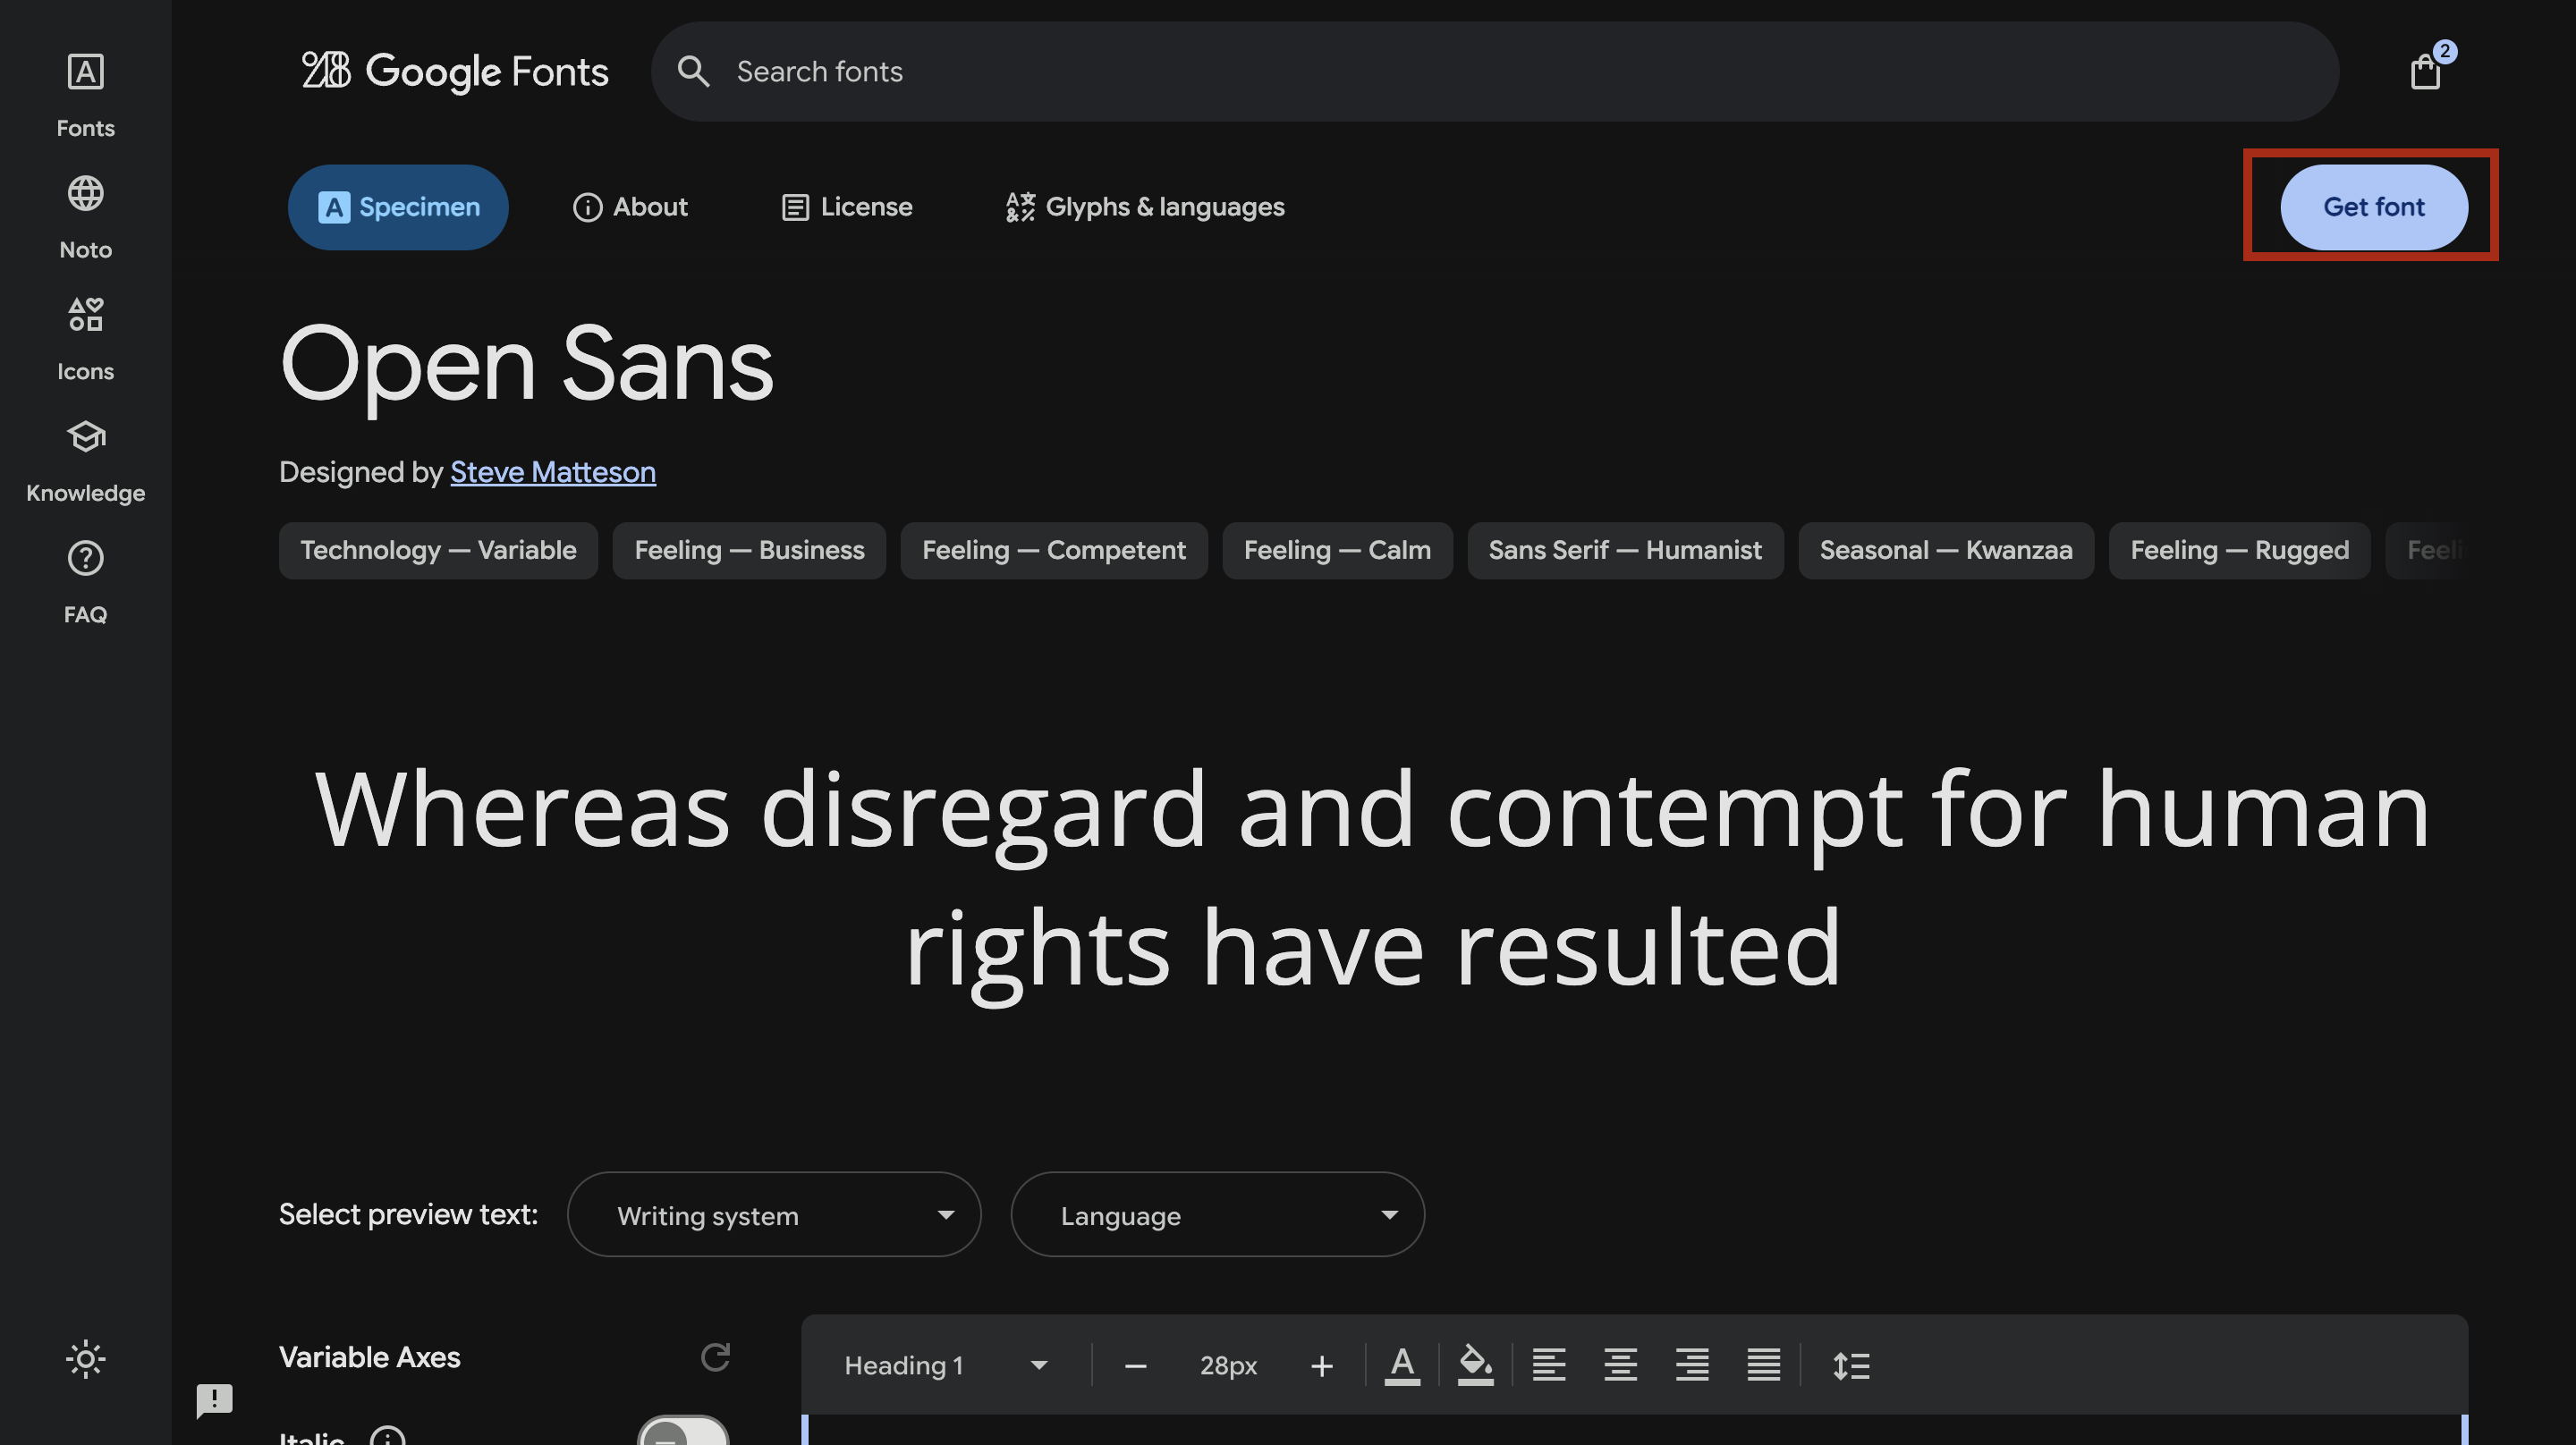
Go to fonts.google.com and browse for a font that matches your brand
Once you've found one, click on “Get Font”
Click on the option to get embed code on the font's page
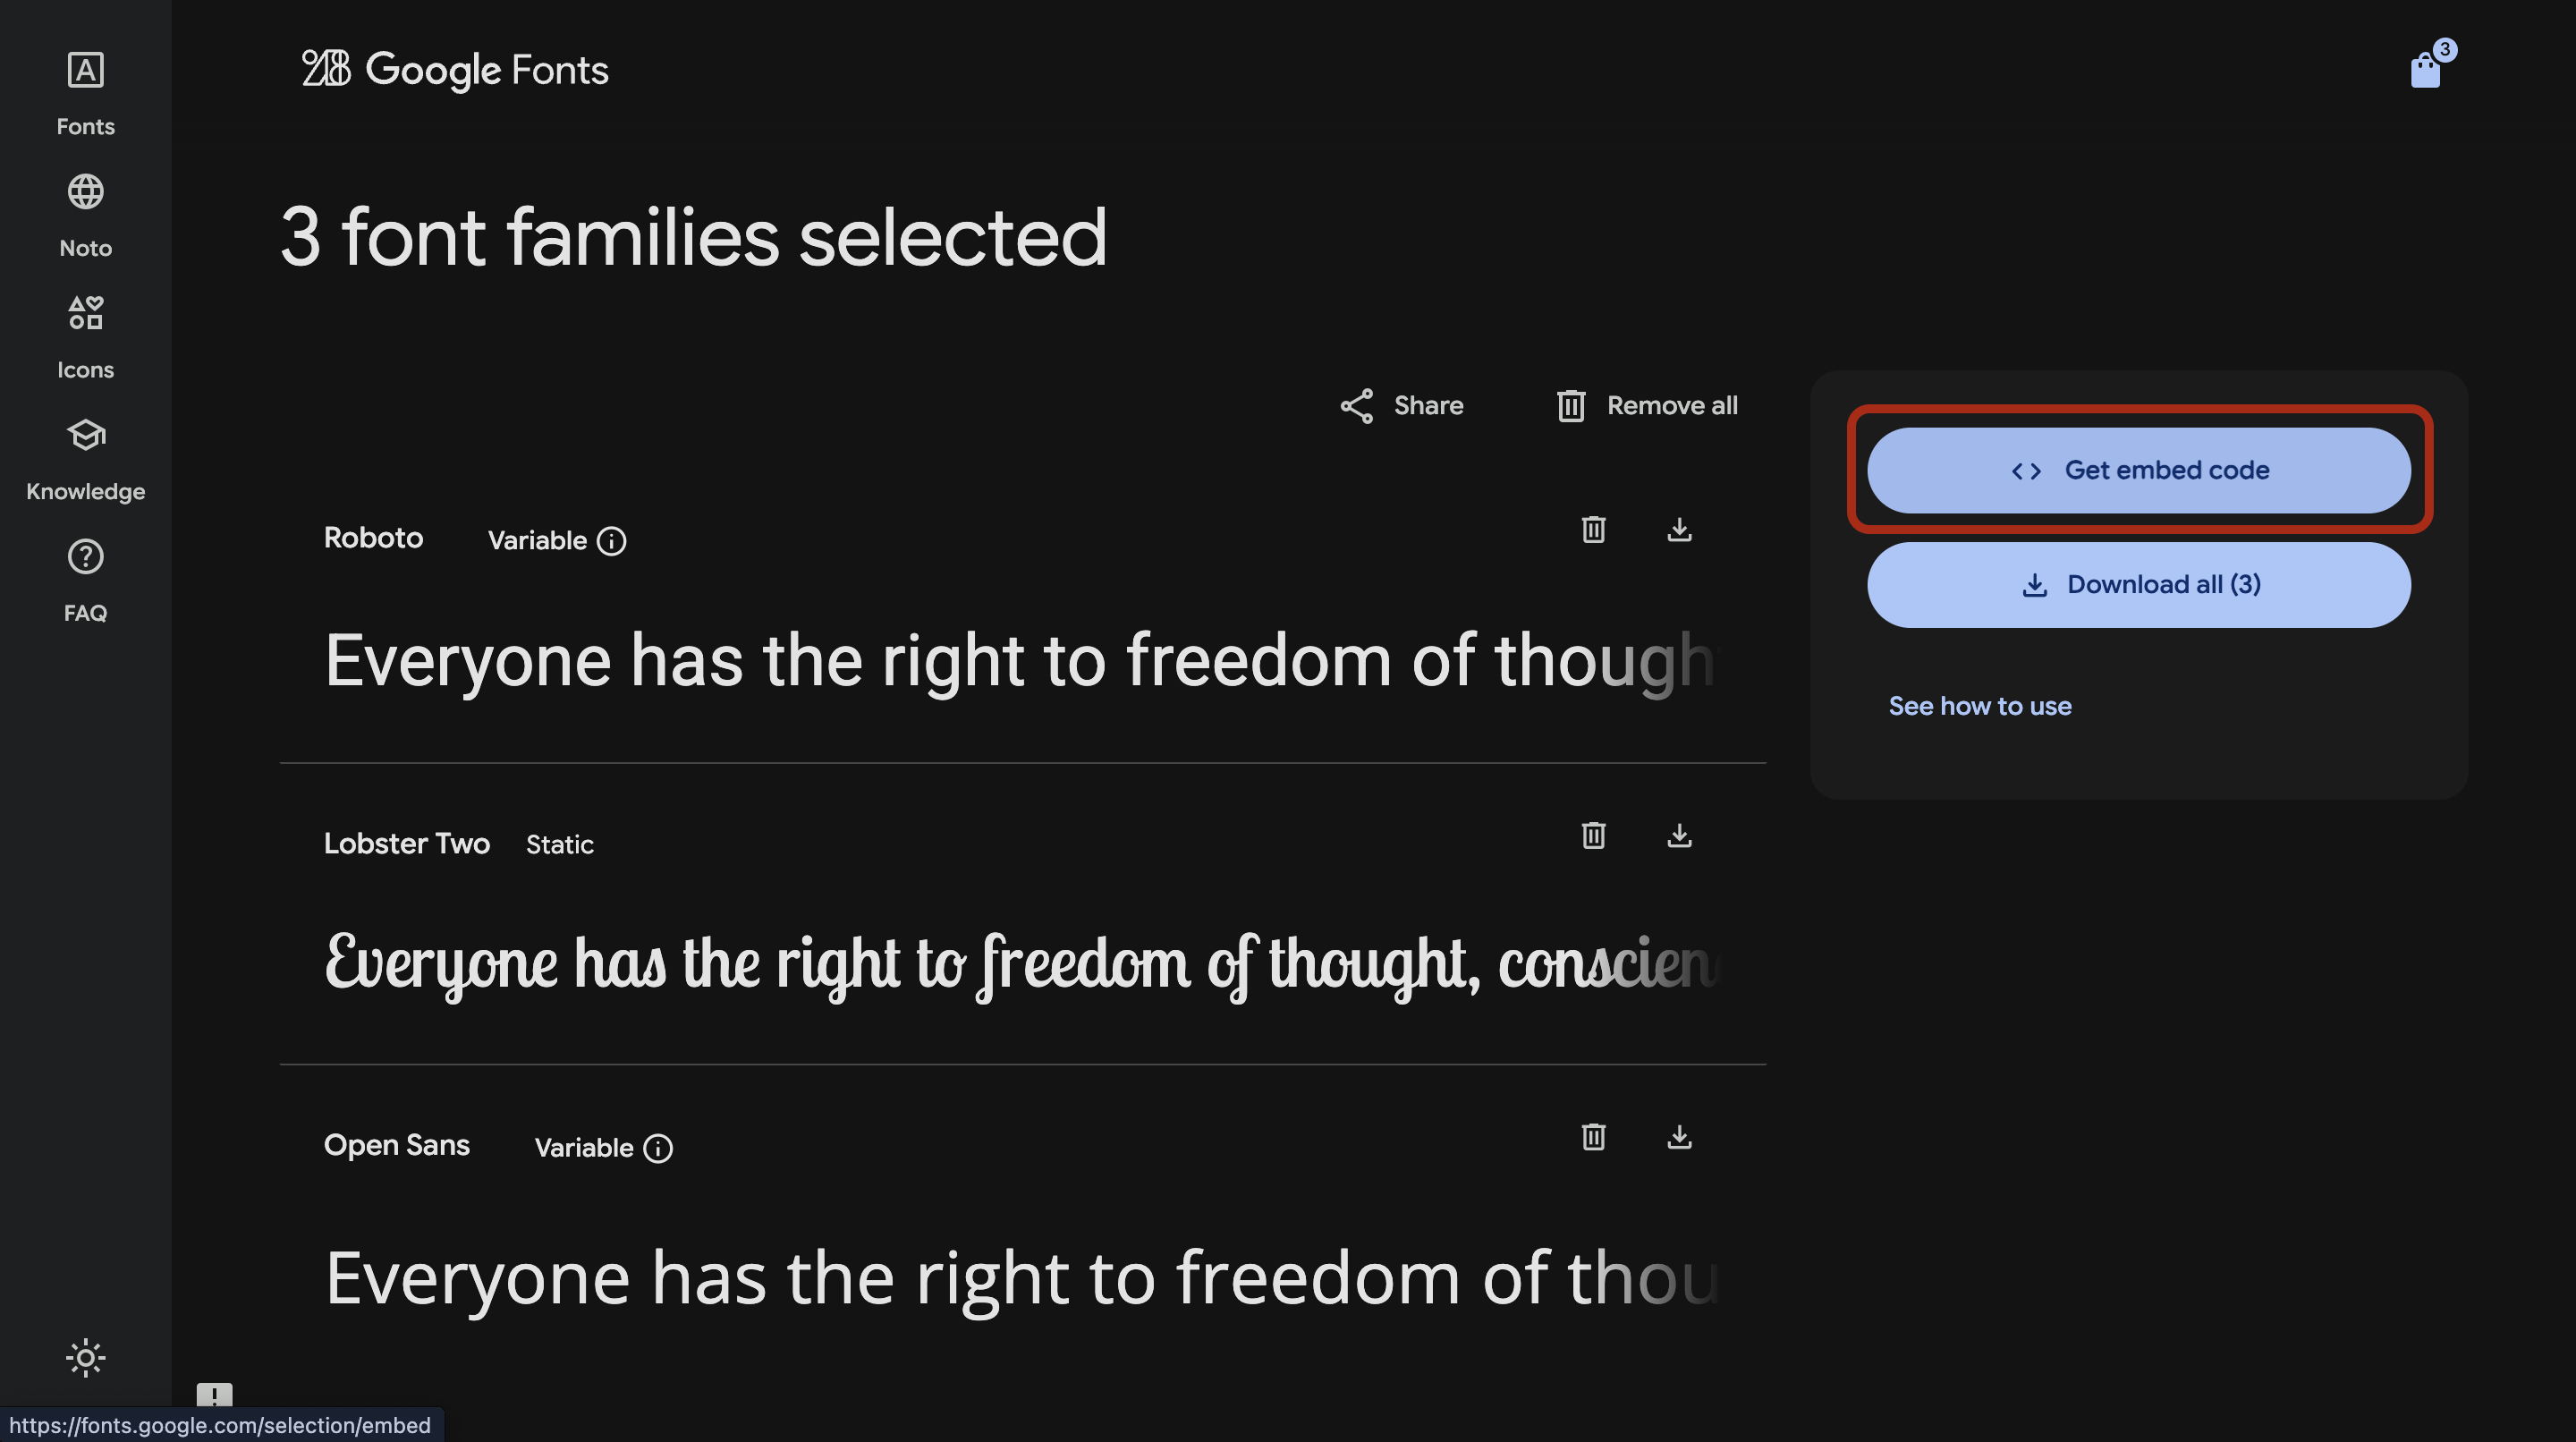
You'll see an HTML snippet where copy only the
<link>tag, not the full block of code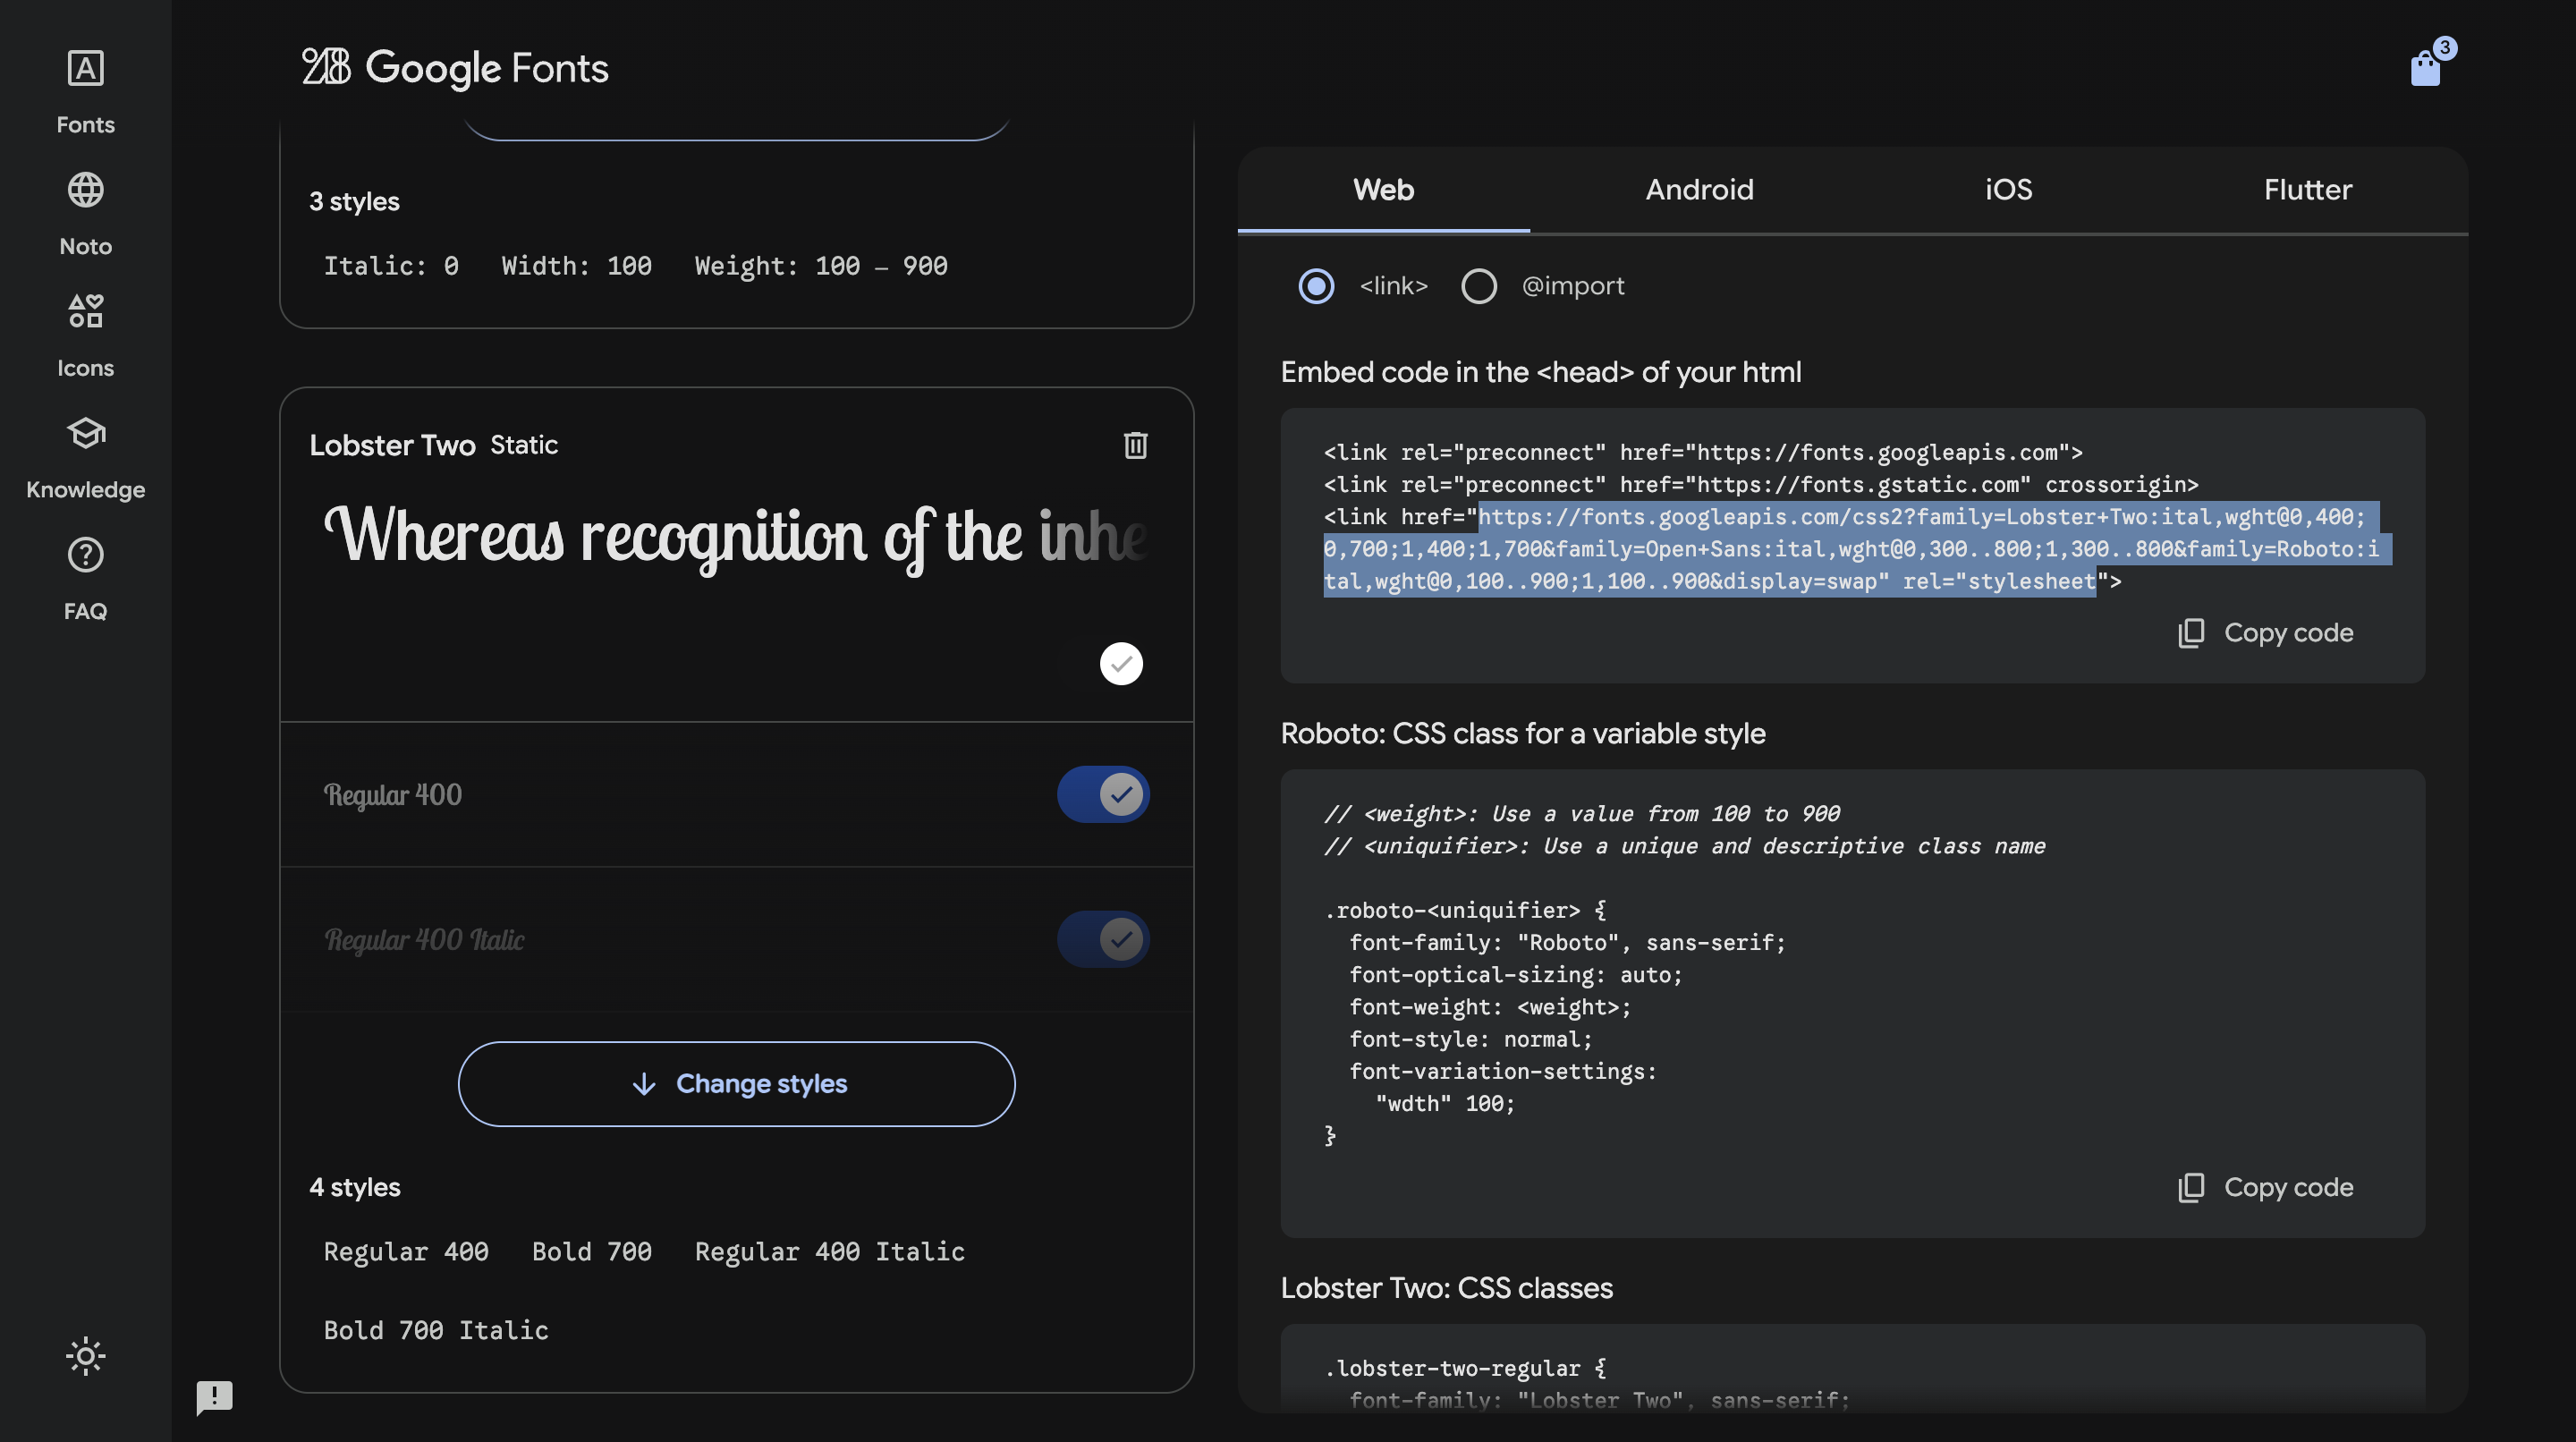
Head back to FeatureOS and scroll to the bottom of the Customization page
Click Add Font and paste the link into the field
Step 2 - Apply the font using CSS
Once registered, you need to tell your portal where to use it. Go to Organization Settings → Enterprise → CSS Customization and add a rule like this:
.fos-user-side-header {
  font-family: 'Your Font Name', sans-serif;
}
Replace 'Your Font Name' with the exact name of the font you chose, for example, 'Inter' or 'Poppins'.
If you want the font applied across your entire portal and not just the header, use body as the selector instead:
body {
  font-family: 'Your Font Name', sans-serif;
}
Your chosen font will now be applied to your homepage header. If you want to use the font across specific elements beyond the default, you can pair this with CSS Customization, see the Customize your homepage header with CSS guide for more on that.
Need more help?
Reach out to our support at [email protected] or submit a request on our support board! 😃
Was this helpful?