


FeatureOS sends notification emails to your users and team members automatically, for things like new posts, comments, changelog updates, and invitations. Email Templates let you rewrite the copy and redesign any of these emails so they sound and look like your brand.
Any change you make applies to all emails of that type sent from your organization.
Getting there
Go to Organization Settings → Appearance → Email Templates.
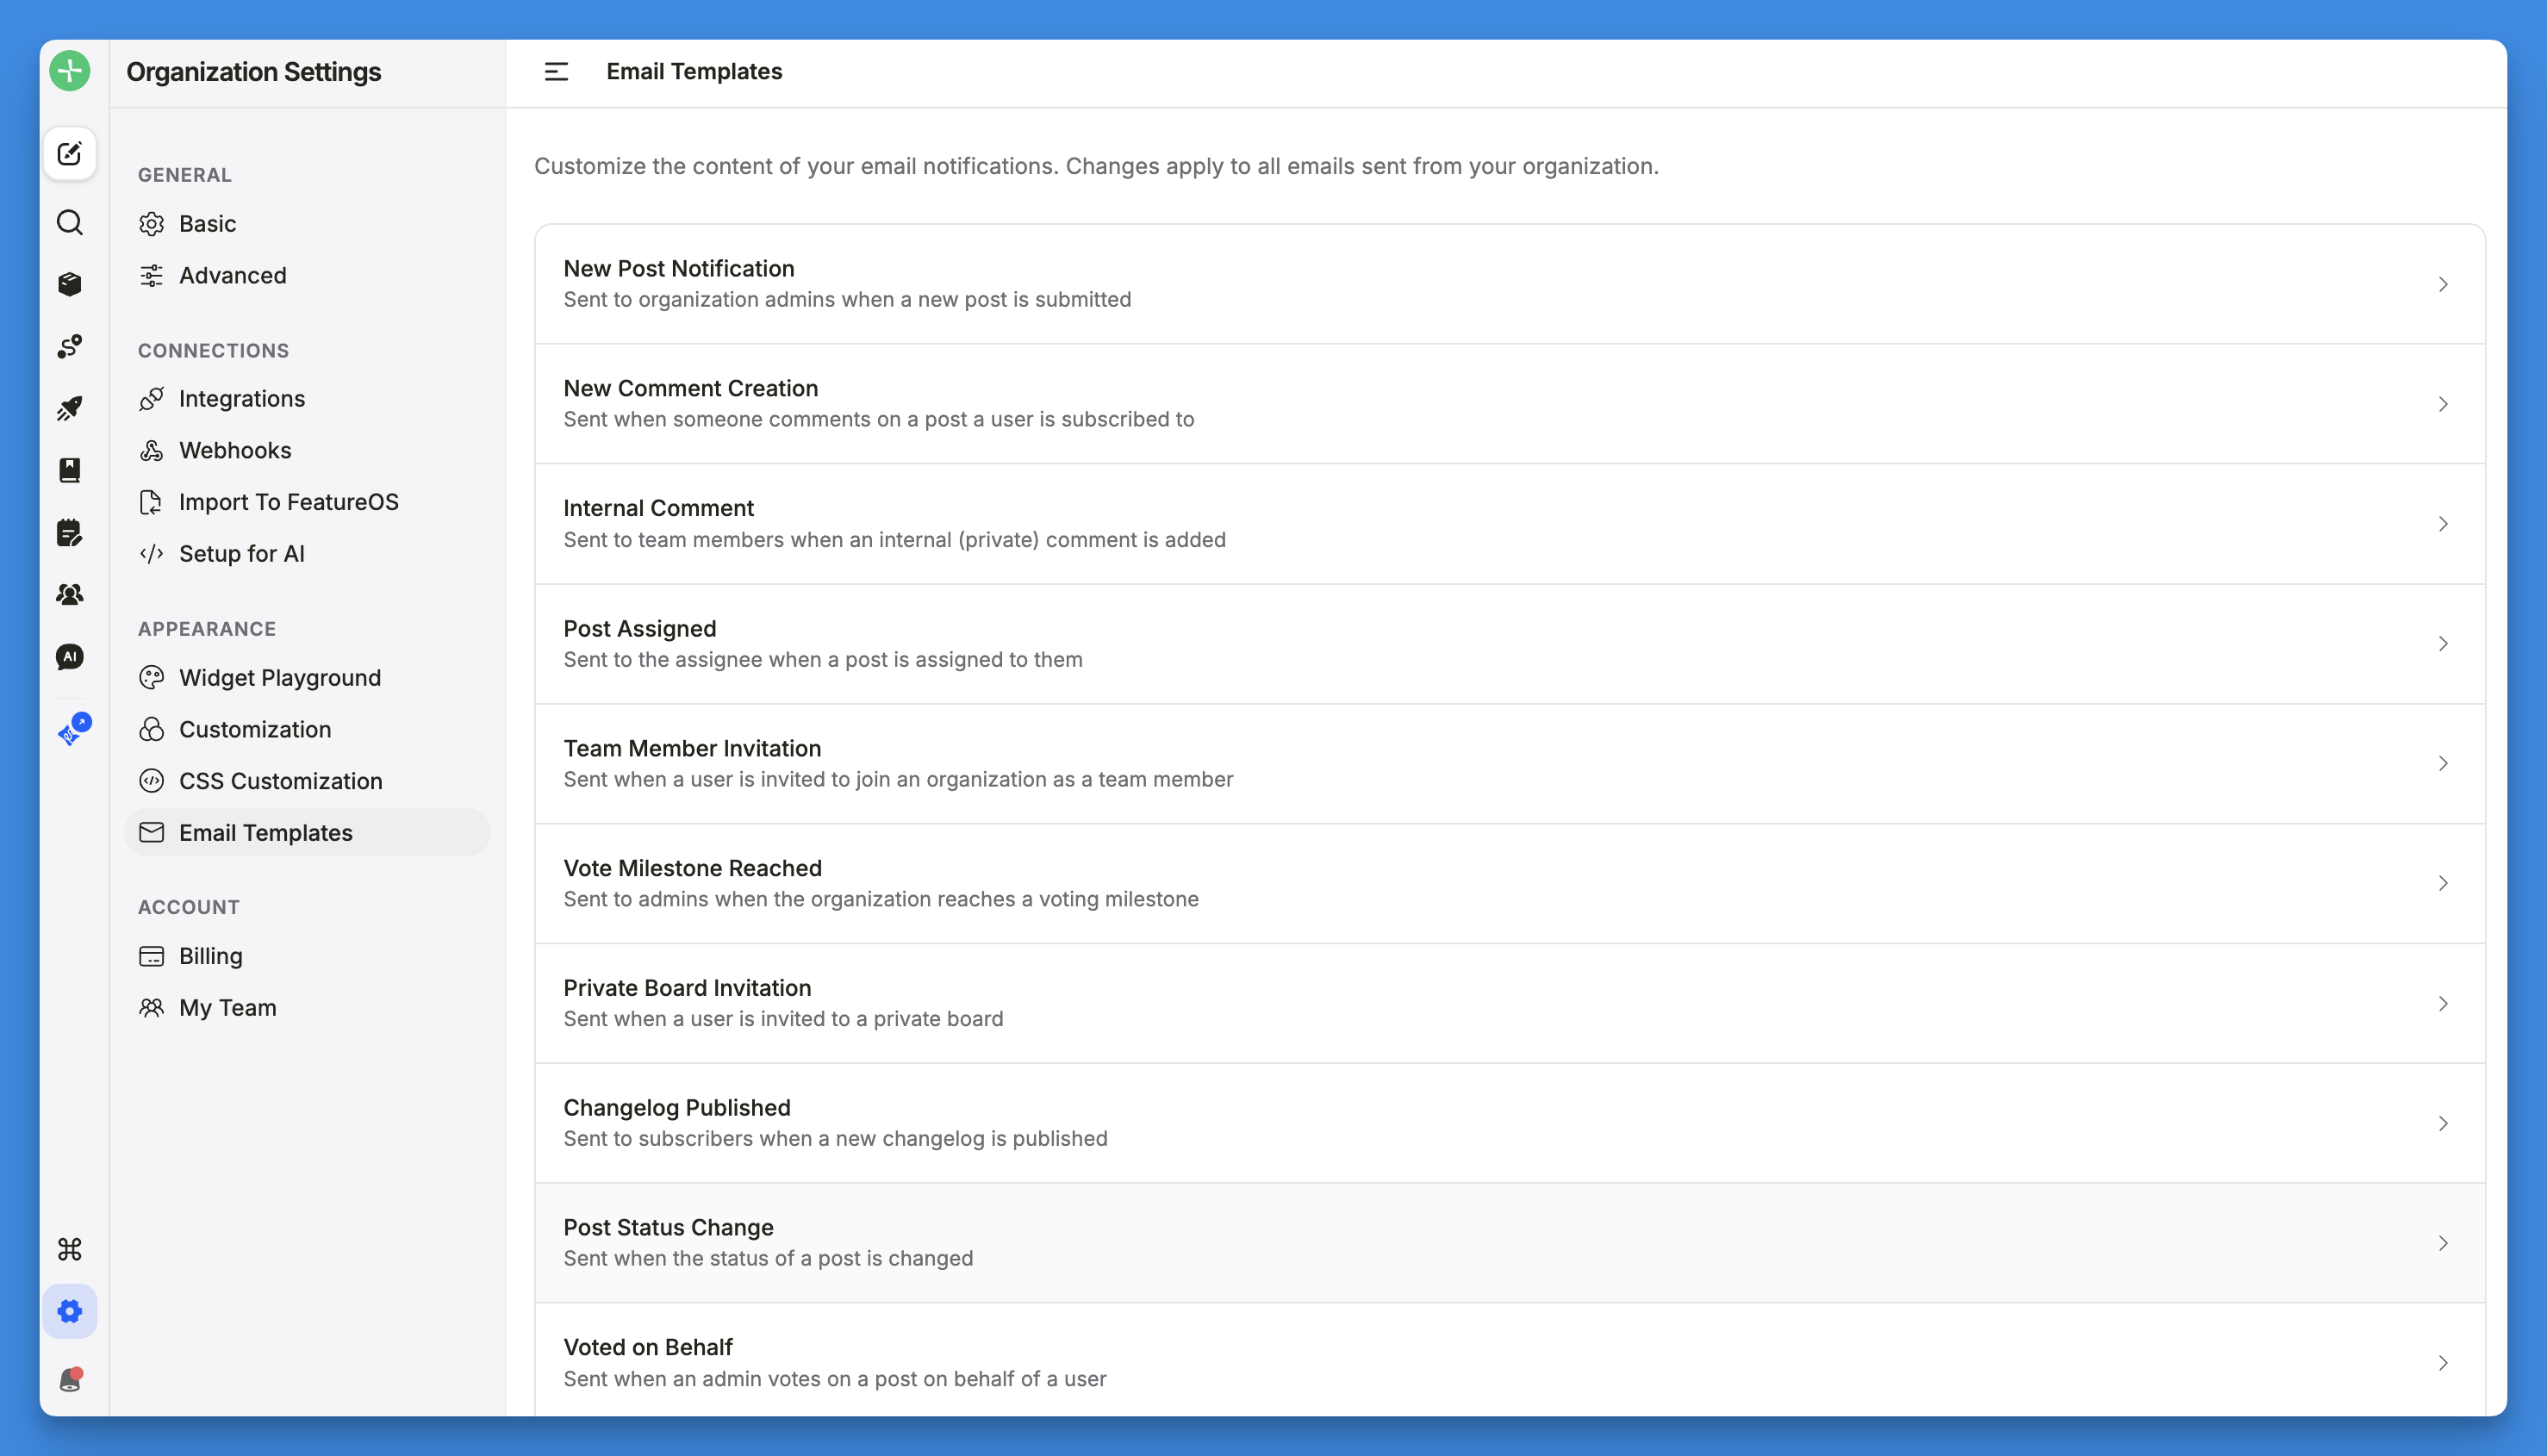
You'll land on a list of every email FeatureOS can send. Each row shows the email's name and when it gets sent. Click any one to start editing it.
Tip: Once you're in the editor, you can jump between templates using the dropdown in the top-right corner, without going back to the list.
The editor at a glance
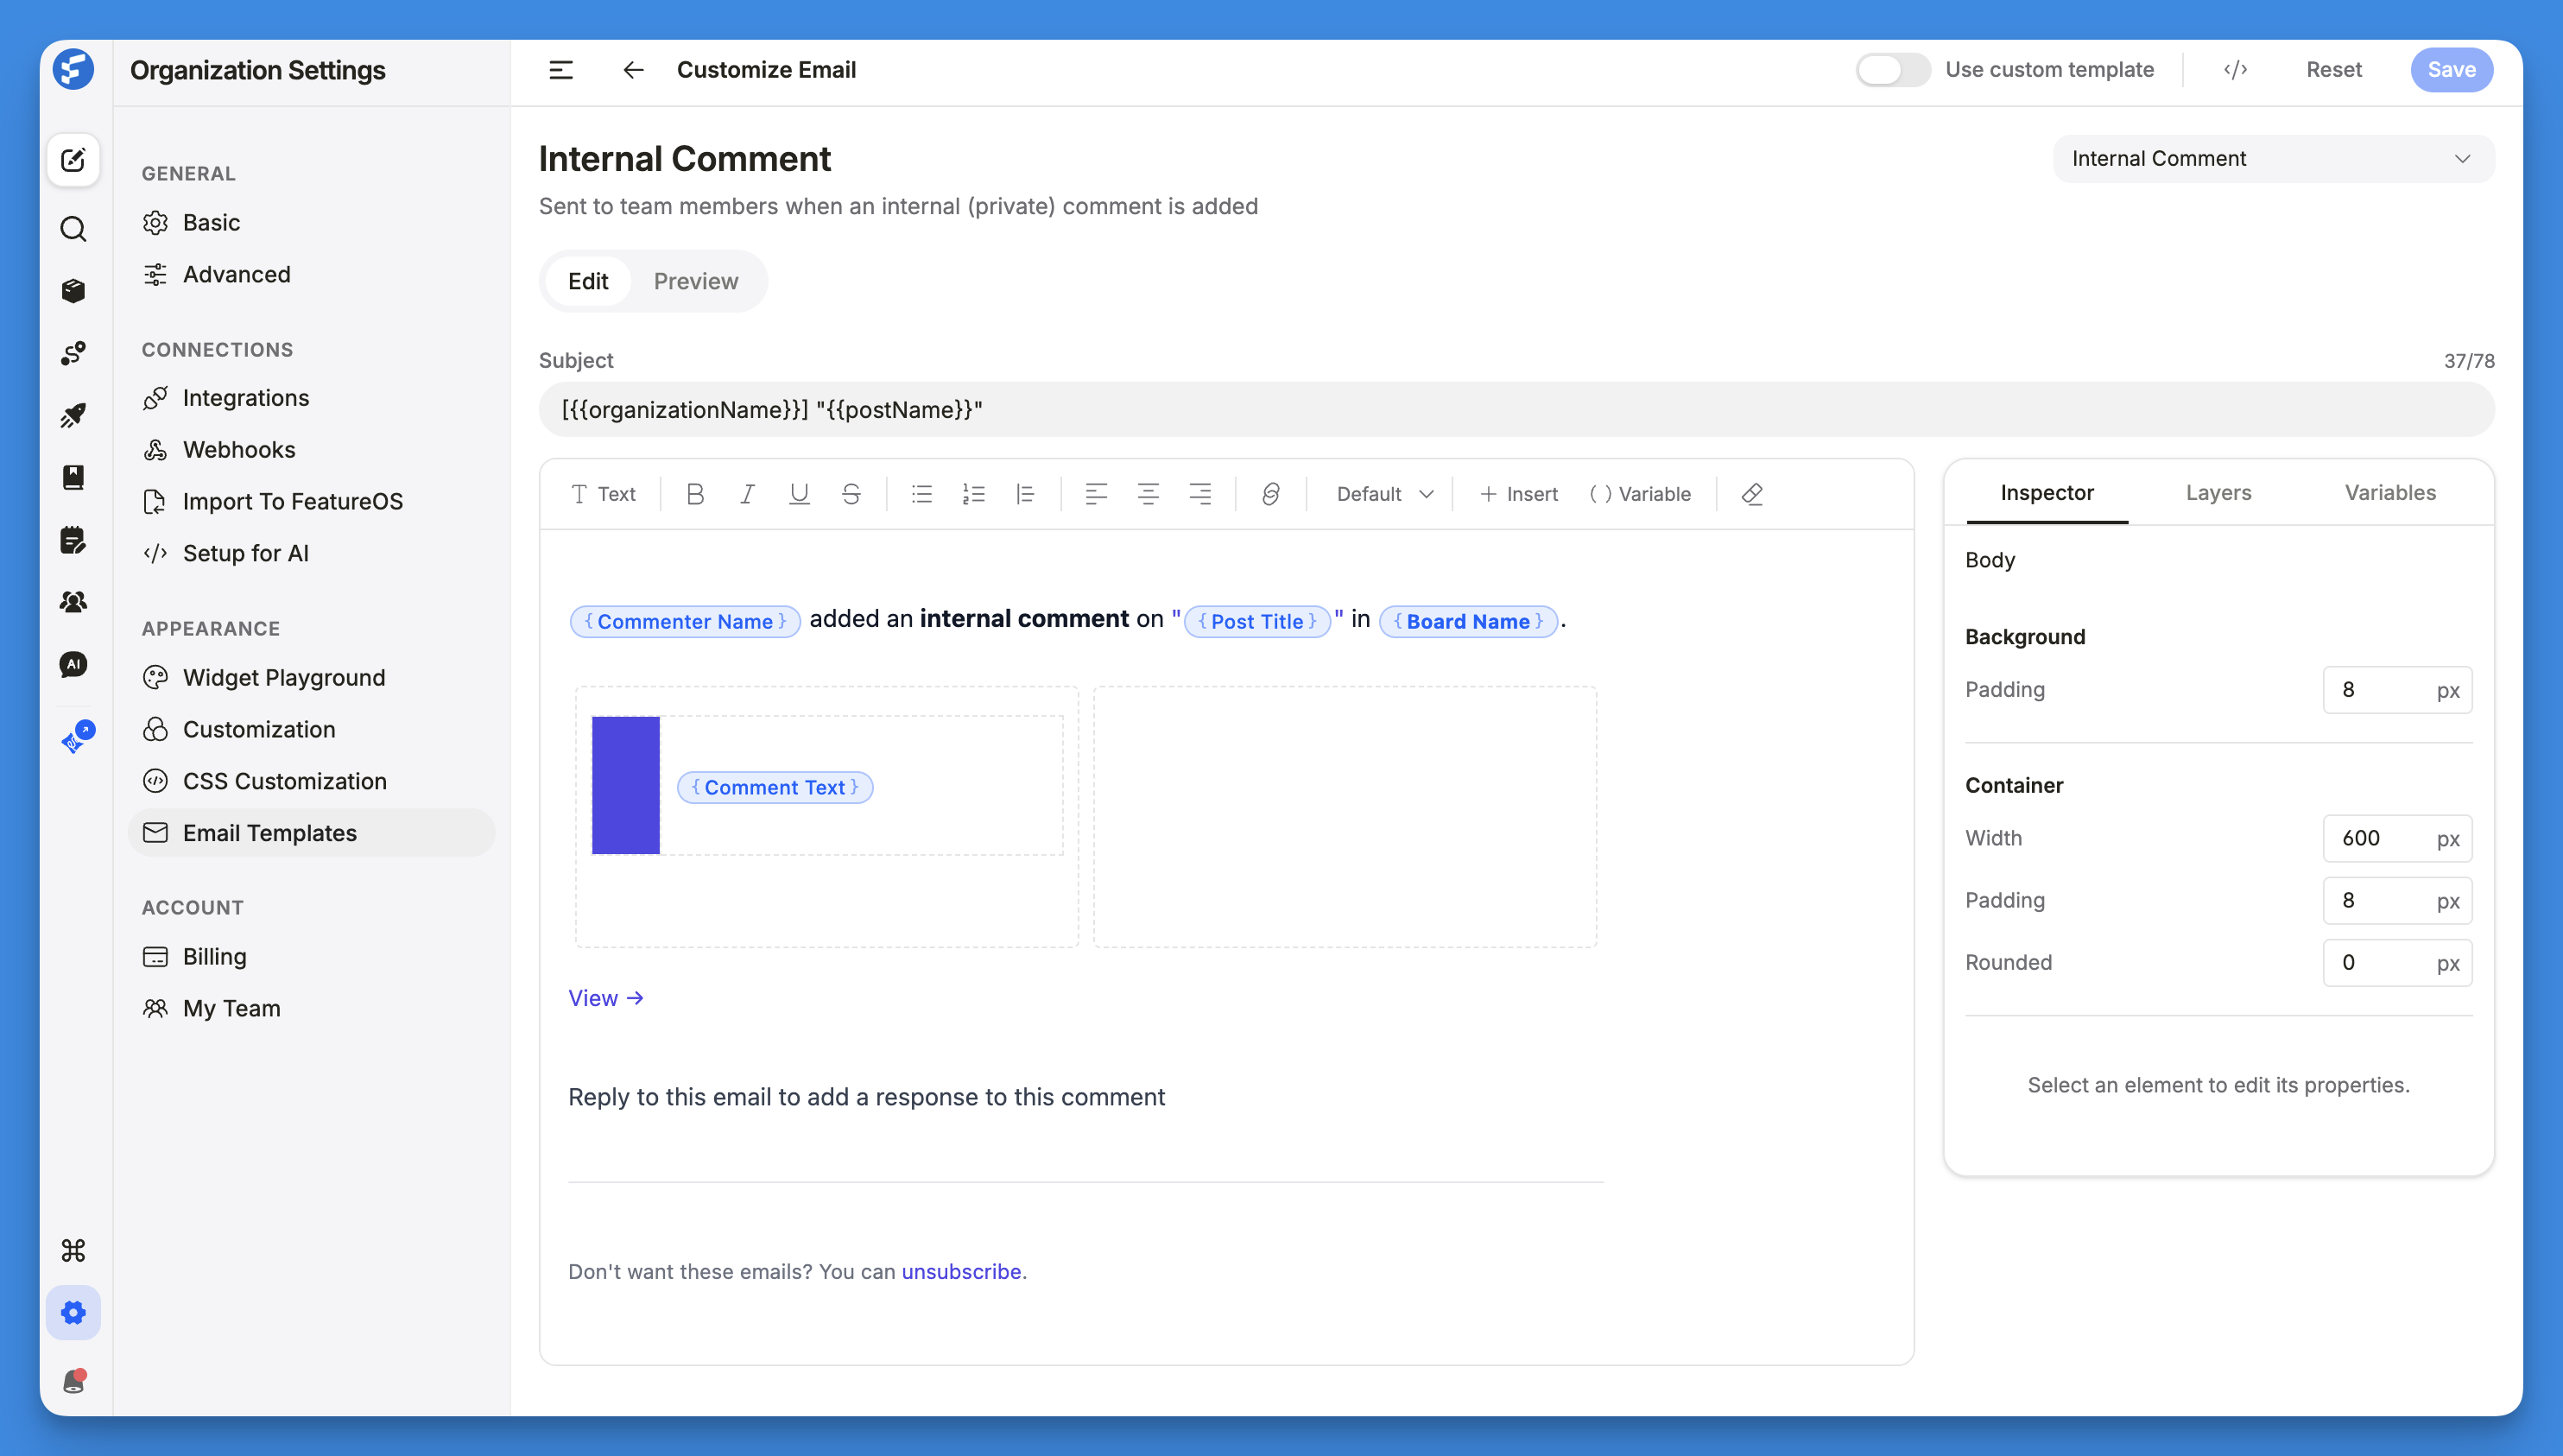
Every template opens in the Customize Email view. Here's what the top bar does:
Control | What it does |
|---|---|
Edit / Preview | Switch between editing the email and previewing the final result |
Use custom template | Turn this email on or off entirely |
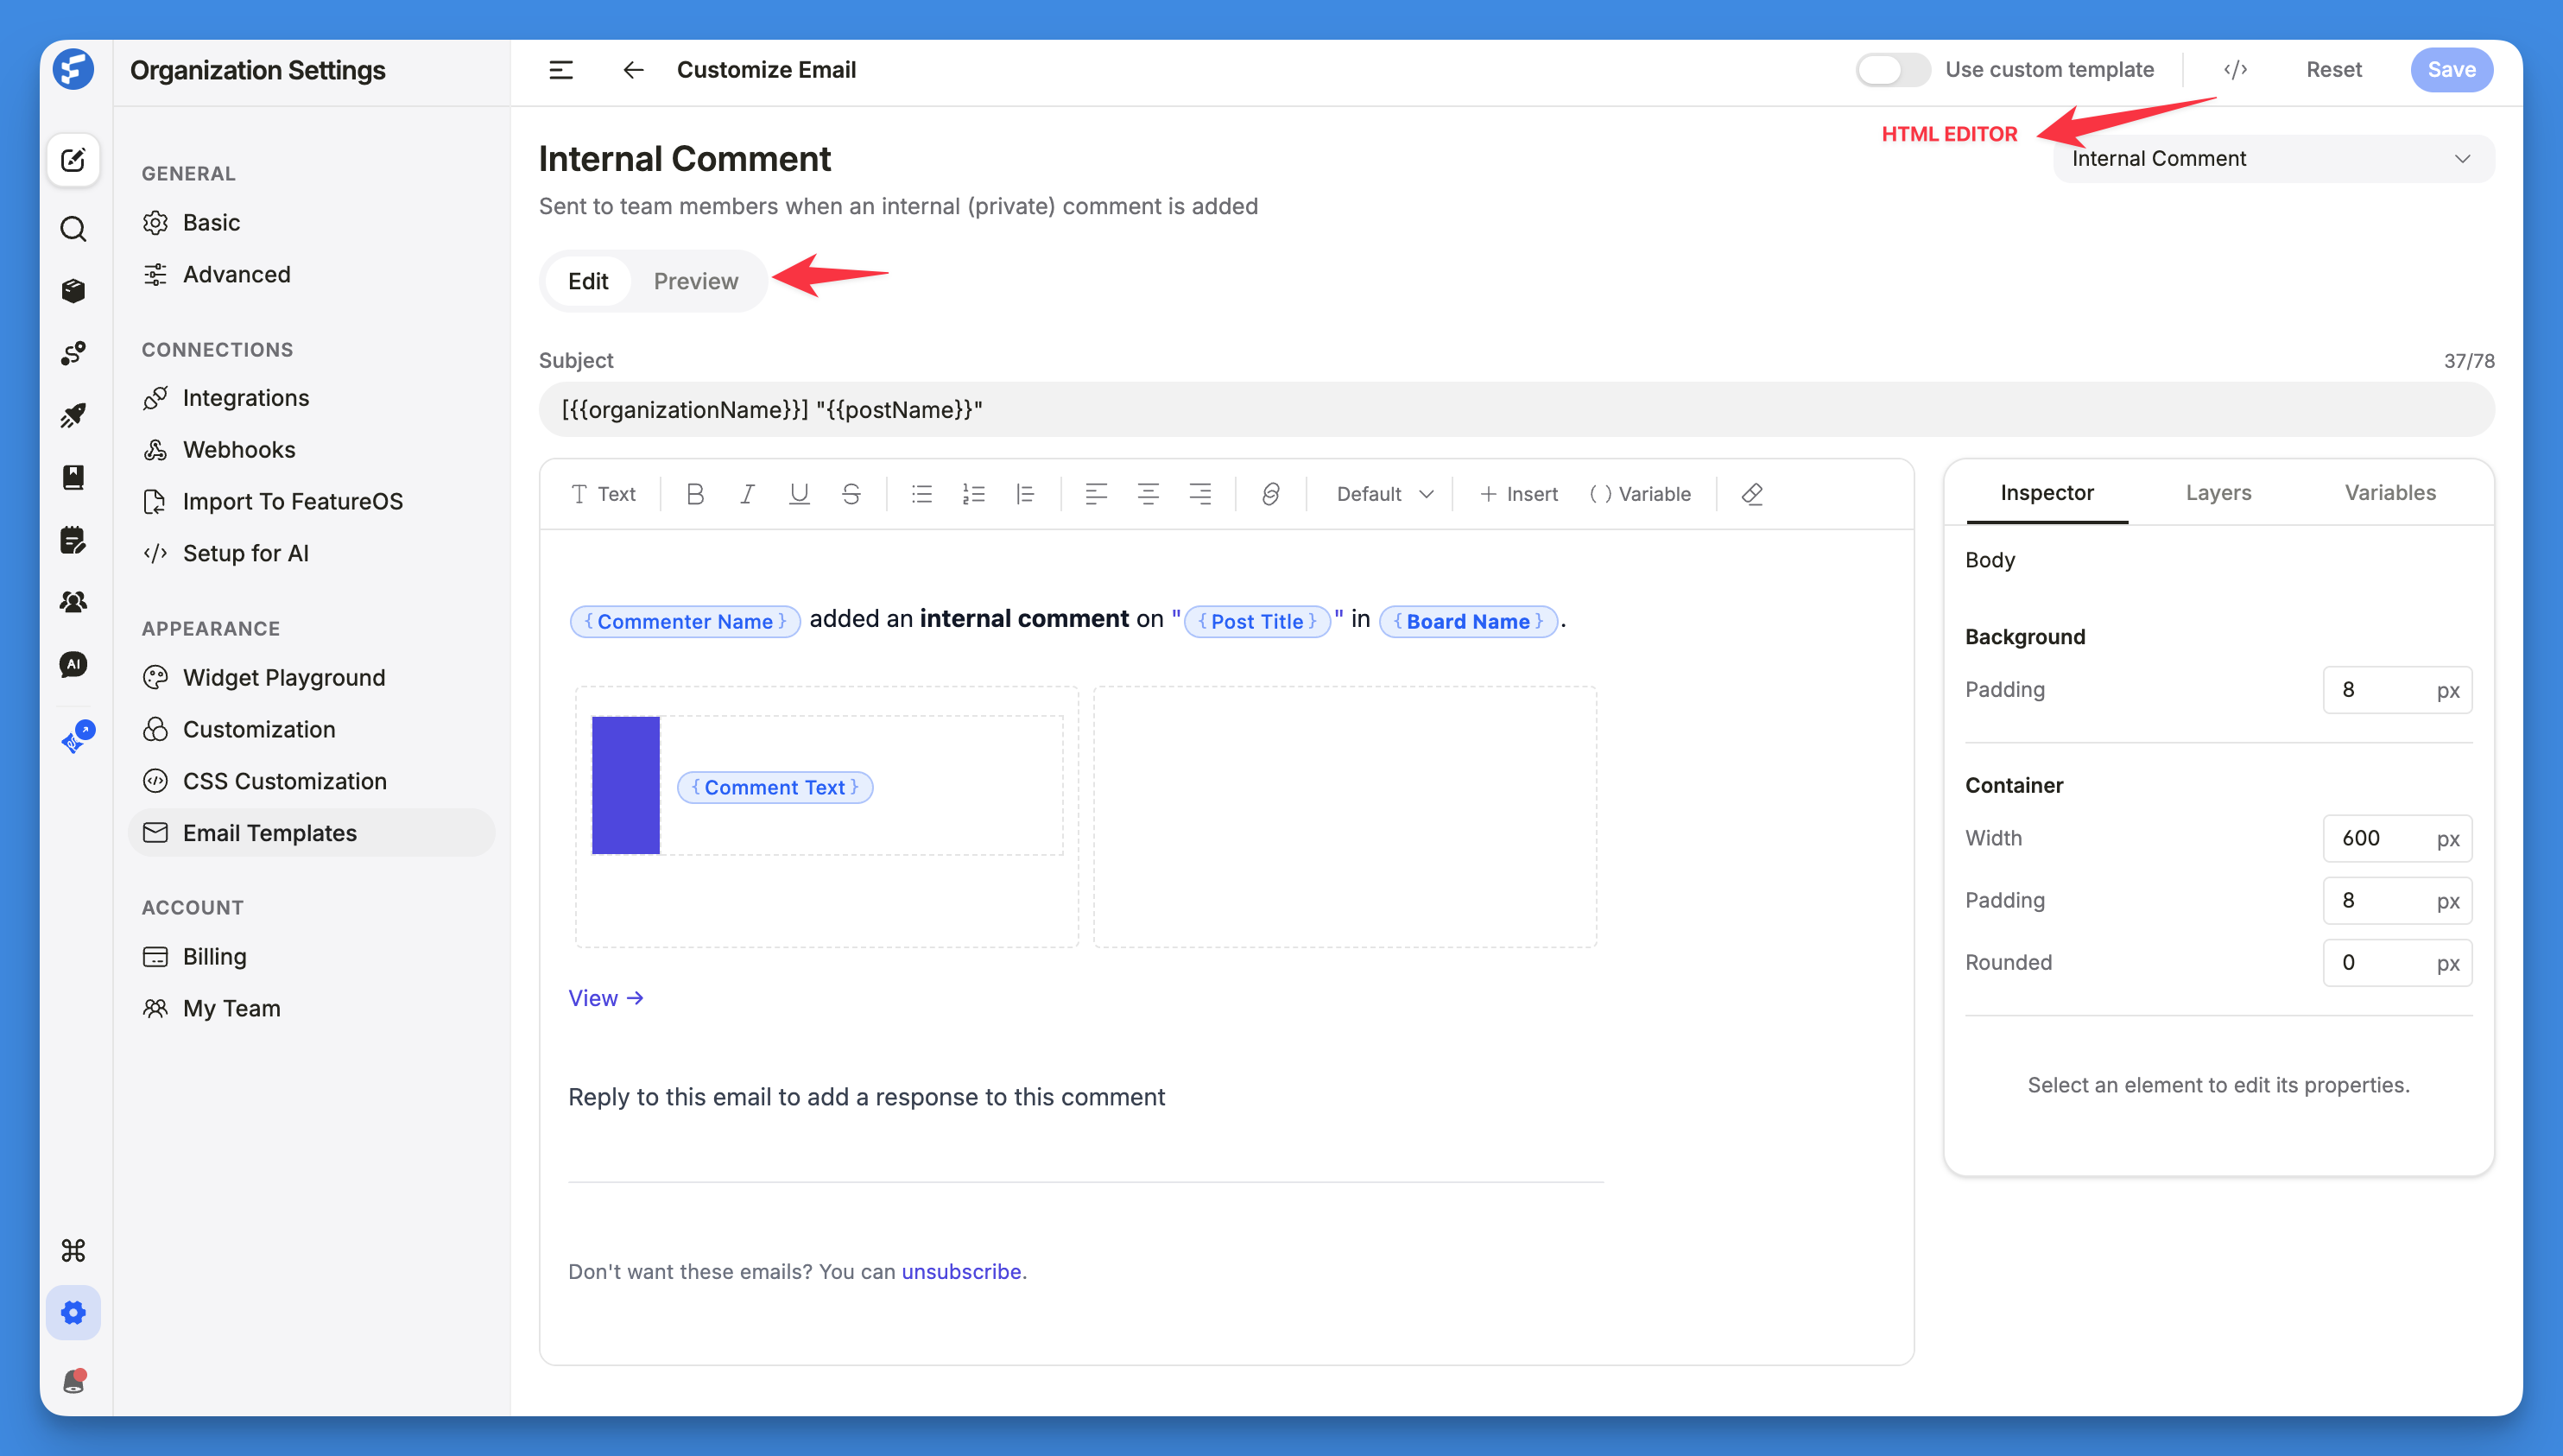
| Open the raw HTML editor (for advanced edits) |
Reset | Revert everything to the FeatureOS default |
Save | Publish your changes |
The screen has two parts: the email itself on the left (subject + body), and a side panel on the right for styling and variables.
Step 1: Edit the subject line
The Subject field sits at the top of the email. A character counter (e.g. 52/78) helps you keep it short enough to display well across inboxes.
To insert dynamic content, drop in a variable using the {{variableName}} format, for example:
You are invited to be a part of
{{organizationName}}
Step 2: Edit the body
The body uses a rich text editor with a familiar toolbar. You can:
Text Type - Paragraph, Heading 1,2 and 3
Style text - bold, italic, underline, strikethrough
Add lists - bulleted or numbered
Align text - left, center, right
Add links & Font size customization
Insert variables - click ( ) Variable, or type
/for the slash menuInsert elements - click + Insert
Pick text styles - from the Default dropdown
Clear formatting - with the eraser
Step 3: Fine-tune with the side panel
The panel on the right has three tabs.
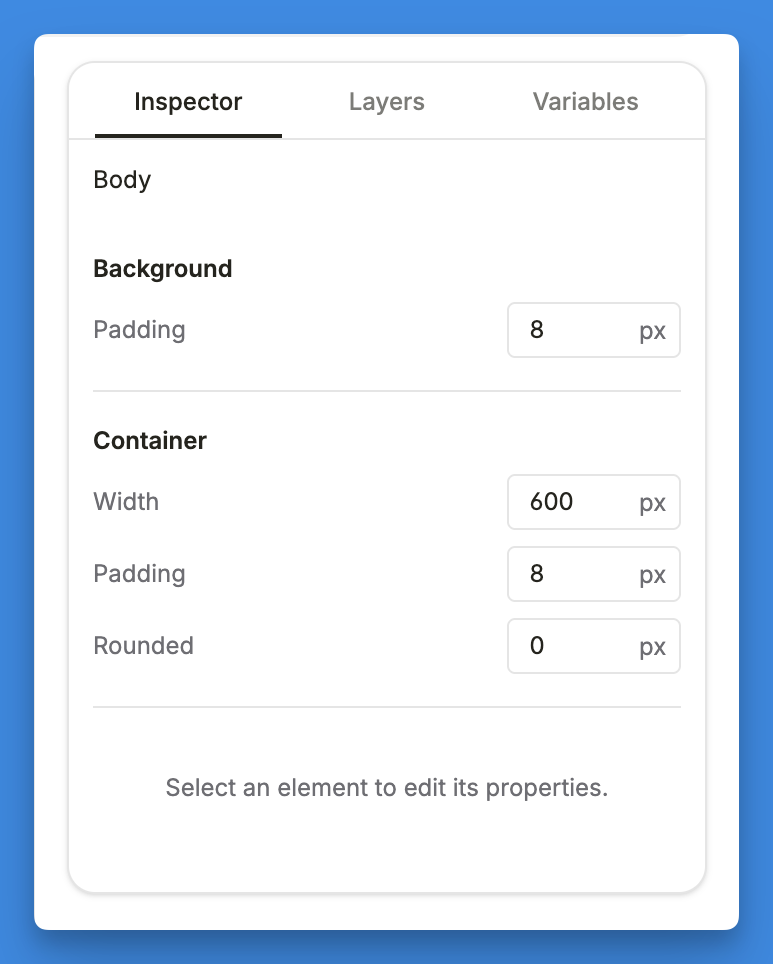
Inspector
Adjusts the design of whatever element you've selected, such as background padding, container width, padding, and corner rounding. Select an element in the email first; otherwise, the panel will prompt you to pick one.
Layers
Shows your email's full structure as a tree (text blocks, lists, list items, buttons, and so on). Use it to navigate quickly and select any piece, especially helpful on longer templates.
Variables
Lists every dynamic value available in the template, for example:
Organization Name -
{{organizationName}}User Role -
{{role}}Invitation Link -
{{manageLink}}Knowledge Base Link -
{{knowledgeBase}}
Click a variable to copy it, then paste it into the subject or use the slash menu in the body. A counter shows how many you're using.
Preview values: You can set a custom value for each variable (e.g. set Organization Name to "Acme"). These only affect what you see in Preview. They're saved locally and never appear in real emails.
Available variables differ from one template to another.
Step 4: Preview before you save
Switch to the Preview tab to see the finished email with all variables filled in using your preview values. This is the closest view to what your recipients will actually receive, including subject, lists, links, and buttons.
Step 5: Save
Click Save to publish. Your changes take effect on all future emails of that type.
While you're here, two related controls:
Use custom template - toggle off if you don't want this email sent at all.
Reset - restores the original FeatureOS default and discards your customizations.
Advanced: editing the raw HTML
For full control over layout and styling, click the </> (Toggle HTML source) button in the top bar. This replaces the visual editor with the email's raw HTML, including inline styles.
Variables appear inline as {{variableName}}, for example {{name}}, {{postName}}, {{postLink}}, and {{unsubscribeLink}}. Edit the markup directly to go beyond what the visual editor offers.
Best for users comfortable with HTML. If something breaks, Reset returns the template to its default.
Quick tips
Check the Variables tab to confirm you're using the right names before saving.
Set preview values, so Preview reflects what recipients really see.
Keep subject lines within the character limit for the cleanest display.
Use Layers to navigate templates with lots of nested elements.
Pricing
Need more help?
Reach out to our support at [email protected] or submit a request on our support board! 😃
Was this helpful?