

FeatureOS now includes a built-in AI article generator in your Knowledge Base. With a single click, you can automatically produce well-structured, publication-ready help articles, saving your team hours of writing time.
What Is AI Article Generation?
The AI article generator lets you create complete, formatted Knowledge Base articles from a short topic description and optional reference material. Whether you need a troubleshooting guide, an FAQ, a how-to walkthrough, or a feature overview, AI can produce a polished first draft in seconds.
This feature is accessible directly from your Knowledge Base dashboard and is designed for product managers, customer success teams, and support agents who need to publish documentation quickly.
How to Access the AI Generator
To create an AI-generated article:
Navigate to your Knowledge Base from the left sidebar.
Click the + Create button in the top-right corner.
Select "Generate with AI" from the dropdown menu.
The AI article generation form will open.
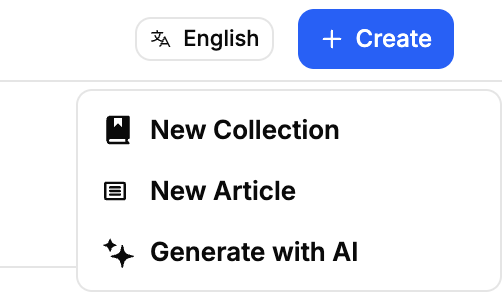
💡 Tip: You can also access this from within any Collection by clicking + Create inside the collection view.
How to set up the prompt for generating help article?
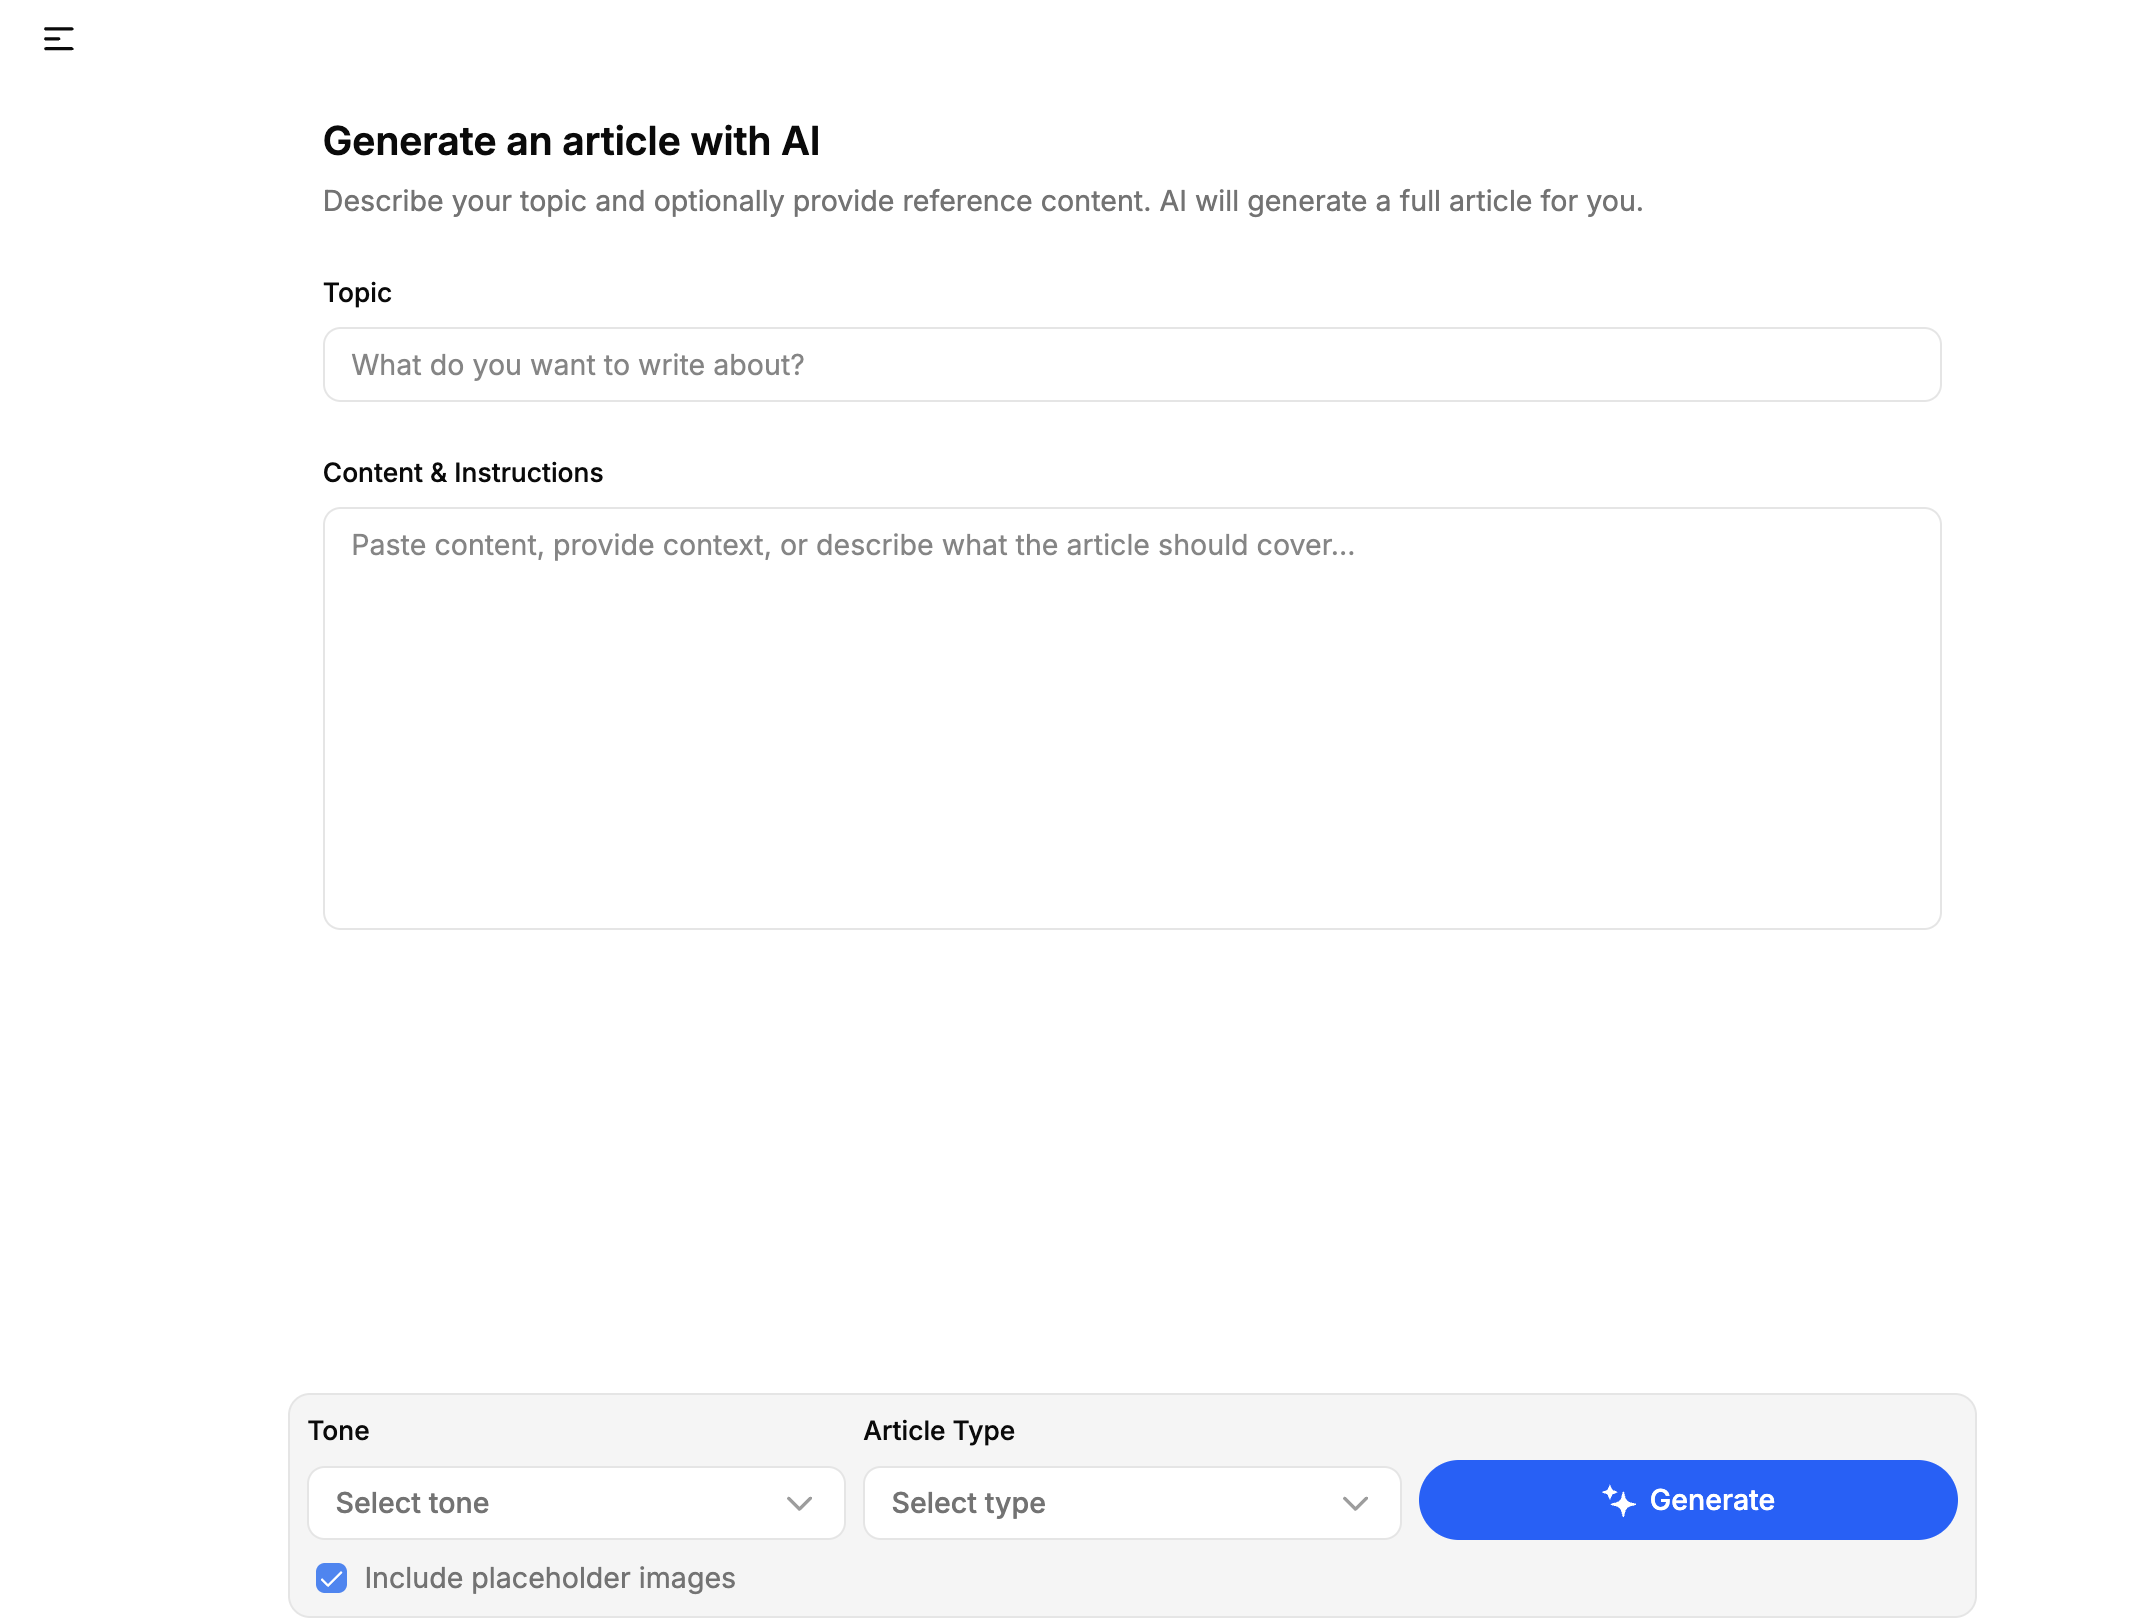
The form contains two input fields and a set of configuration options:
1. Topic
Enter a concise title or subject for your article. Be specific, the more precise your topic, the better the output.
Examples: "How to reset your password", "Understanding usage limits on the Pro plan", "API authentication setup"
2. Content & Instructions
This optional field allows you to guide the AI with additional context. You can:
Paste in existing documentation or raw notes to be restructured
Describe specific sections you want the article to include
Provide product-specific terminology or feature names
Set a target audience (e.g., "Written for non-technical end users")
If left blank, the AI will generate the article based solely on the topic, which works well for common help topics.
3. Tone Options
Tone | Best For | Example Use Case |
|---|---|---|
Casual | Relaxed, approachable writing | Consumer apps, community-facing help centers |
Concise | Short sentences, no filler | Quick-start guides, feature summaries |
Detailed | In-depth coverage with context | API docs, advanced configuration articles |
Friendly | Warm and encouraging voice | Onboarding articles, first-time user guides |
Professional | Formal and authoritative tone | Enterprise documentation, compliance articles |
4. Article Types
FAQ : A list of common questions and answers organized by topic
How-to Guide : Step-by-step instructions for completing a specific task
Overview : A high-level explanation of a feature, concept, or workflow
Troubleshooting : Diagnosis and resolution steps for common issues or errors
Placeholder Images
The "Include placeholder images" checkbox is enabled by default. When checked, the AI will insert relevant image placeholders throughout the article to indicate where screenshots or visuals should be added. These serve as reminders for your team to add real images before publishing.
If you prefer a text-only draft, simply uncheck this option before generating.
Generating and Reviewing the Article
Once you have filled in your topic, instructions, and preferences, click the Generate button. The AI will produce a full draft article within a few seconds.
After generation, the article opens in the standard FeatureOS article editor, where you can:
Edit any section of the content directly
Add or replace placeholder images with real screenshots
Apply formatting using the toolbar (headings, bold, lists, code blocks, etc.)
Assign the article to a Collection
Click Regenerate in the top-right corner to produce a fresh draft if the first result does not meet your expectations
⚠️ Important: Always review AI-generated content before publishing. While the AI produces accurate and well-structured drafts, you should verify product-specific details, pricing, and any technical steps against your actual product behavior.
Publishing Your Article
When you are satisfied with the content:
Click the Select collection dropdown at the bottom of the editor.
Search for or select the appropriate collection (e.g., "Getting Started", "Account Settings & Privacy").
Choose to Save as draft to continue editing later, or click Publish Now to make the article immediately visible to your users.
Need more help?
Reach out to our support at [email protected] or submit a request on our support board! 😃
Was this helpful?